Meetings
This is a feature that allows Quobis collaborator users to setup and schedule an online meeting with someone who does not belong to its organization and thus, does not have a Sippo collaborator account. These external participants can join the meeting just by clicking on an invitation URL on its desktop or mobile devices. Meetings have support for multiple participants, including multi-party video conferencing [1]
Setting up the meeting
Collaborator meetings section is accessible via its icon on the bottom bar of the main screen  . In order to create a new meeting, just click on the
  located at the top right of the main panel, and a form will be displayed where the following information needs to be introduced:
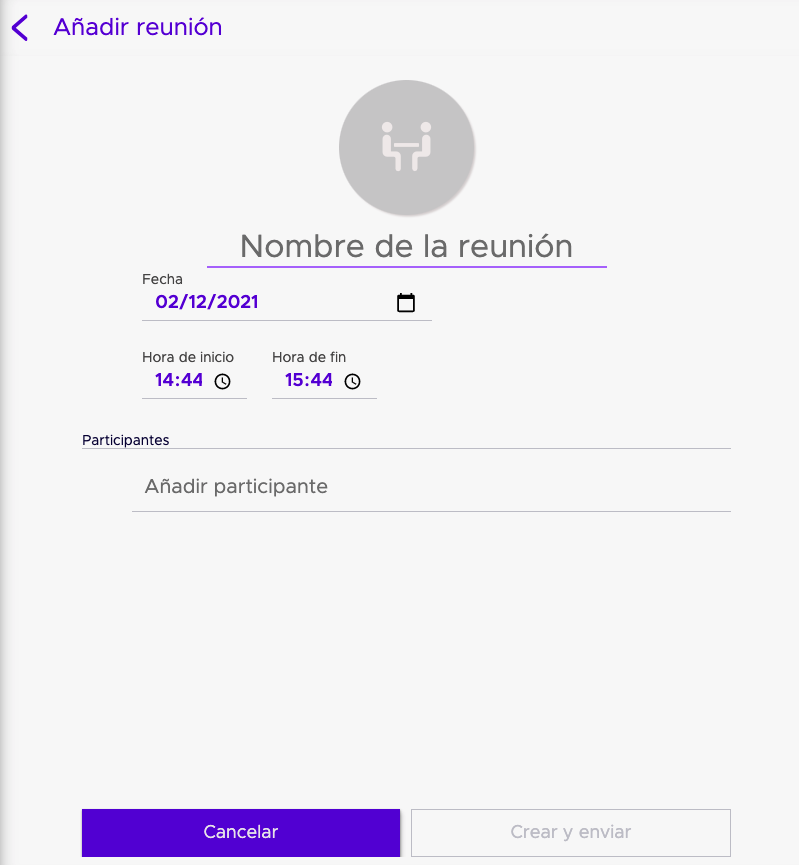
Example of a meeting setup
Meeting name (mandatory). This is just to identify the meeting.
Participants Email address, mobile phone number or user name of each of the participants. Press ENTER after add each participant. [2]
Date and time To be added on the ICS invitation.
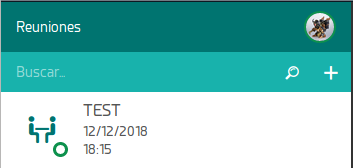
Once that a meeting is created, you will see it in the meeting list.
Meeting invitations will be sent to the invited participants, either via email or via SMS:
The email invitation message contains an ICS file that the participant can download or open, so that he can the meeting to his personal calendar.
The SMS invitation is just a plain text message containing a link to the meeting site.
Note
Note that it is not required that the invited user is a registered user, the e-mail contains a link that brings the user in a dedicated web space in which the registered user of|qc| and the invited user can share information.
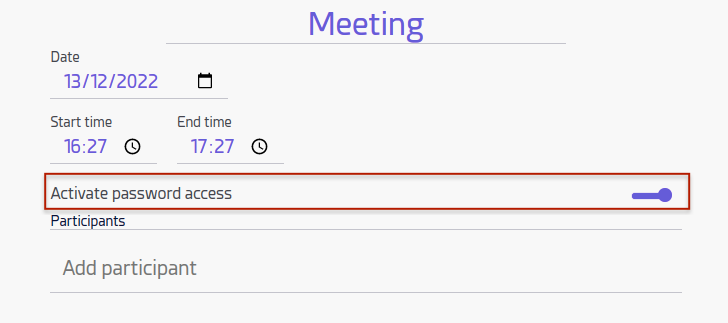
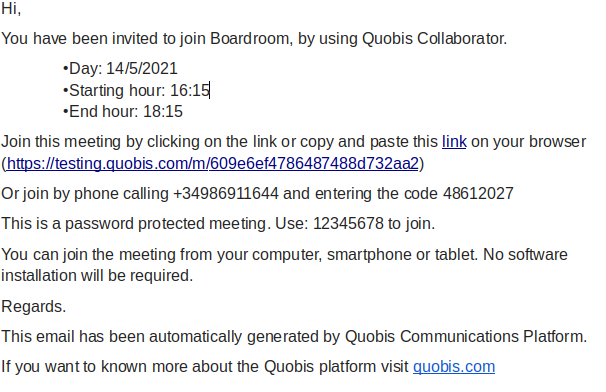
Since version 7.3.0, meetings can be password-protected by the activation of this flag. The meeting invitation will include the password in plain text, and it will be required in order to join the meeting:
Joining a meeting
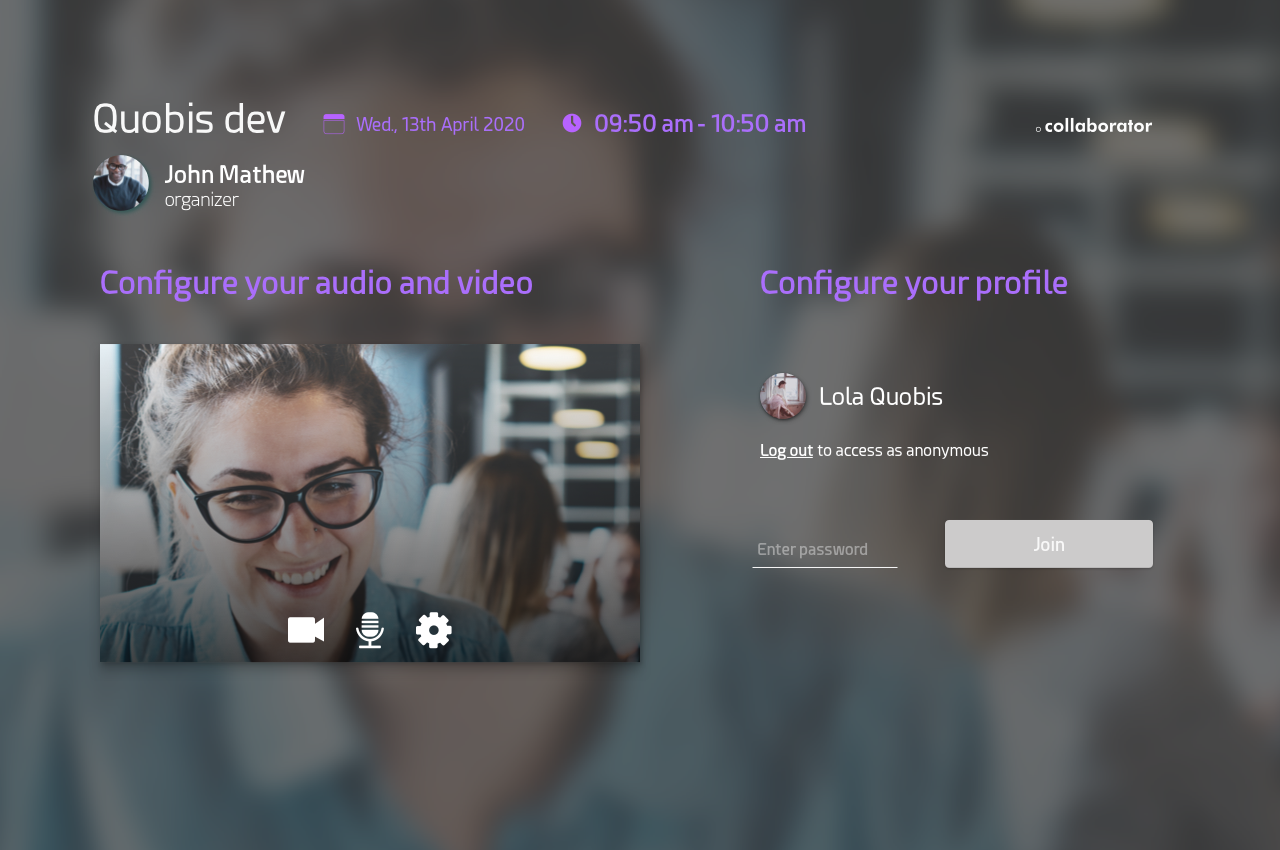
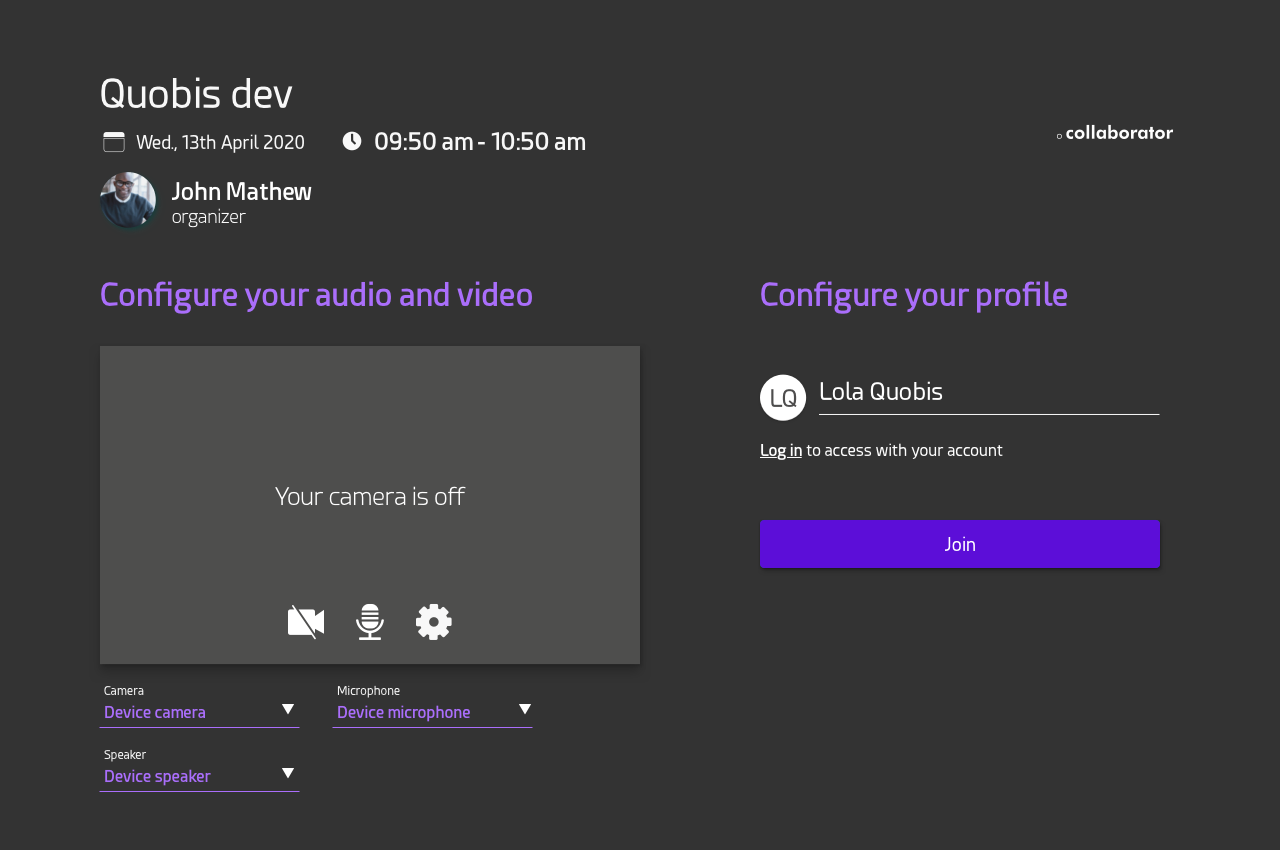
To join a meeting, participants just need to click on the meeting URL and they will be welcome by the lobby, where the participant will introduce, name and can upload a picture. This information is required in order to show it to the rest of participants:
The name is shown in the participant’s list
The picture is shown as user’s avatar
If the participant has a Quobis collaborator account and is already logged, this information will be optional, then he/she will be directed straight forward to the meeting room.
If the participant does not have a camera or wants to join in audio-only mode, he can choose those options in the lobby.
Once the participant is connected to the room, it will have access to a limited multiparty conference. All the participants will be shown in a row in the upper-right
One of them is shown as main background. Last connected user.
Each participant can select which user to see in the main background just by clicking on it.
If a participant stops his video, his avatar is shown instead of its video stream.
If a participant is a user of the system and he is logged, its own avatar and display name will be shown instead.
Participants joining the meeting from a desktop browser will be able to share its screen.
Check more about multiparty conferences at Multiparty conferences section.
Password protected meeting
In the case that your admin has set the meetings to have a password, this will change slightly the way the user access to the meeting.
The change is minor, as the only real difference is that, after being invited to a Password protected meeting the user will receive via email/SMS the invitation with the password in plain text.
Example of a email for a Password protected meeting
Once the user is in the lobby, he/she will be prompted to input the password:

Passing variables via the URL as a query param
There are a number of options that can be passed into the URL as a query param that will modify the interface for the users. For instance,
once you create a meeting, you can add at ?username=name query param (swap name for the desired name) and then when the external user access
to the lobby, the name area will be autofilled.
In order to do this the user will have to first create the meeting and copy the URL. Let’s imaging this is the URL: https://testing.quobis.com/collaborator/m/614da63ed0c61431945bd3fc. Now that you do hav the URL just add the parameter at the end like this: https://testing.quobis.com/collaborator/m/614da63ed0c61431945bd3fc?username=Bob and when Bob receives that URL and click on it will be directed to this lobby:
There are other query params available, you can check them in the Quobis collaborator configuration section: Quobis collaborator configuration