Quobis Manager administration guide
Access to Quobis manager
In order to use the Quobis manager application you must first open a compatible browser and navigate to the URL provided by your system administrator. This URL will take you to the Quobis manager login page.
Login
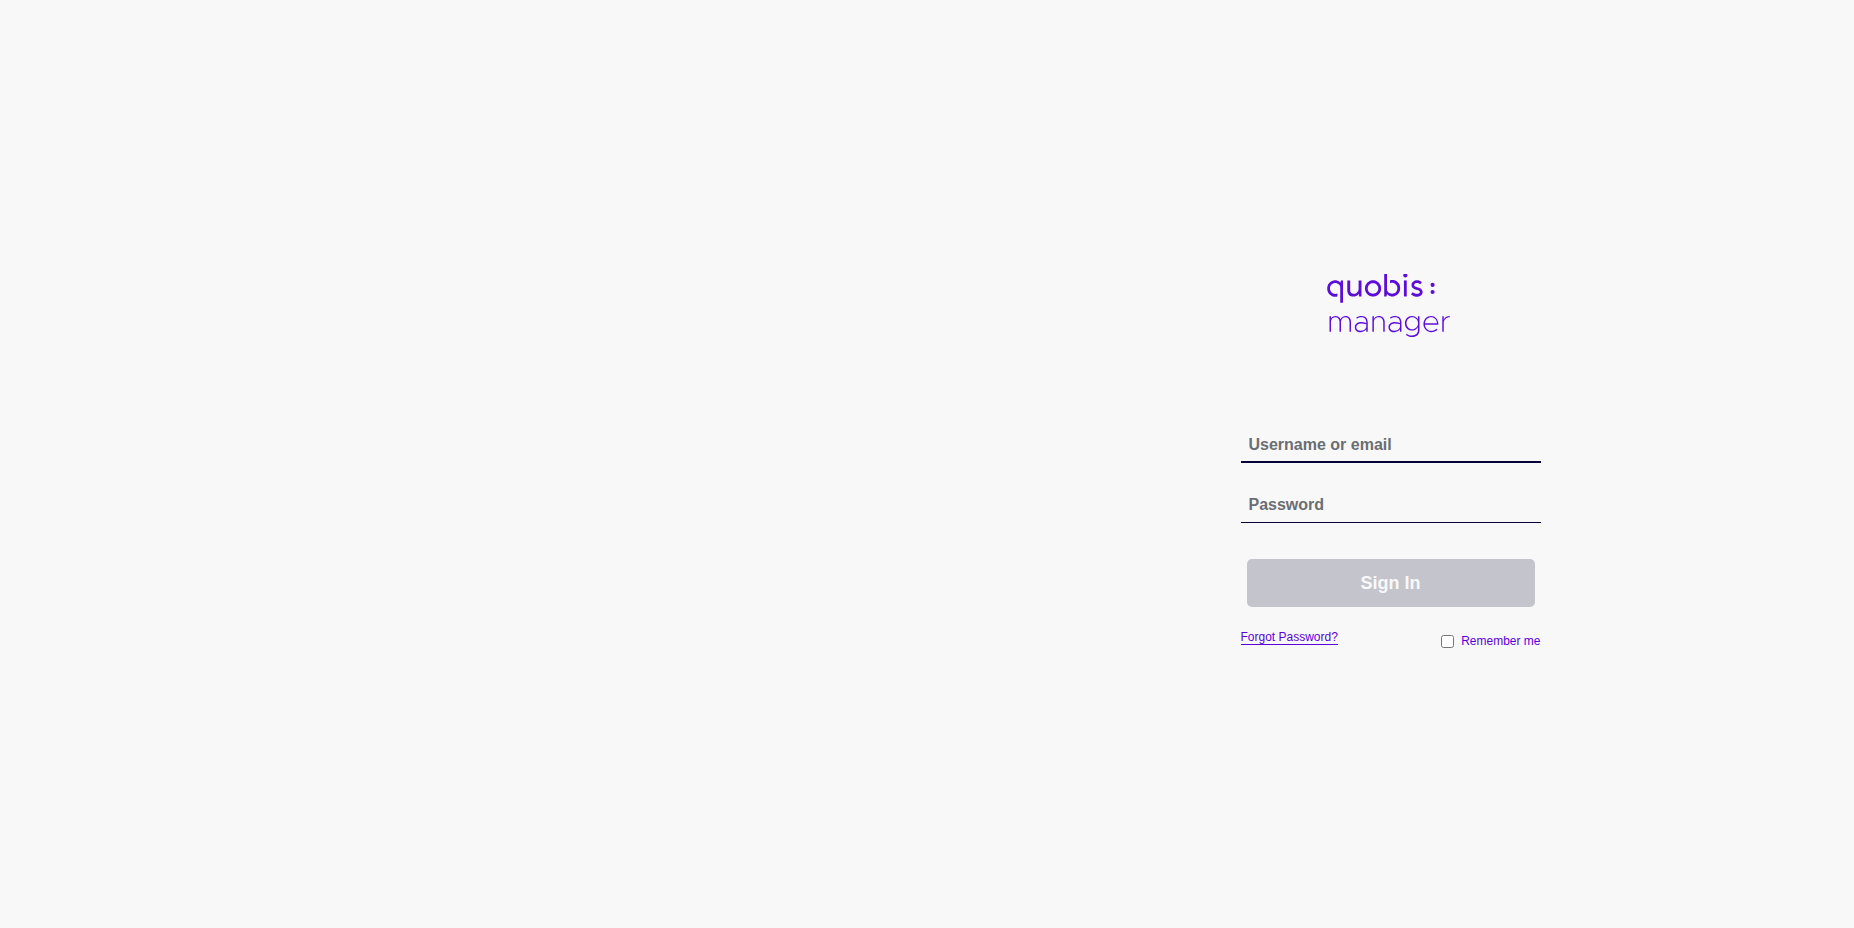
To initiate a session in Quobis manager you must provide valid system administrator credentials, composed of a username (or email) and a password. The login page also offers a Forgot Password? link to recover the password and a Remember me option to keep the session open in the browser.
General overview
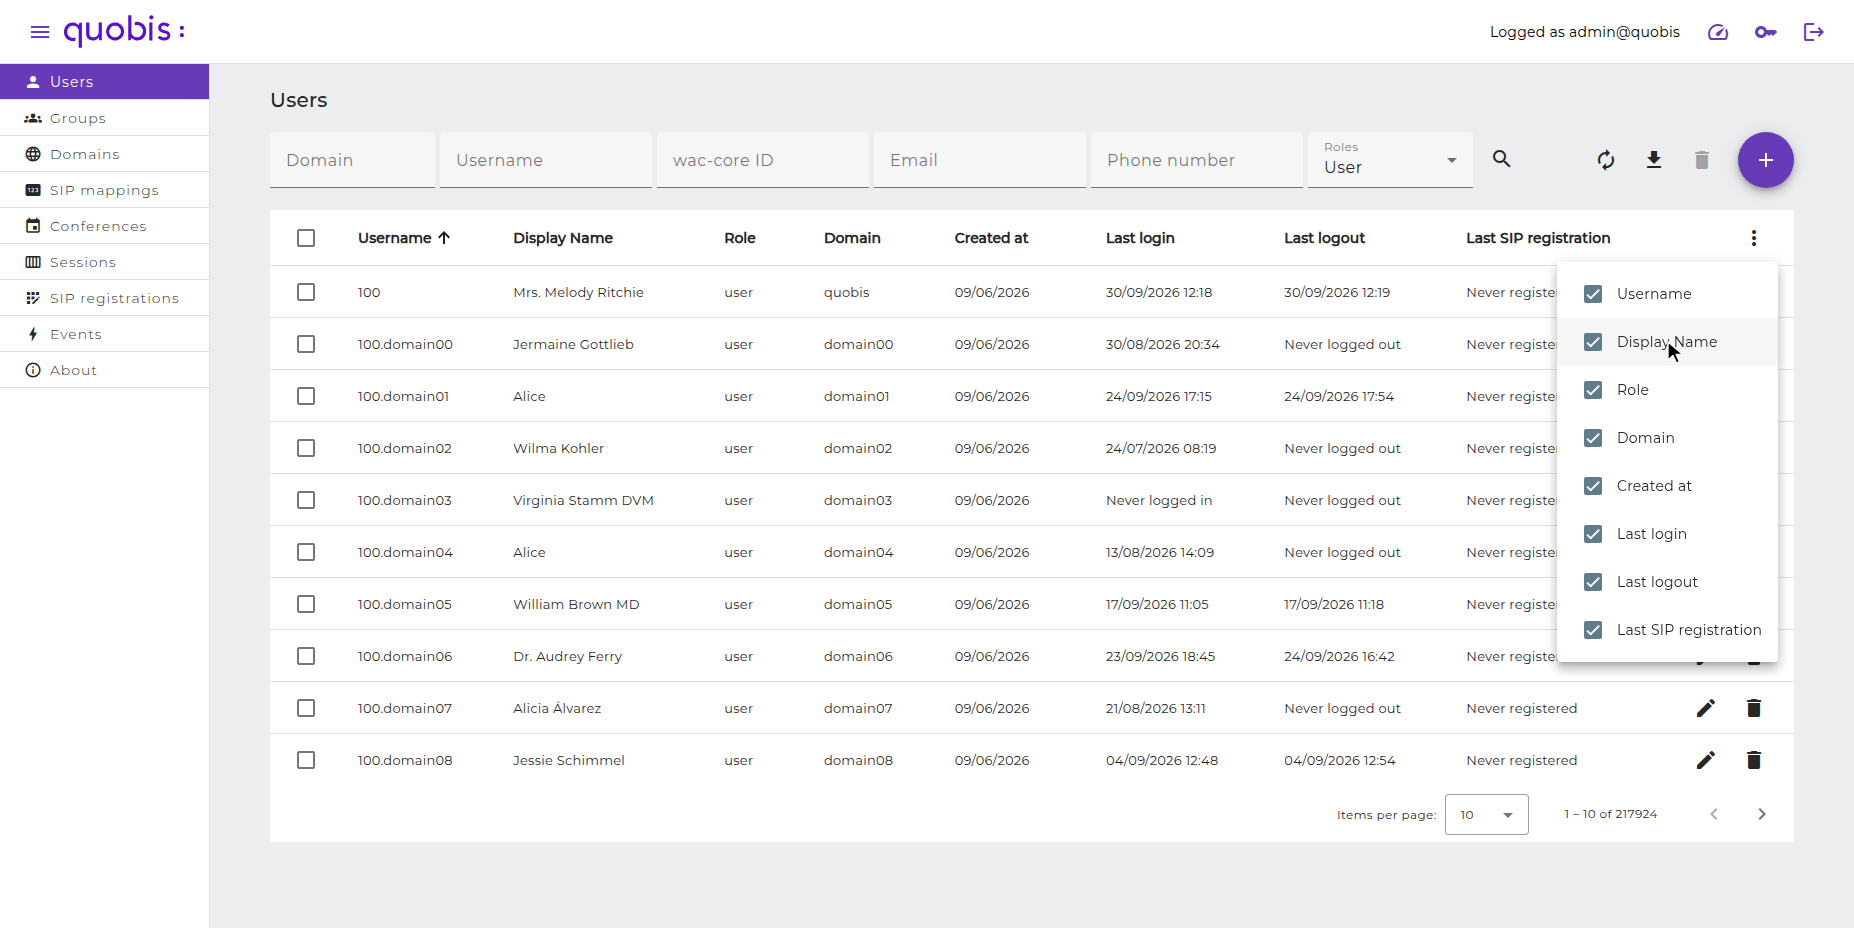
The application’s layout is divided into three areas:
Top bar. Contains the menu button, which shows or hides the left panel, the name of the logged-in administrator and three shortcuts:
Monitoring. Opens the monitoring dashboard (Grafana) of the platform.
Keycloak. Opens the Keycloak administration console.
Logout. Terminates the current session.
Left panel. Gives access to every section of the application: Users, Groups, Domains, SIP mappings, Conferences, Sessions, SIP registrations, Events and About.
Main working area. Displays the content of the selected section.
Most sections display their data in a table that shares the following features:
Filters. Located above the table. Fill in one or several filters and click the search button (or press Enter) to apply them.
Sorting. Click on a column title to sort the table by that column.
Columns. Click the three dots button located in the upper right corner of the table to choose which columns are displayed.
Reload. Refreshes the data shown in the table.
Download. Exports the records into a CSV file.
Bulk actions. Select several rows using the checkboxes next to them and use the buttons located above the table to perform an action over all of them together.
Pagination. Located at the bottom of the table. Allows to choose how many items are displayed per page and to navigate through the pages.
Terminating the session
To log out of your session from any screen inside Quobis manager, click the Logout button located in the upper right corner of the top bar.
Users
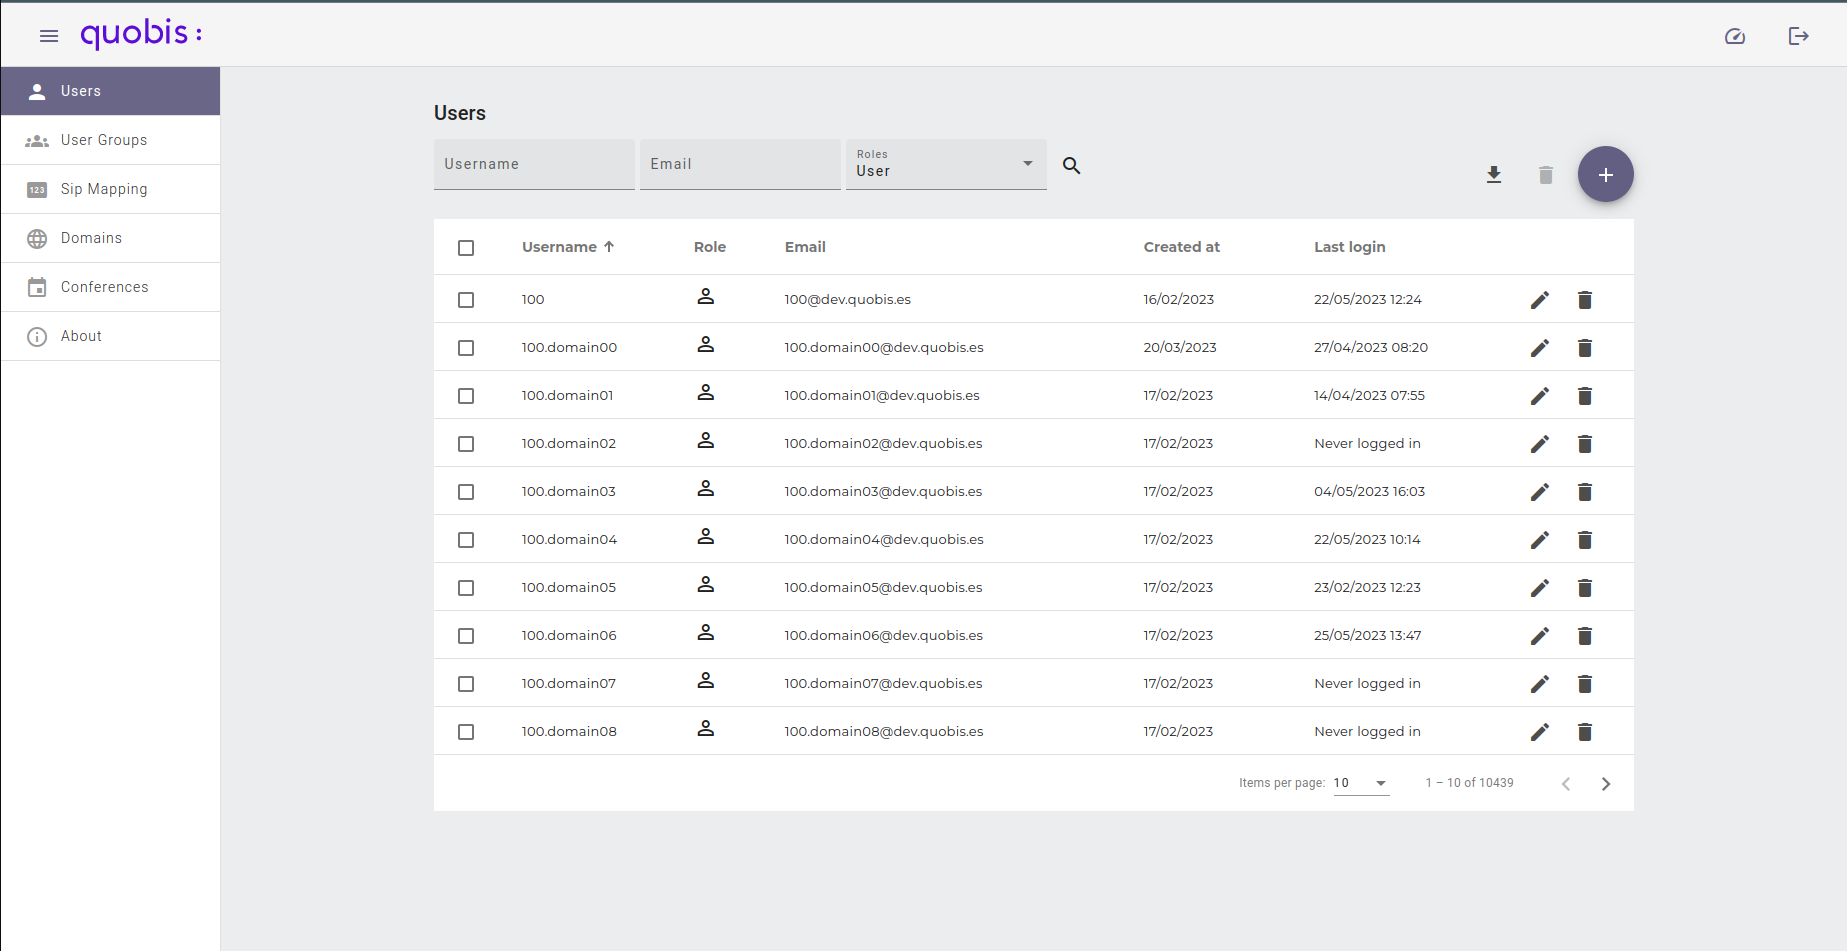
Selecting “Users” in the left panel will display a list of accounts registered on the system. This list will show by default the following columns:
Username. Name by which the user is registered.
Display Name. Name seen by the user and its contacts.
Role. Admin, user or anonymous.
Domain. Domain the user belongs to.
Created at. Date in which the user was included into the platform.
Last login. User’s last login date and time.
Last logout. User’s last logout date and time.
Last SIP registration. Date and time of the last SIP registration of the user.
In order to locate one or several users from the list you have the following options:
Filter by Domain, Username, wac-core ID, Email or Phone number using the search boxes located above the table.
Filter by role using the Roles selector. More than one role (User, Admin, Anonymous) can be selected at the same time.
Sort by a specified column by clicking on the column title.
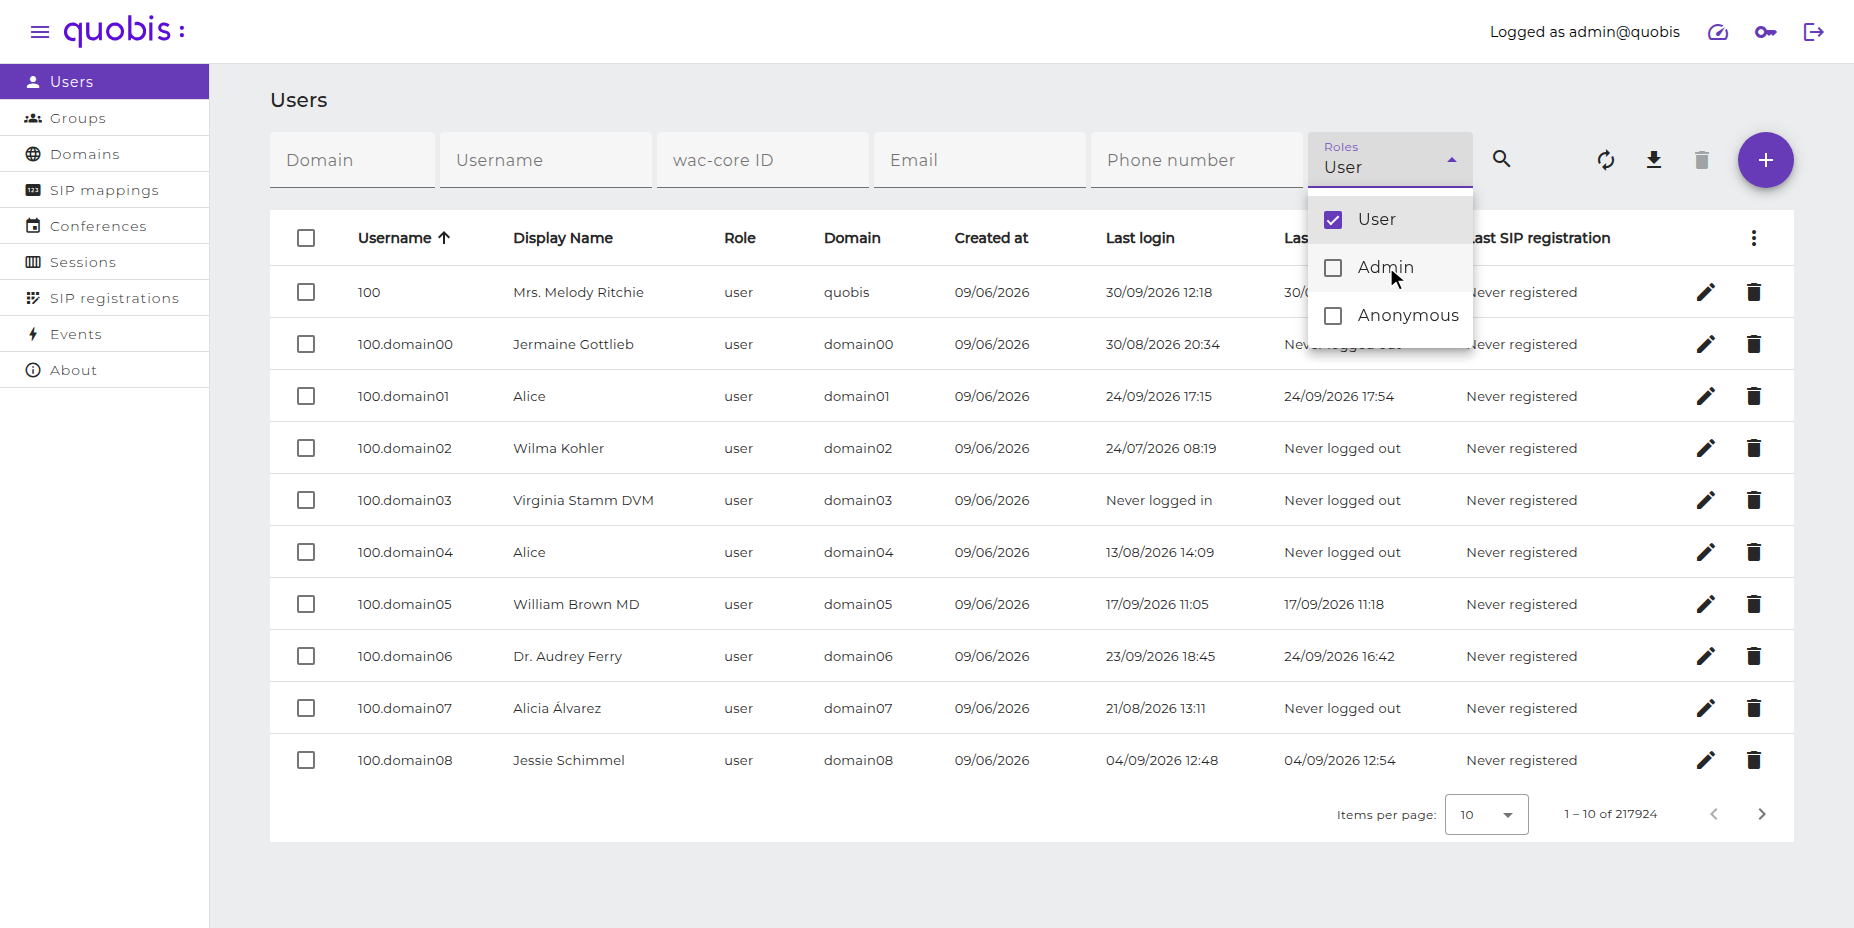
The whole list of users can be exported into a CSV file using the Download all users button. You can also select a group of users by marking the checkboxes next to the Username column and delete all of them together using the Delete users button.
Adding a new user
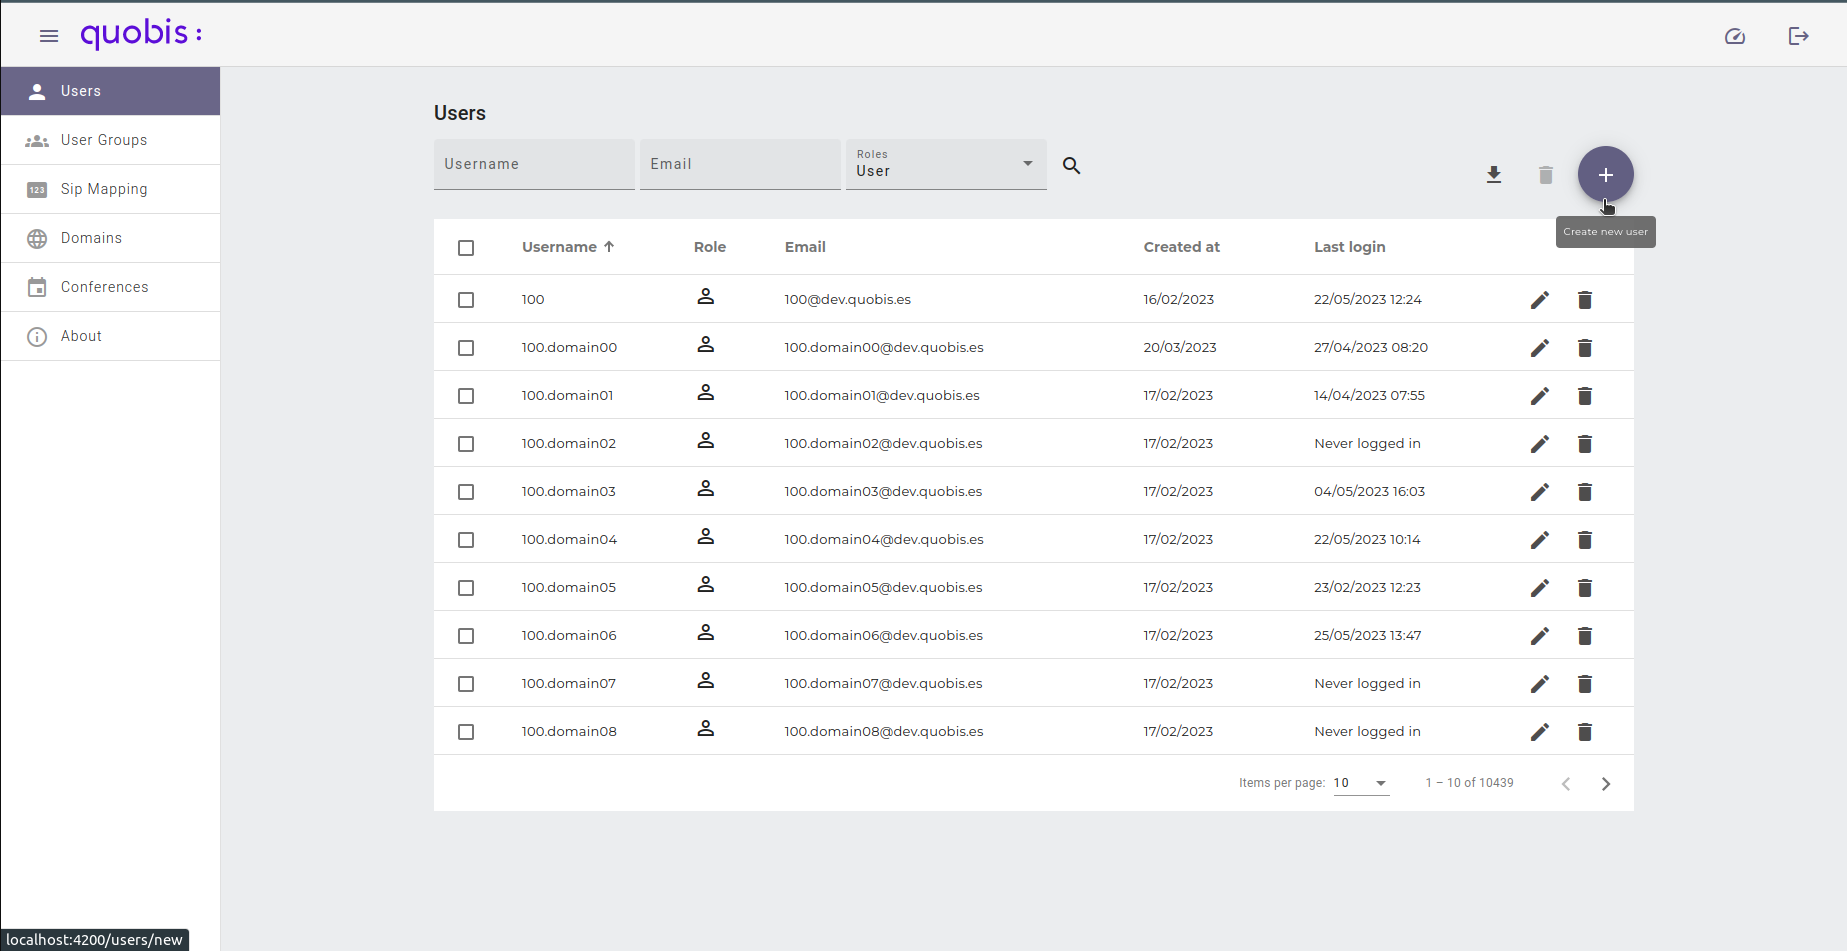
To add a new user click on the “plus” icon on the upper right corner of the screen. A new form will appear in order to configure the following attributes:
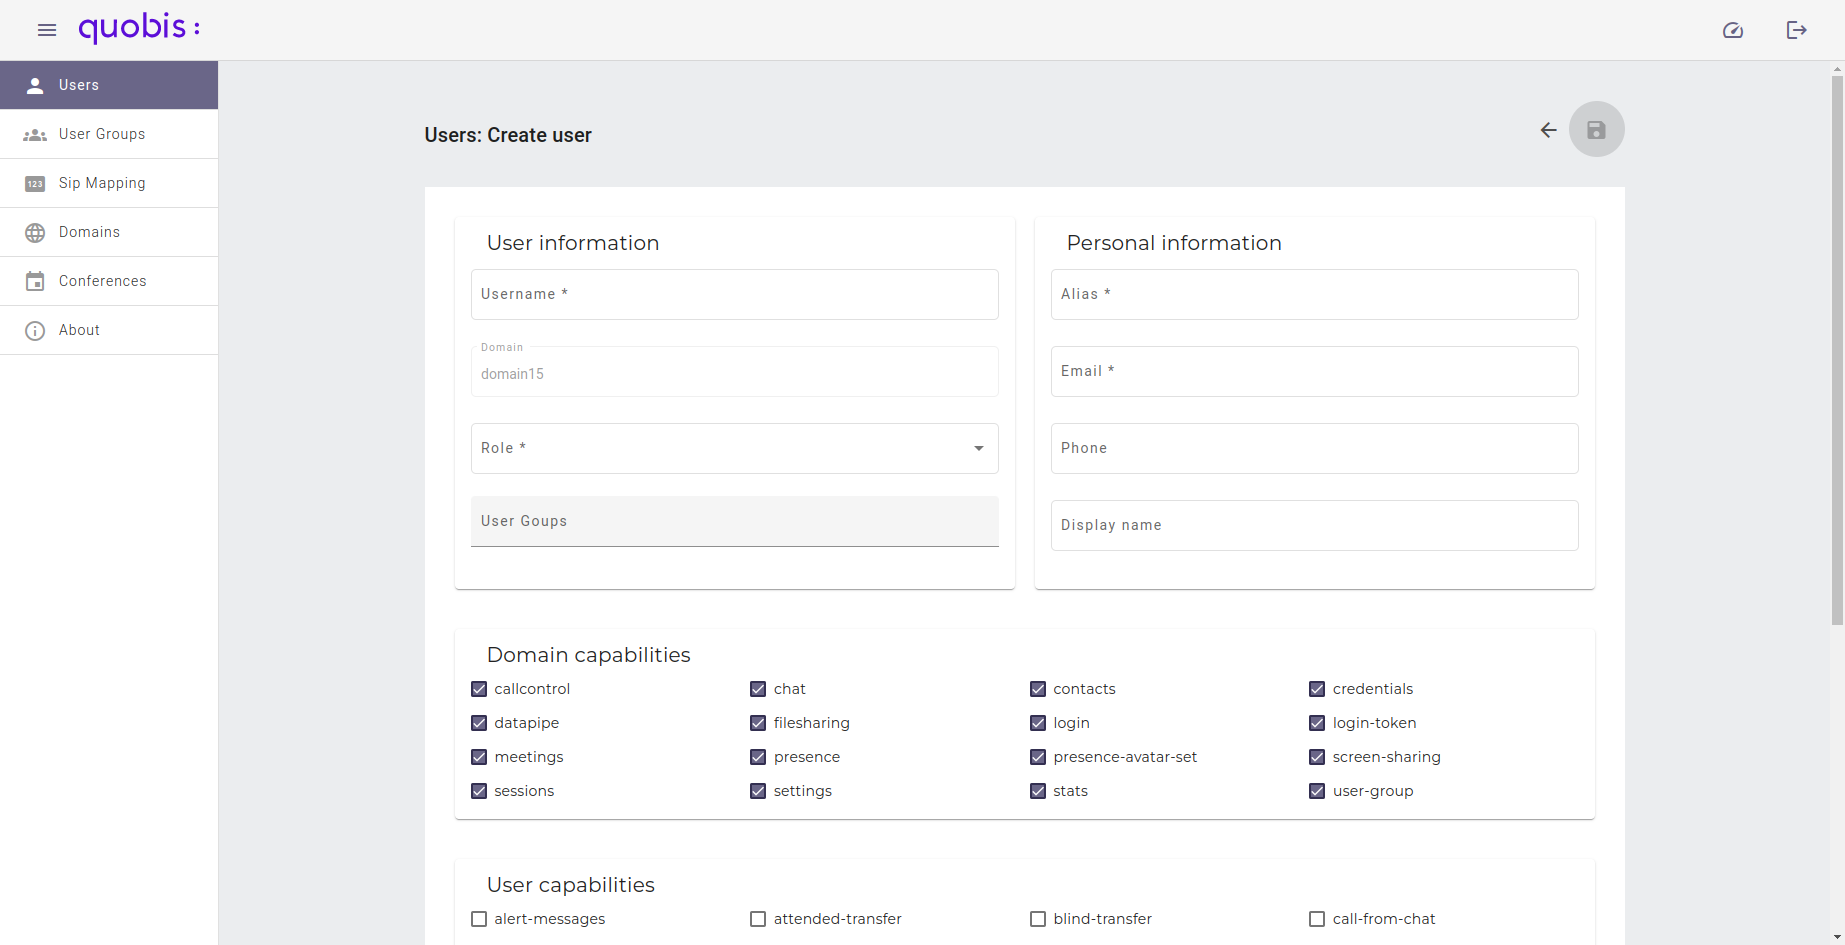
Following the order shown in the image:
Username. Name by which the user is registered. It may not match with the display name.
Domain. User’s domain.
Role. Available to choose between User, Admin or Anonymous.
User Groups. Groups the user belongs to.
Alias. Unique string associated with the user.
Email. User’s email.
Phone. User’s phone number.
Display name. Name seen by the user and its contacts.
Below these fields the capabilities and permissions of the user can be configured:
Domain capabilities. Capabilities of the user’s domain.
User capabilities. Additional capabilities for this user, such as call-history, filesharing, start-chat or whiteboard.
Media capabilities. Media features available for the user, such as audio, video, audio-call, video-call or conferences.
Domain permissions. Recording profile, Recording type and Voicemail settings of the user. By default they take the value defined for the domain (Domain default).
Presence. Mood and Note shown to the user’s contacts.
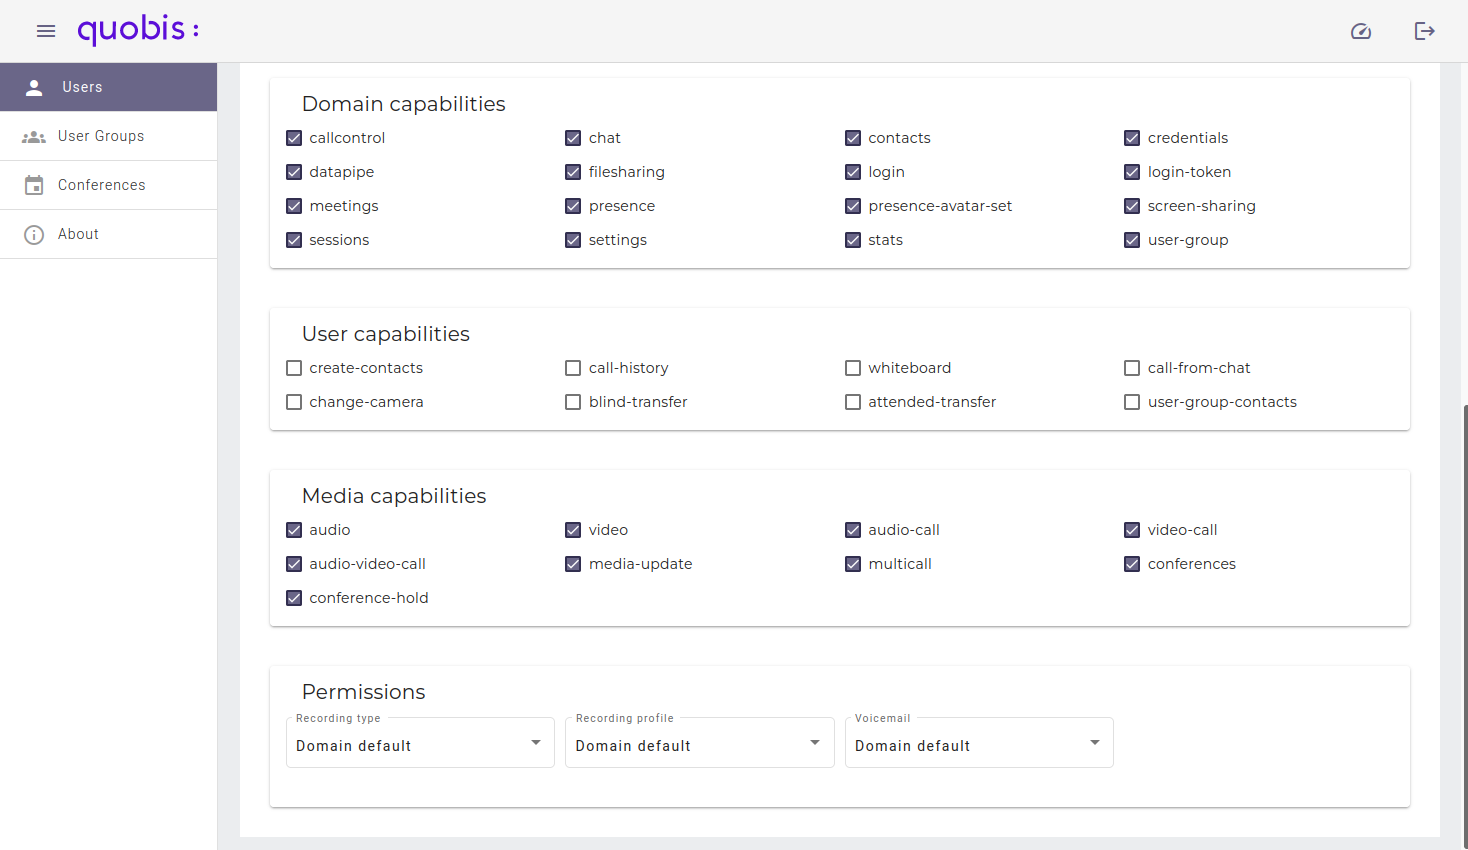
After filling in all required fields click on the Save button (in the upper right corner of the screen) to register the new user into the platform, or on the back arrow to dismiss this screen.
Note
All required fields are marked with an asterisk (*). A new user account cannot be created until all these fields are correctly covered.
Editing users
To edit a user’s information, click on the Edit (pencil) button of the user in the list.
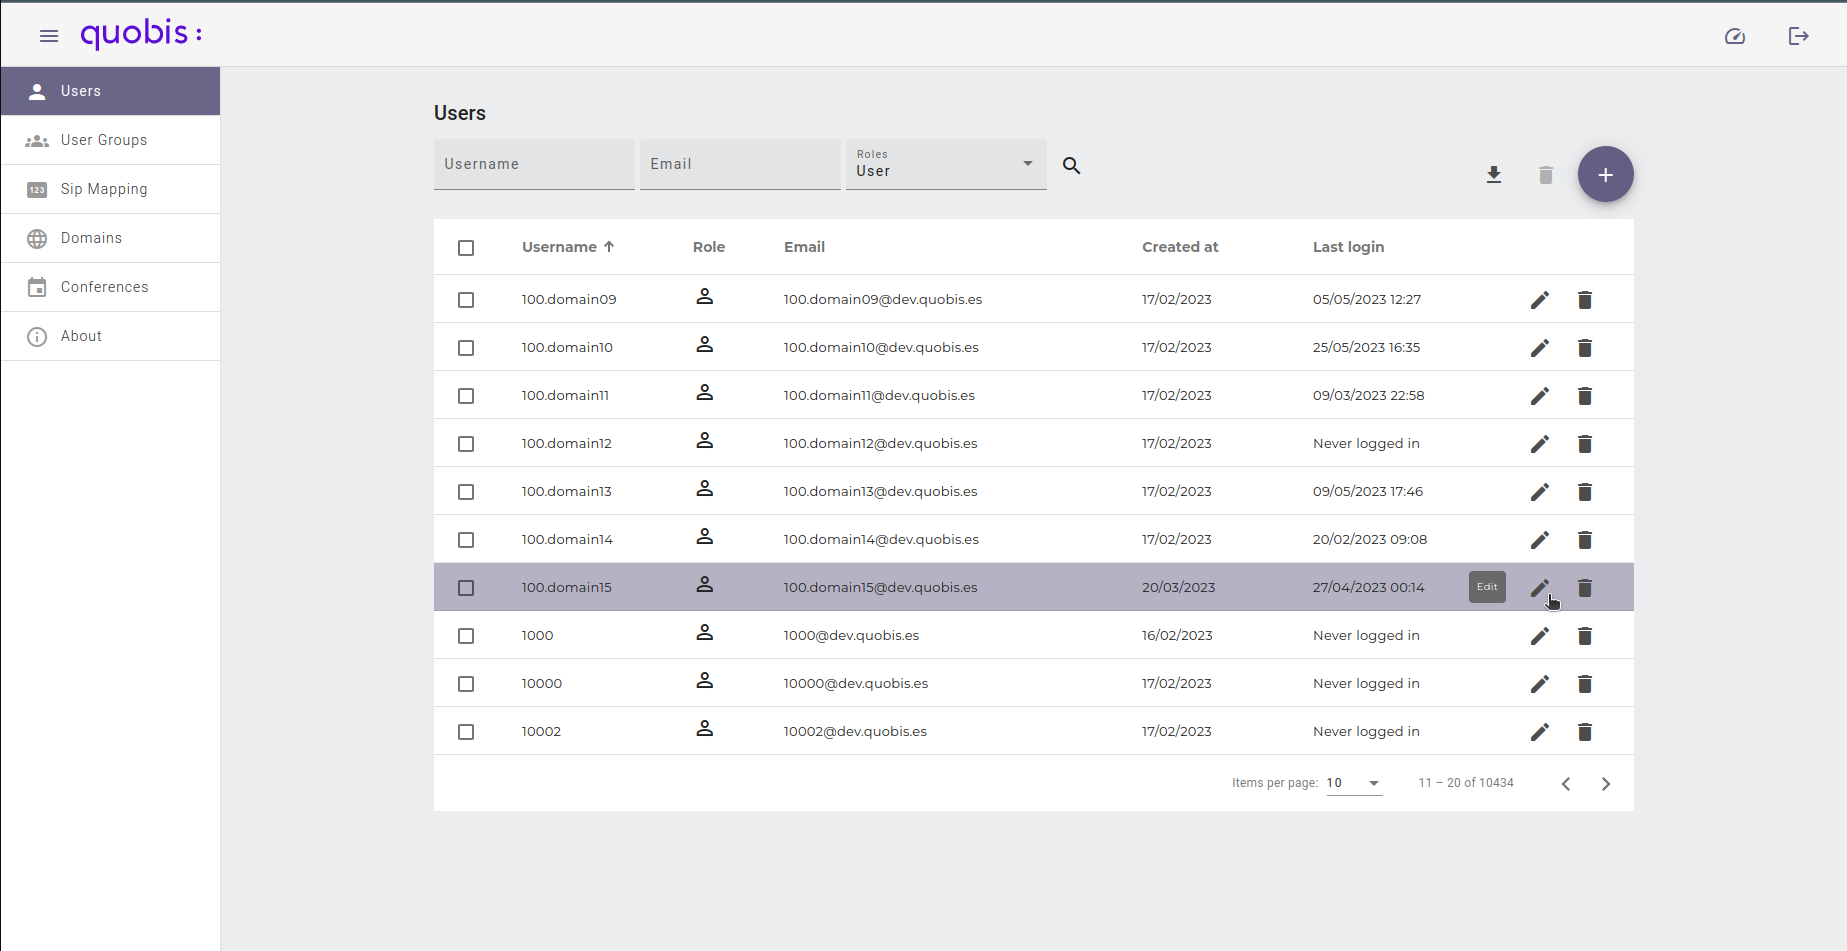
An edit screen will be displayed where you will be able to change any of the attributes mentioned when creating a new user. The upper part of the screen shows the user’s username, domain, wac-core ID, Keycloak ID, creation date and last login. Be aware that the username and domain cannot be modified.
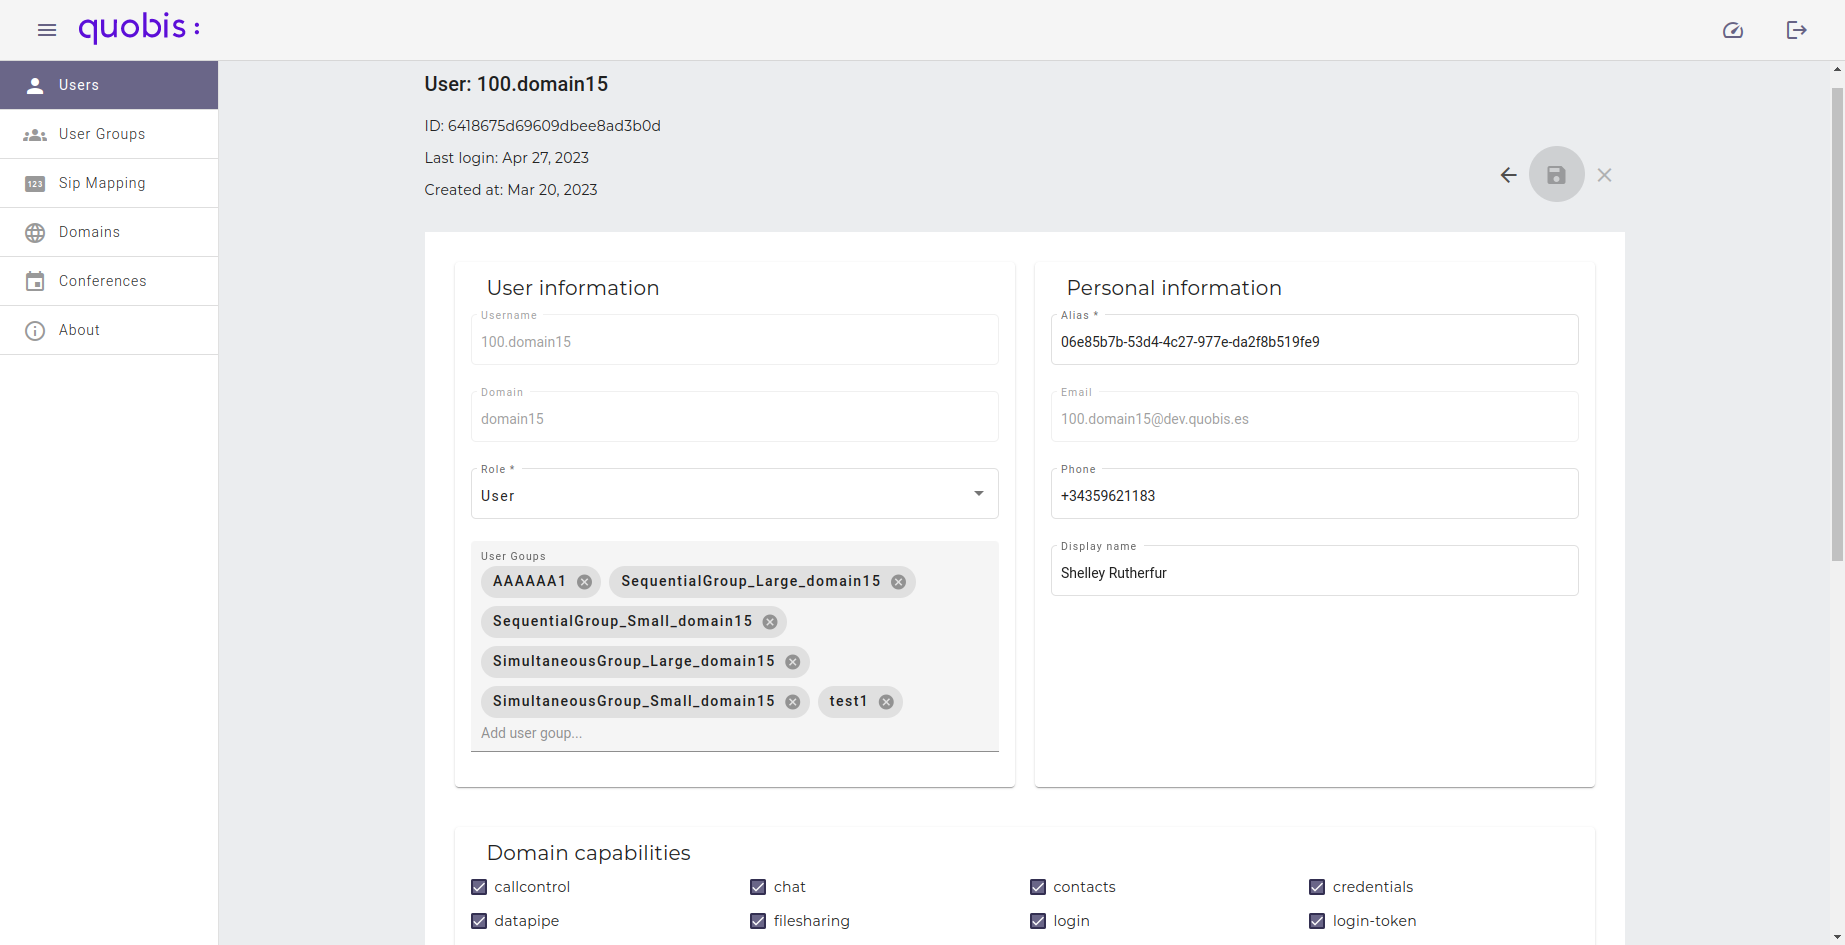
The edit screen also includes the following sections:
Credentials. Allows to set a new password for the user. The new password must be typed twice.
Current wac-core sessions. Lists the active sessions of the user. The Revoke all sessions button terminates all of them.
SIP mapping information. Displays the SIP mapping of the user. If the user has no SIP mapping, one can be created from here: the SIP username is mandatory, so no SIP mapping will be created if it is left blank, even if the SIP password has a value.
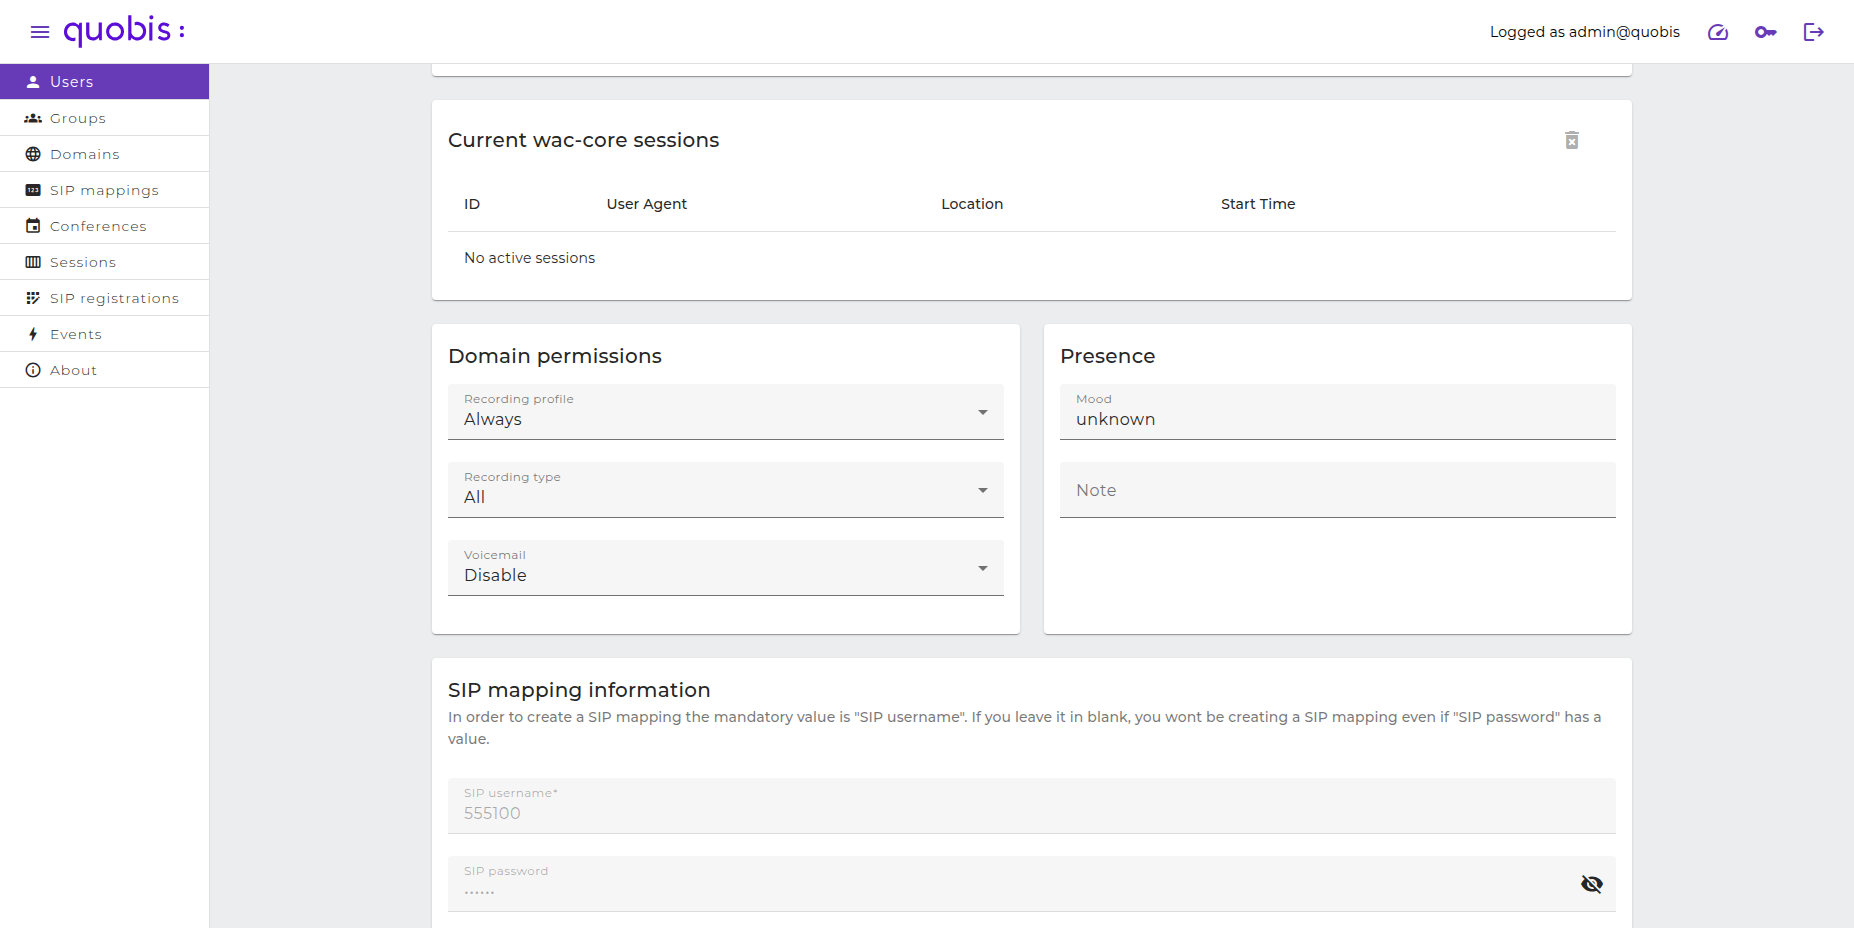
Click on Save to apply the changes or on Cancel to discard them.
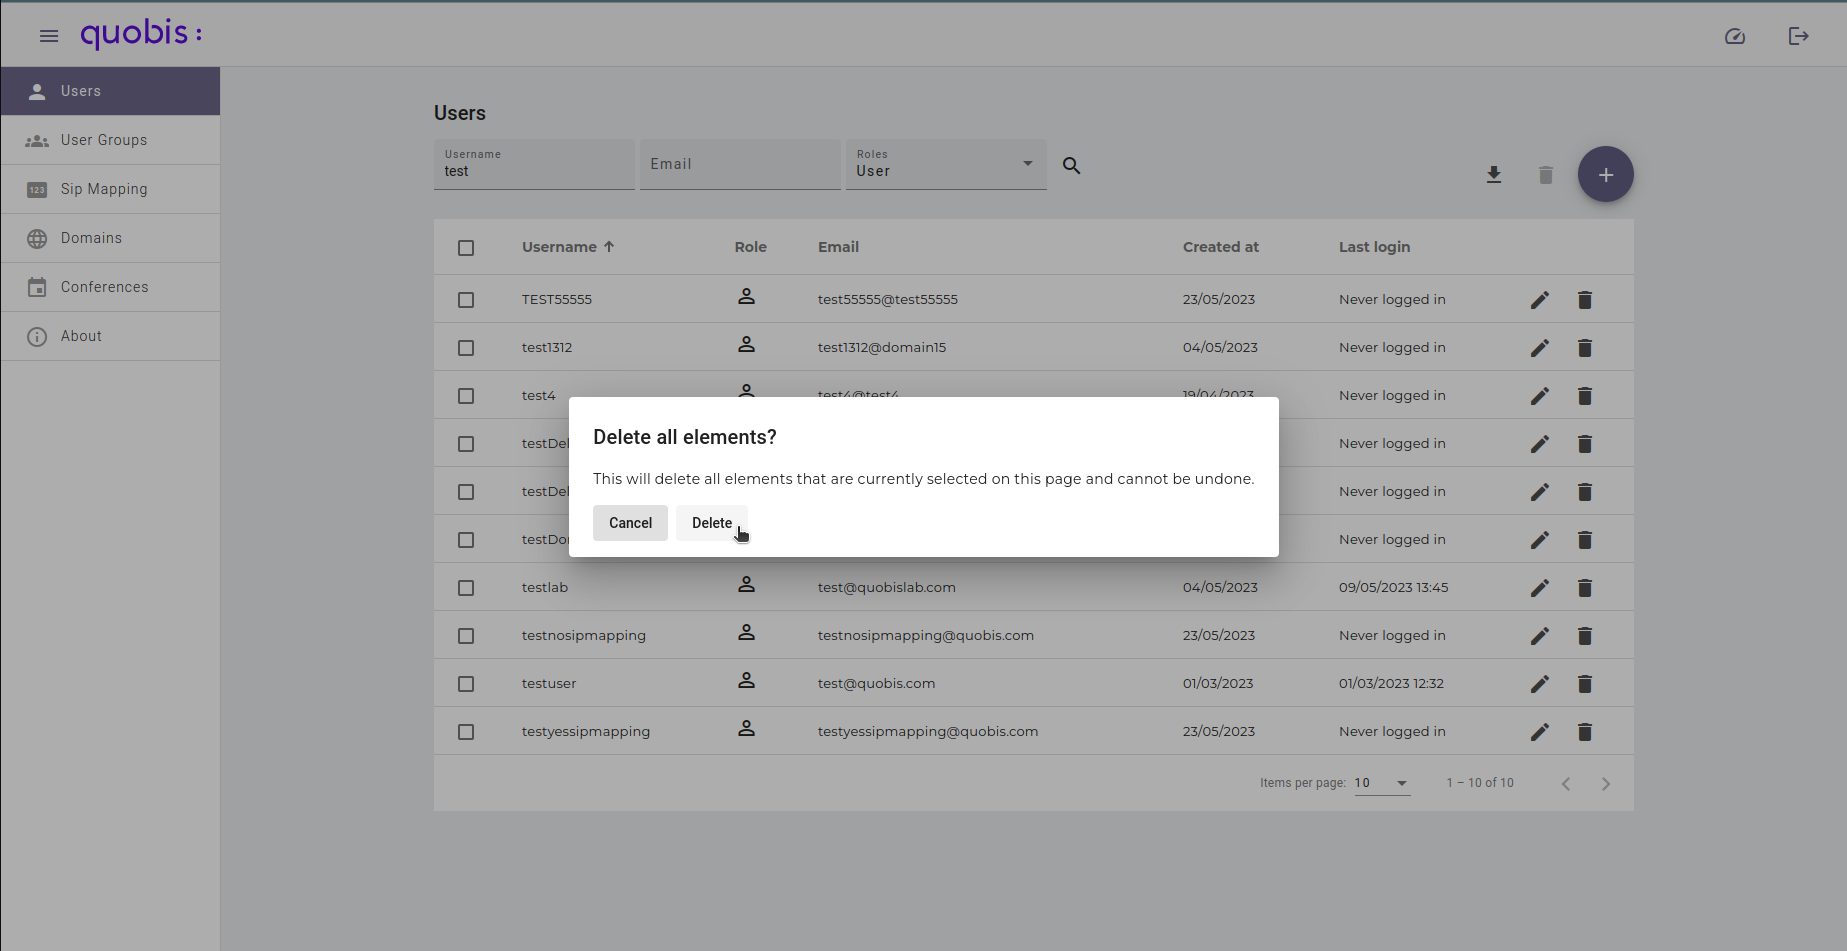
Deleting a user
To delete a user, click on the Delete (trash) button next to the Edit button. This will show a confirmation dialog:
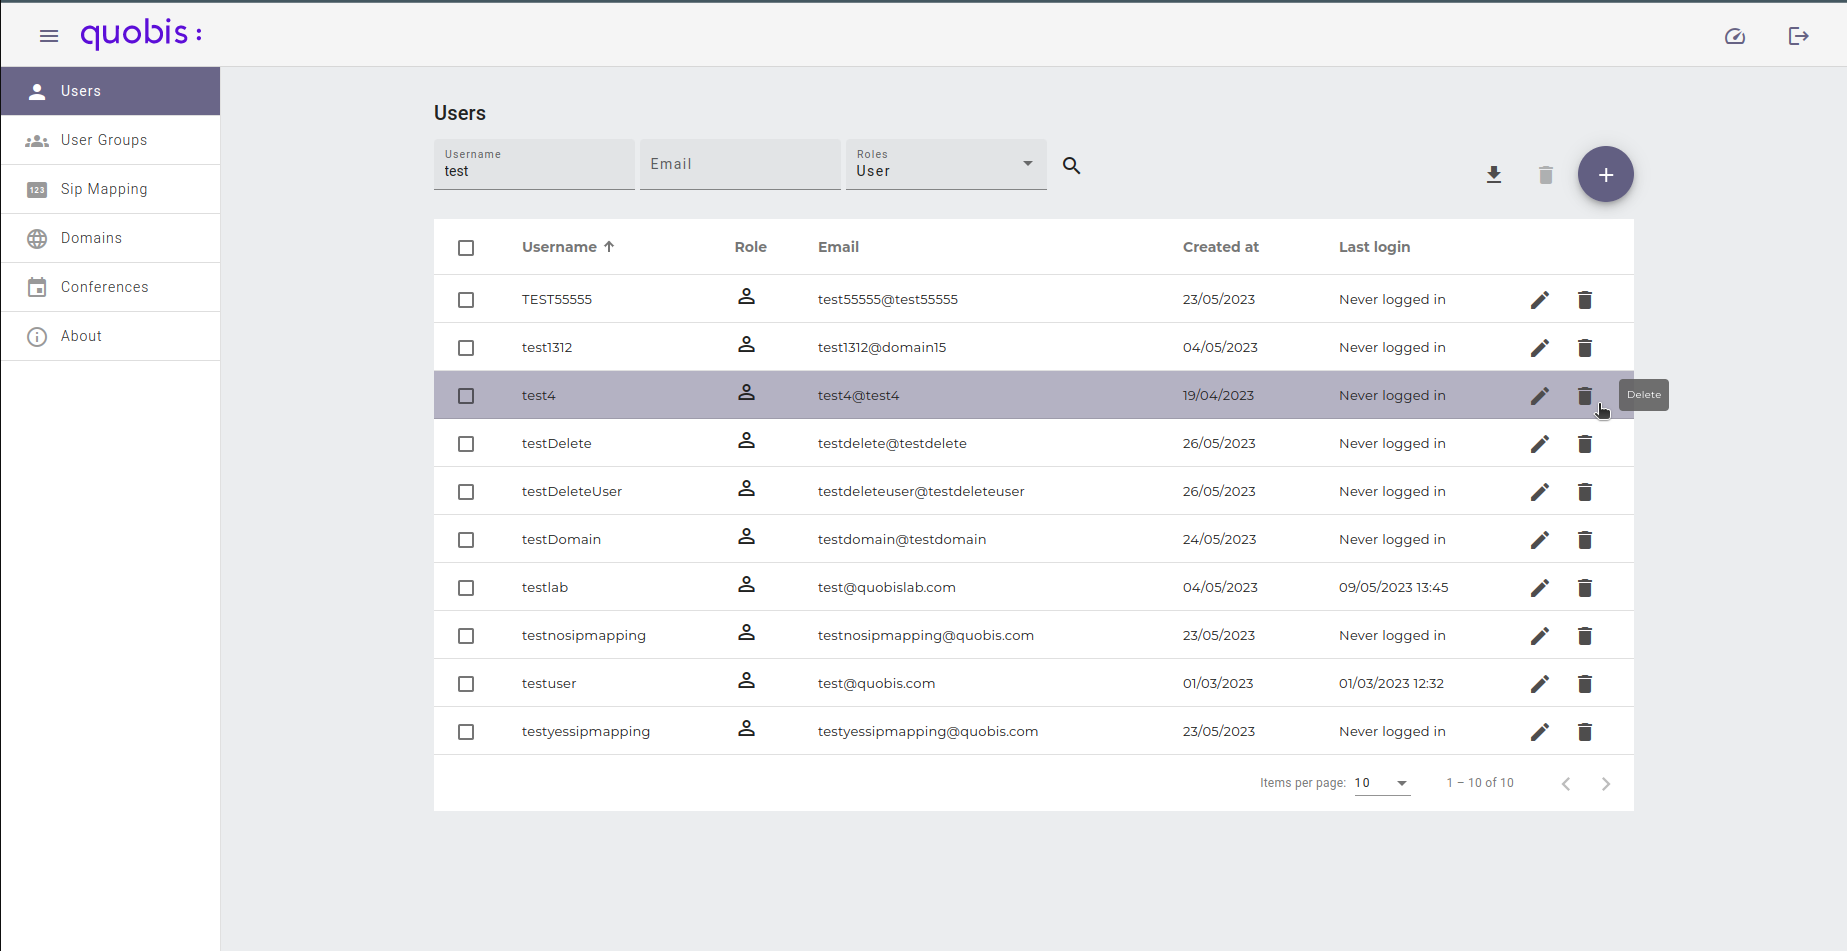
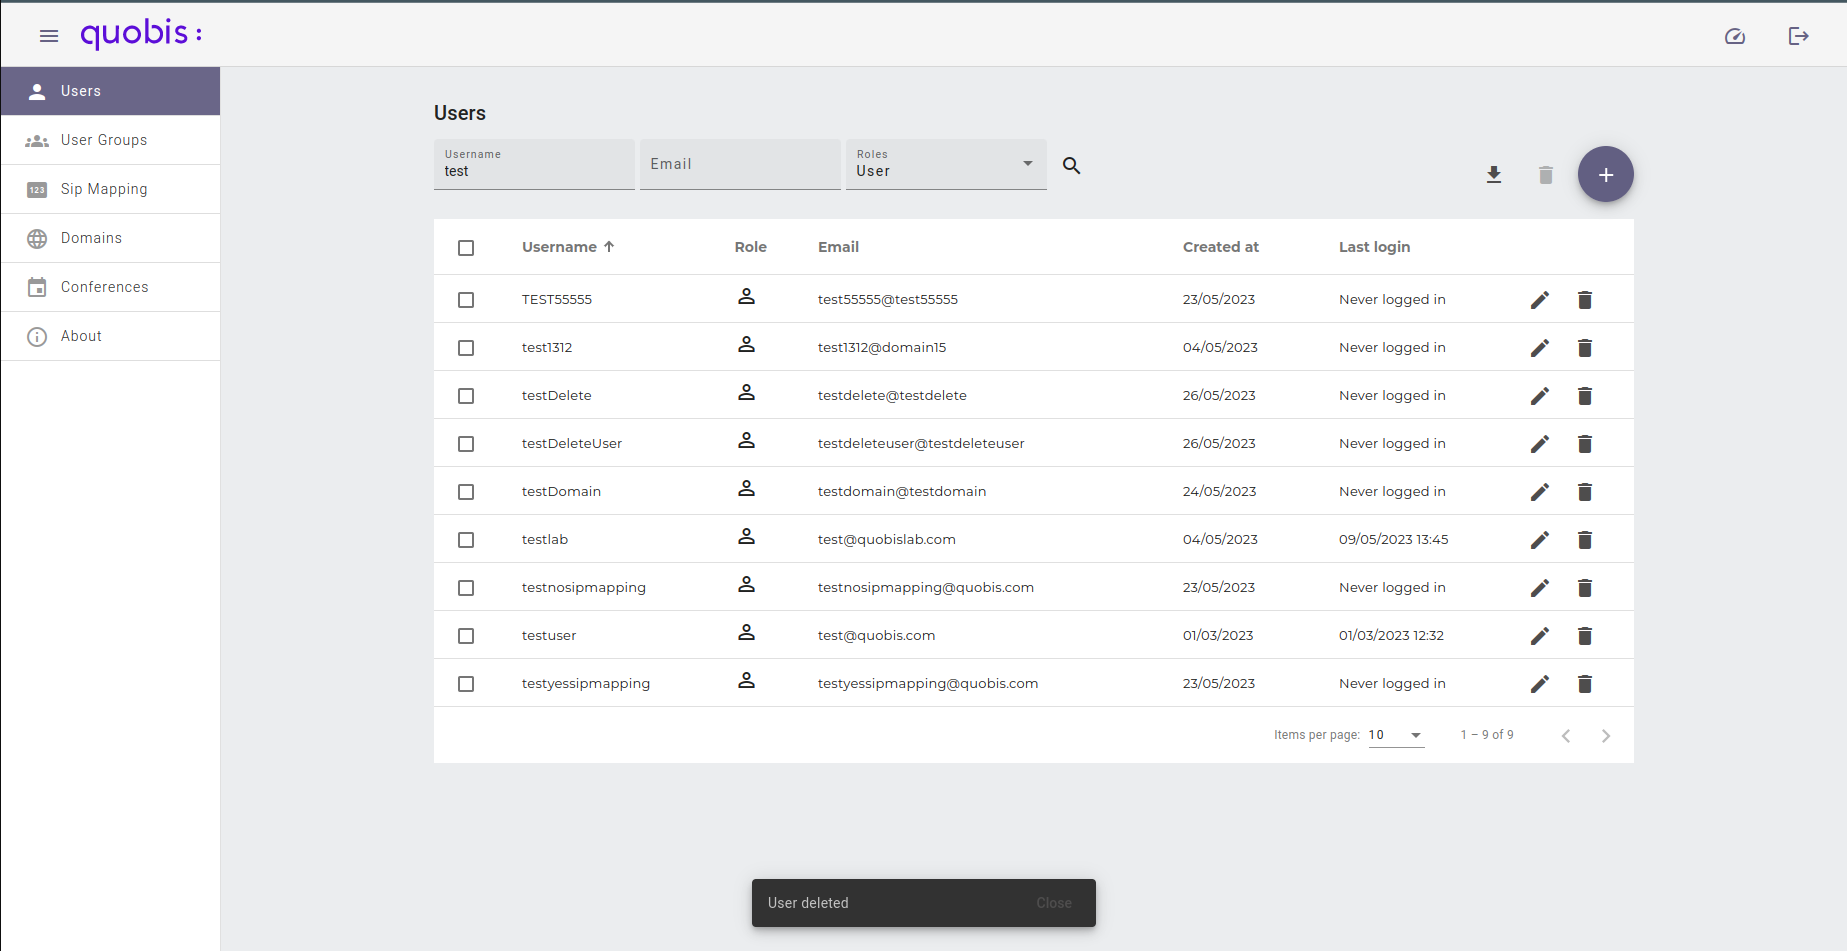
When accepted, a notification will appear confirming the action:
User Groups
In the left menu click Groups. Just like the Users section, a list will come up displaying all groups registered in the system. This list is composed of three columns:
Group name. The name of the group.
Owner. The username of the creator.
Participants. Number of participants in the group.
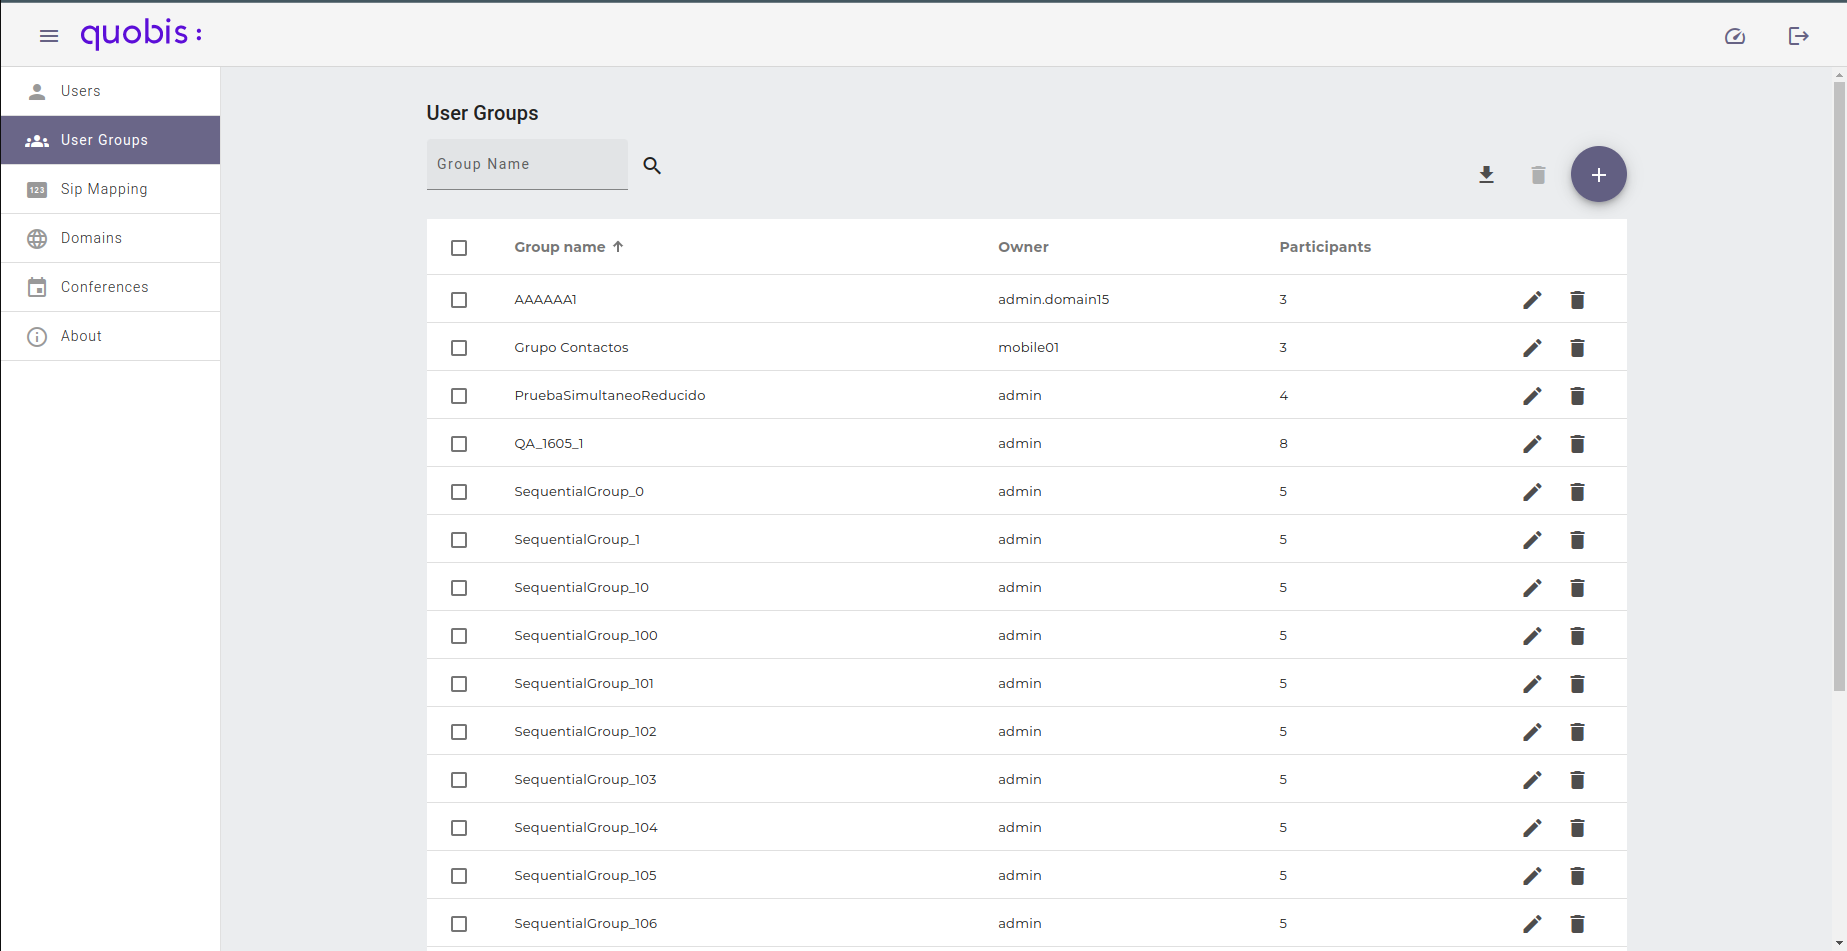
Groups can be filtered by name using the search box located above the table. The whole list can be exported into a CSV file using the Download all groups button, and several groups can be deleted at once by selecting them and clicking the Delete groups button.
Add a new user group
To add a new user group click on the “plus” icon on the upper right corner of the screen. A new form will appear in order to configure the following attributes:
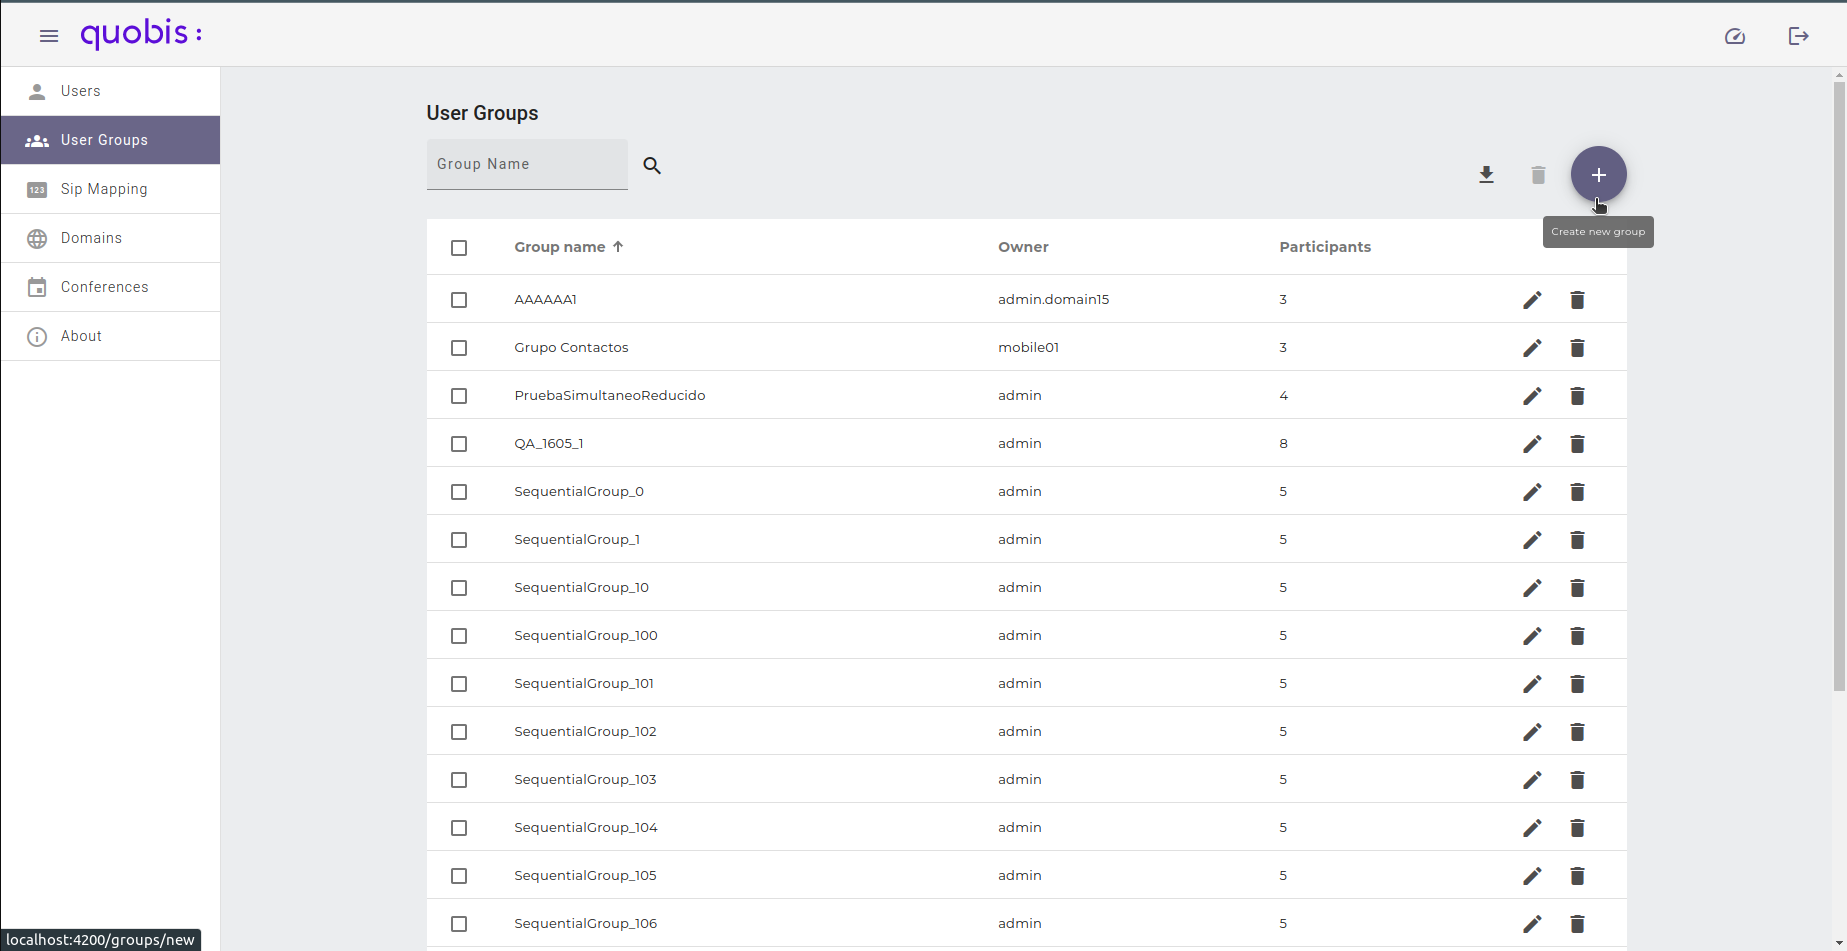
Name. The name of the group.
Participants. The users you want to add to the group. Type part of the username in the Add users… box and select the user from the list of suggestions. Each selected user will be shown below the box and can be removed by clicking on the cross next to its name.
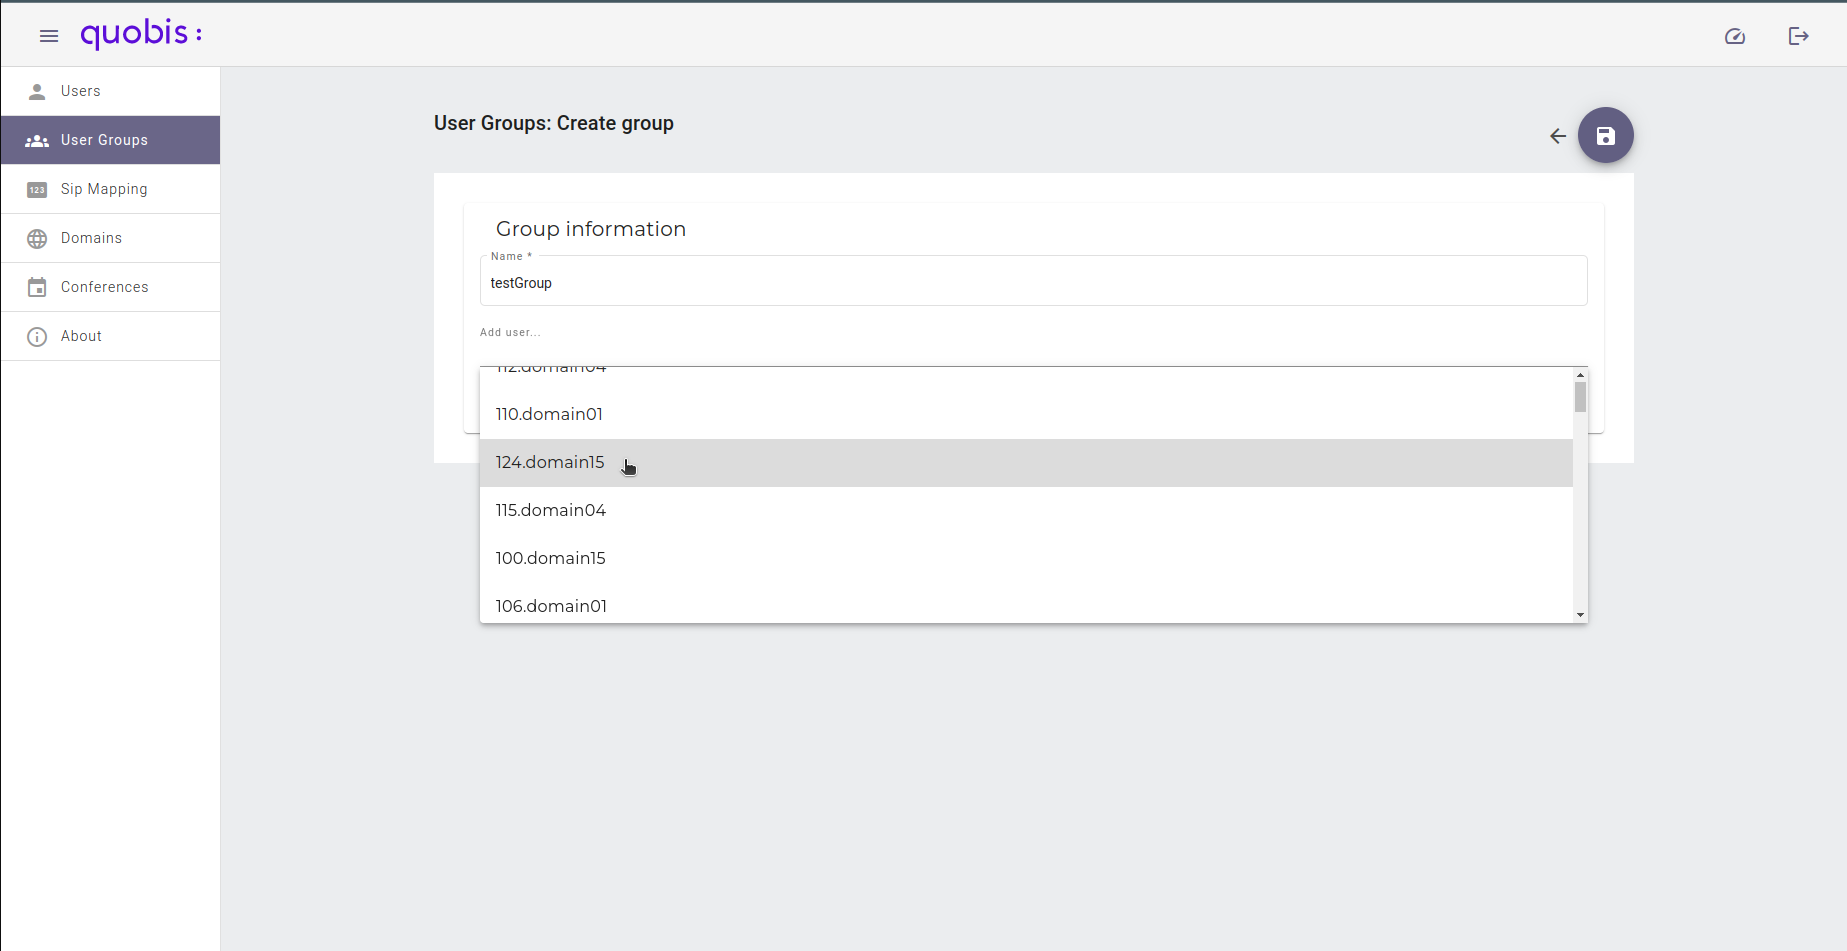
Once all the participants are added, click on the Save button:
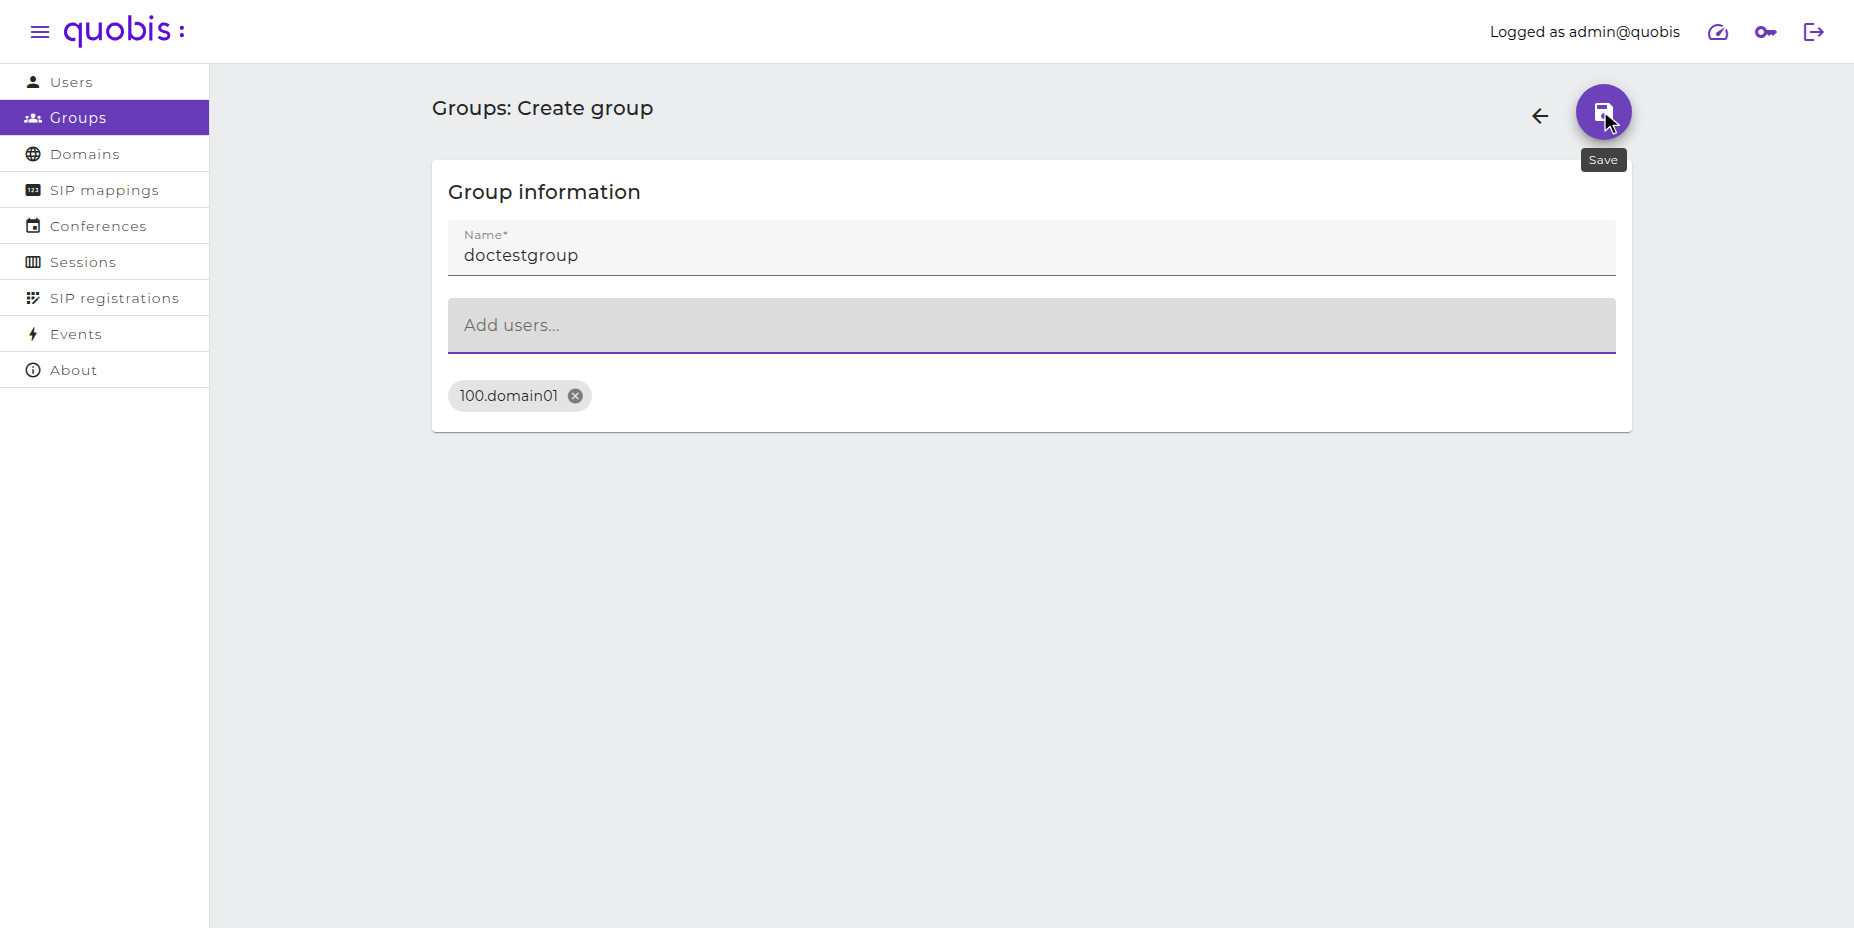
Note
All required fields are marked with an asterisk (*). A new user group cannot be created until all these fields are correctly covered.
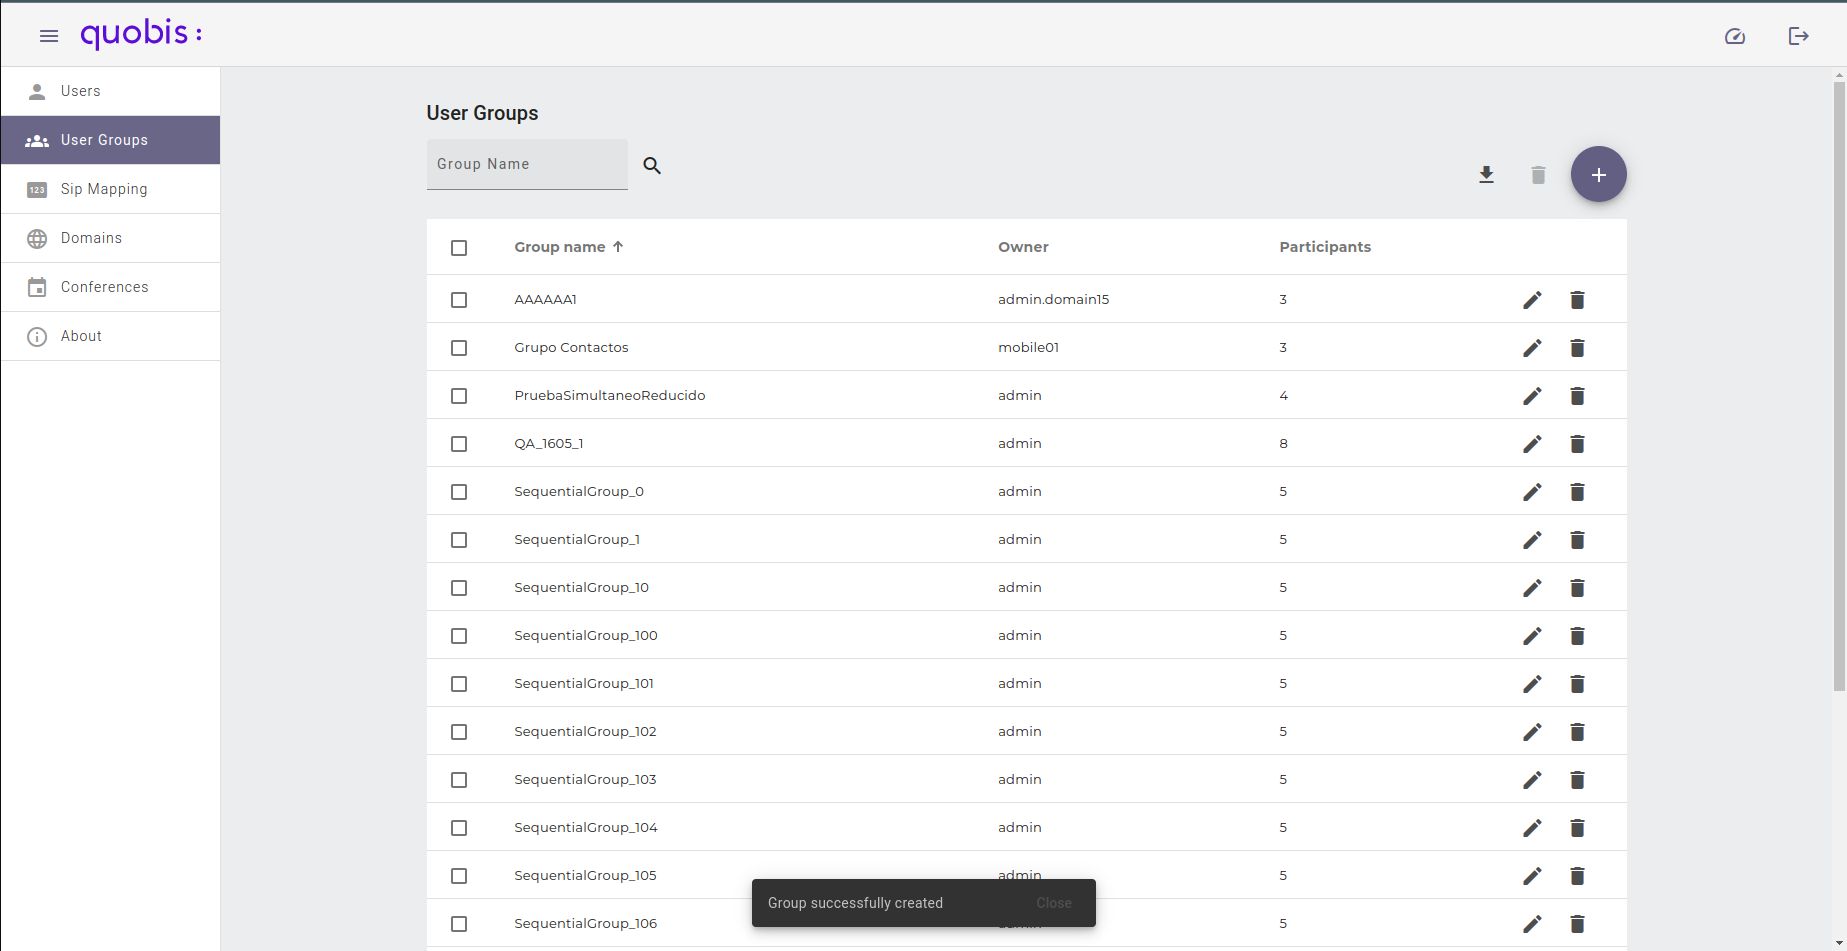
After saved, a notification will appear confirming the action:
Edit user groups
To edit a user group, click on the Edit (pencil) button of the group in the list.
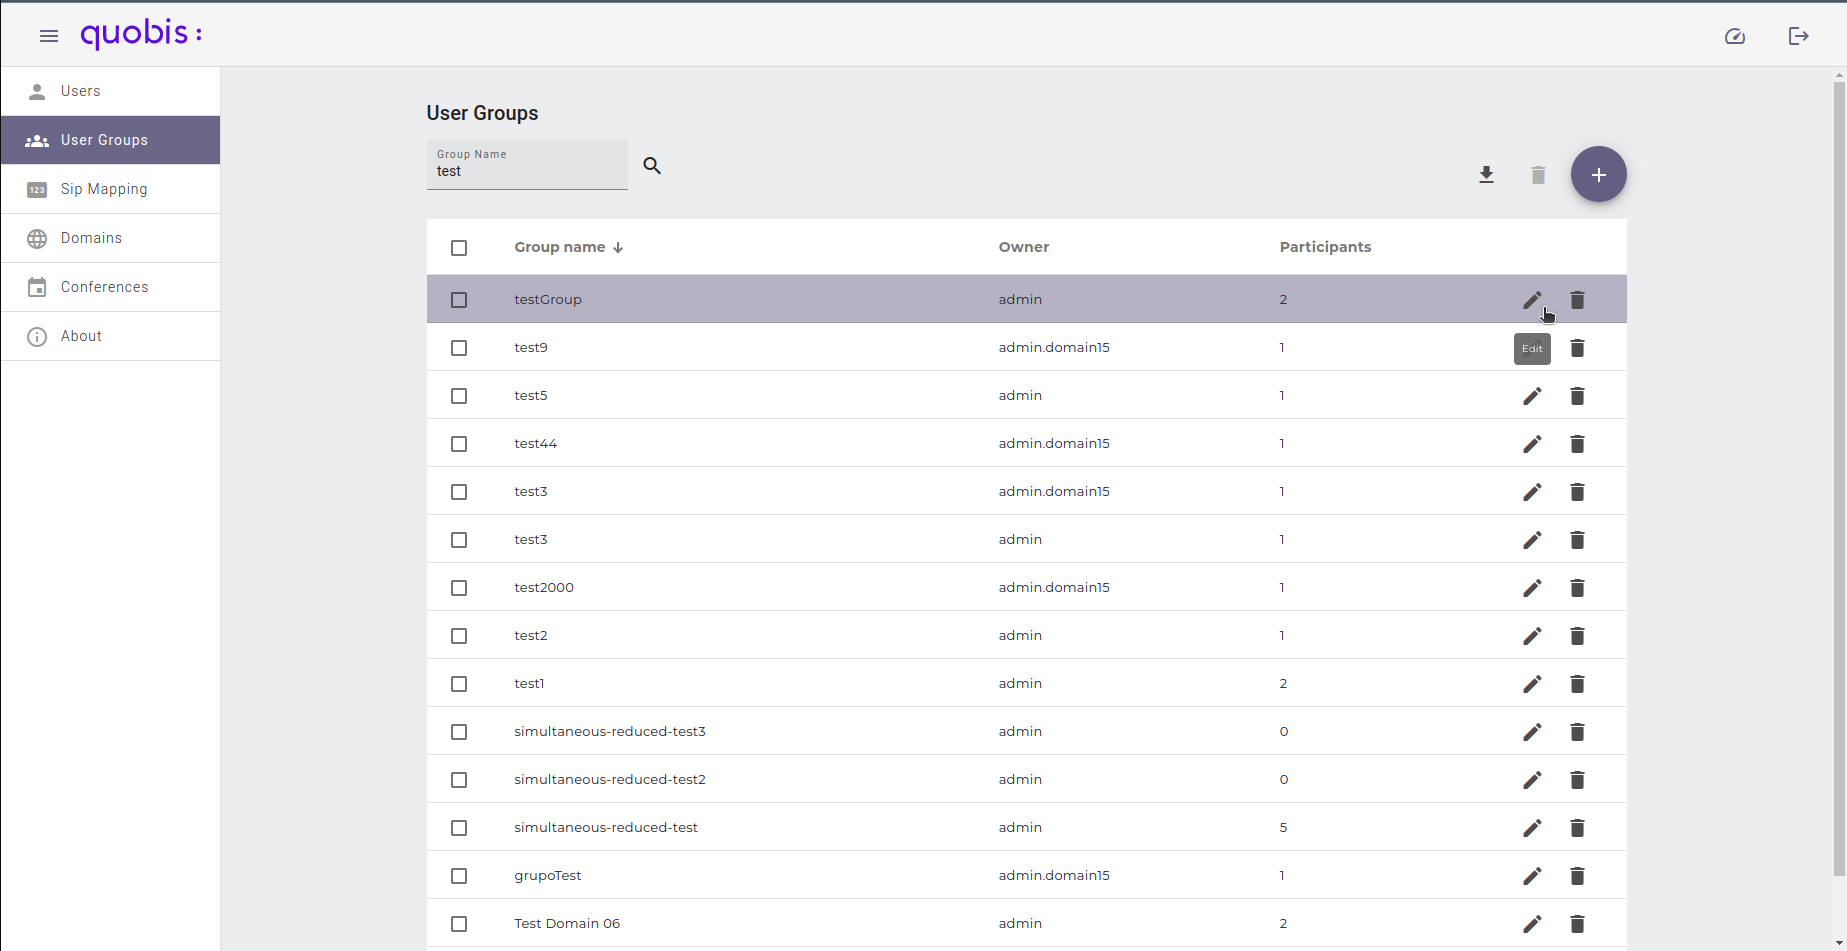
An edit screen will be displayed showing the group ID, the owner and the owner ID, where you will be able to change any of the attributes mentioned when creating a new user group.
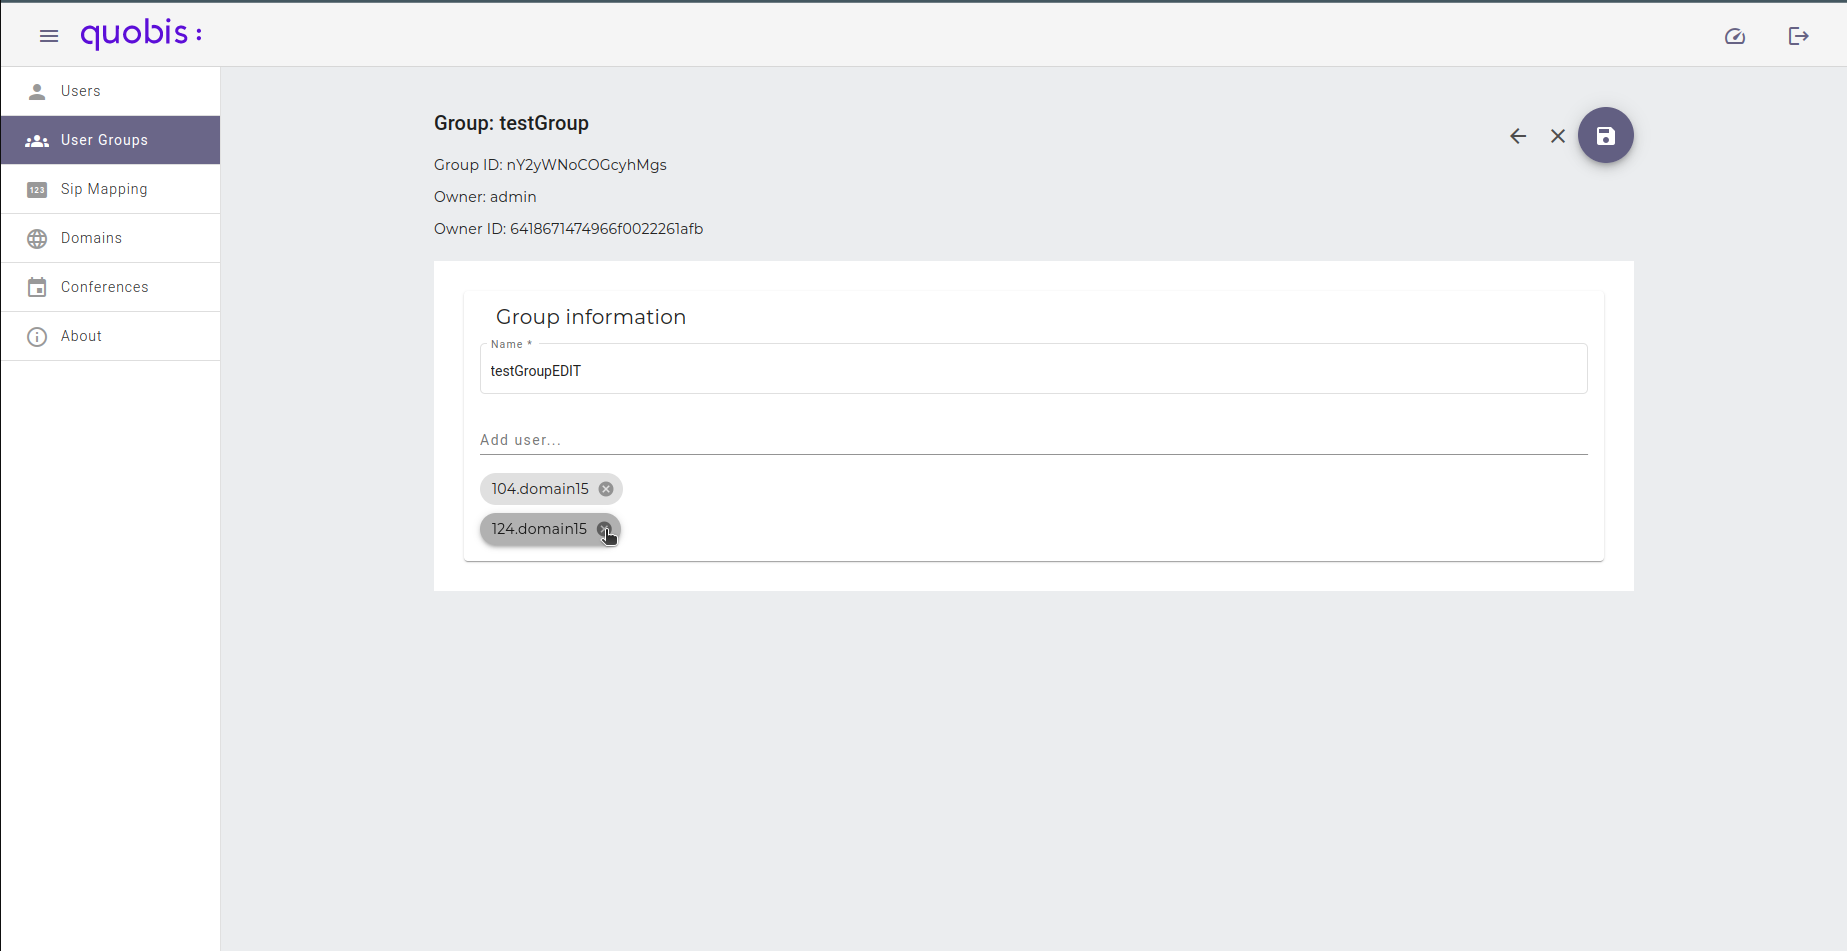
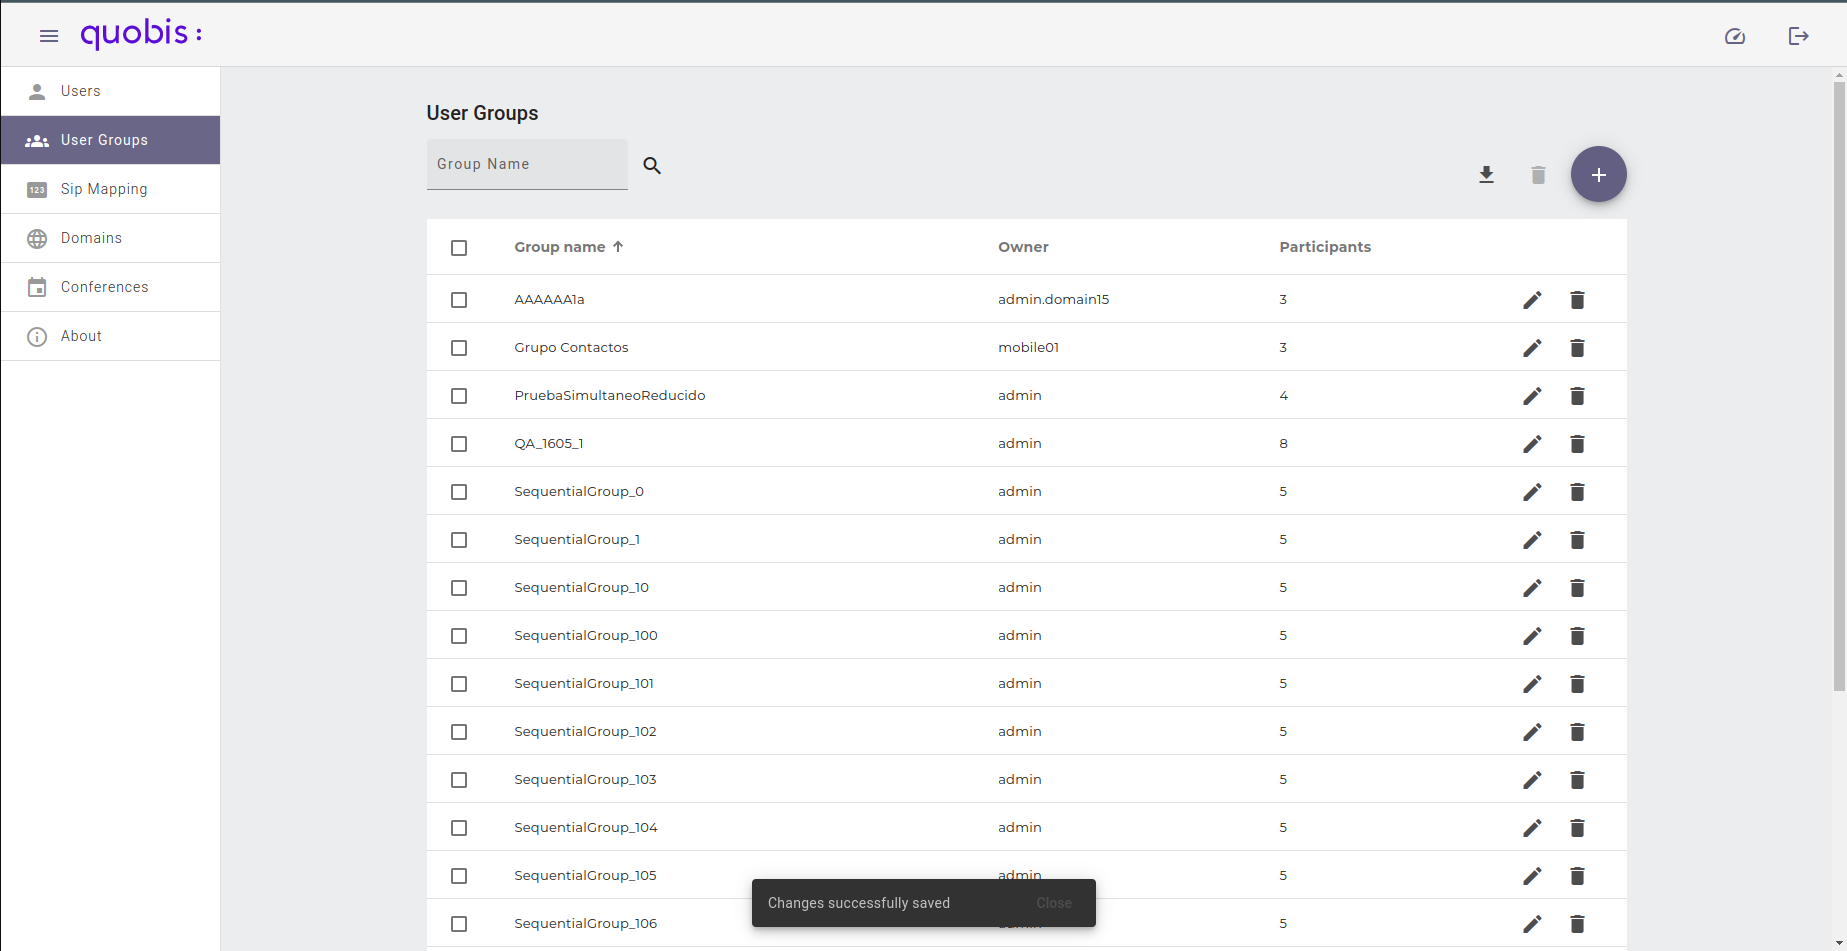
After saved, a notification will appear confirming the action:
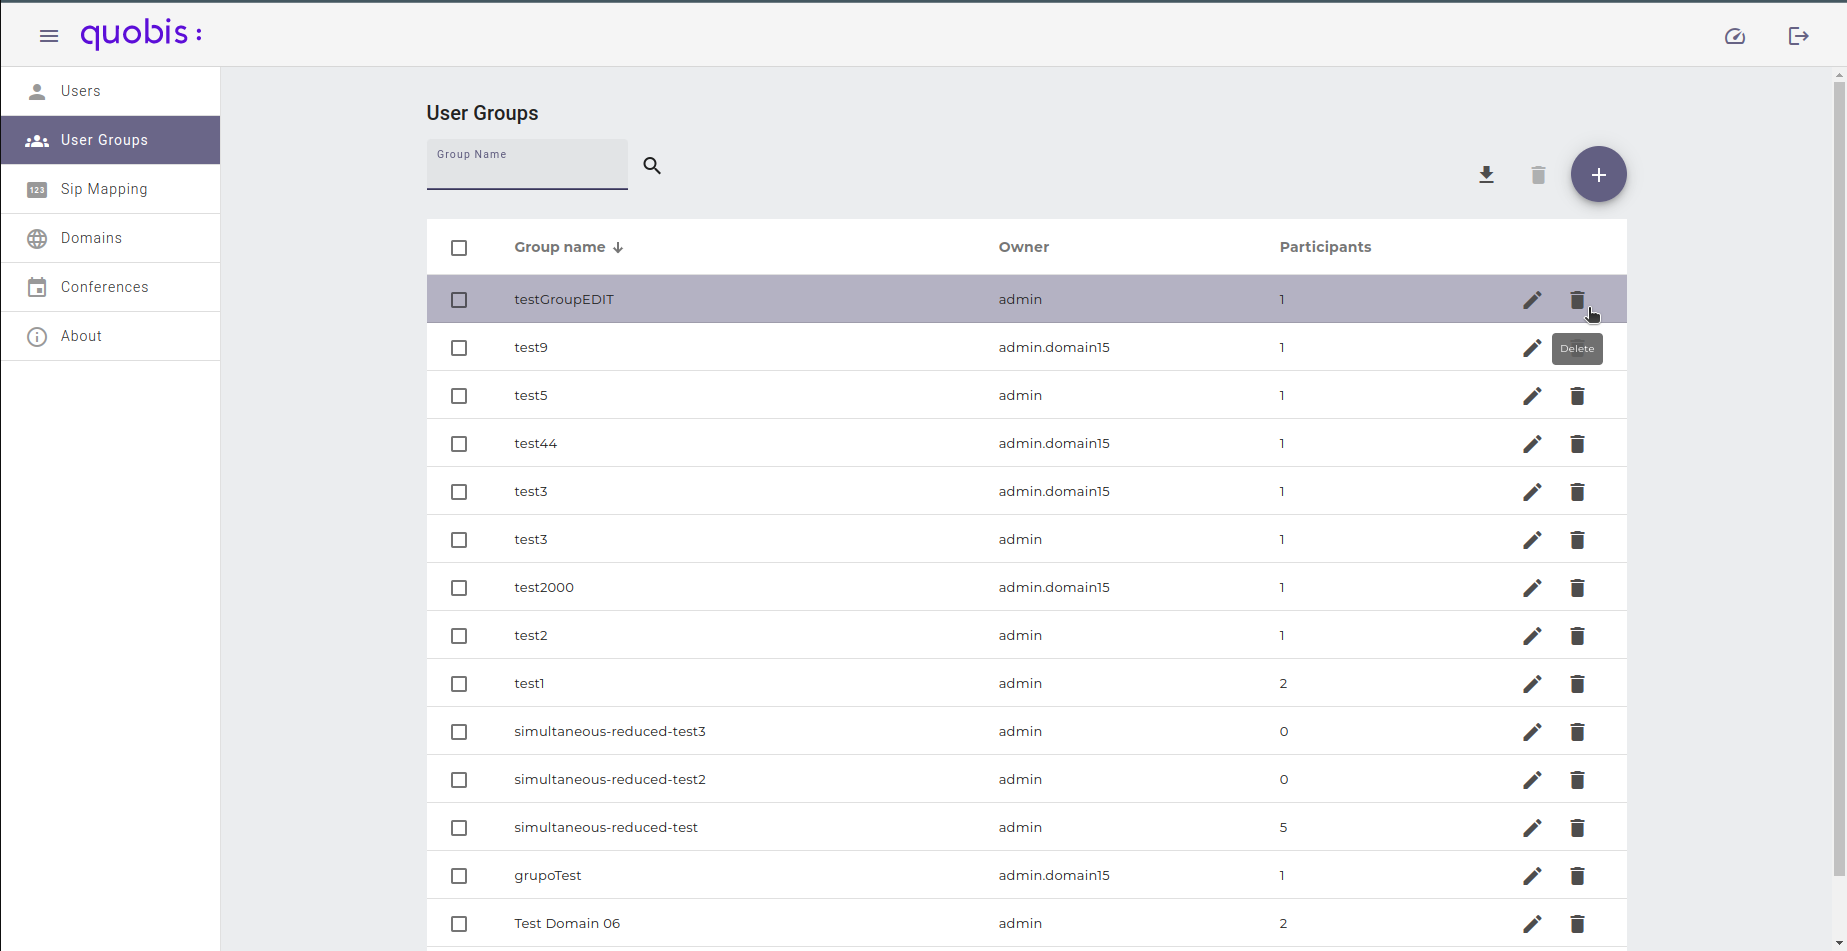
Delete a user group
To delete a user group, click on the Delete (trash) button next to the Edit button. This will show a confirmation dialog:
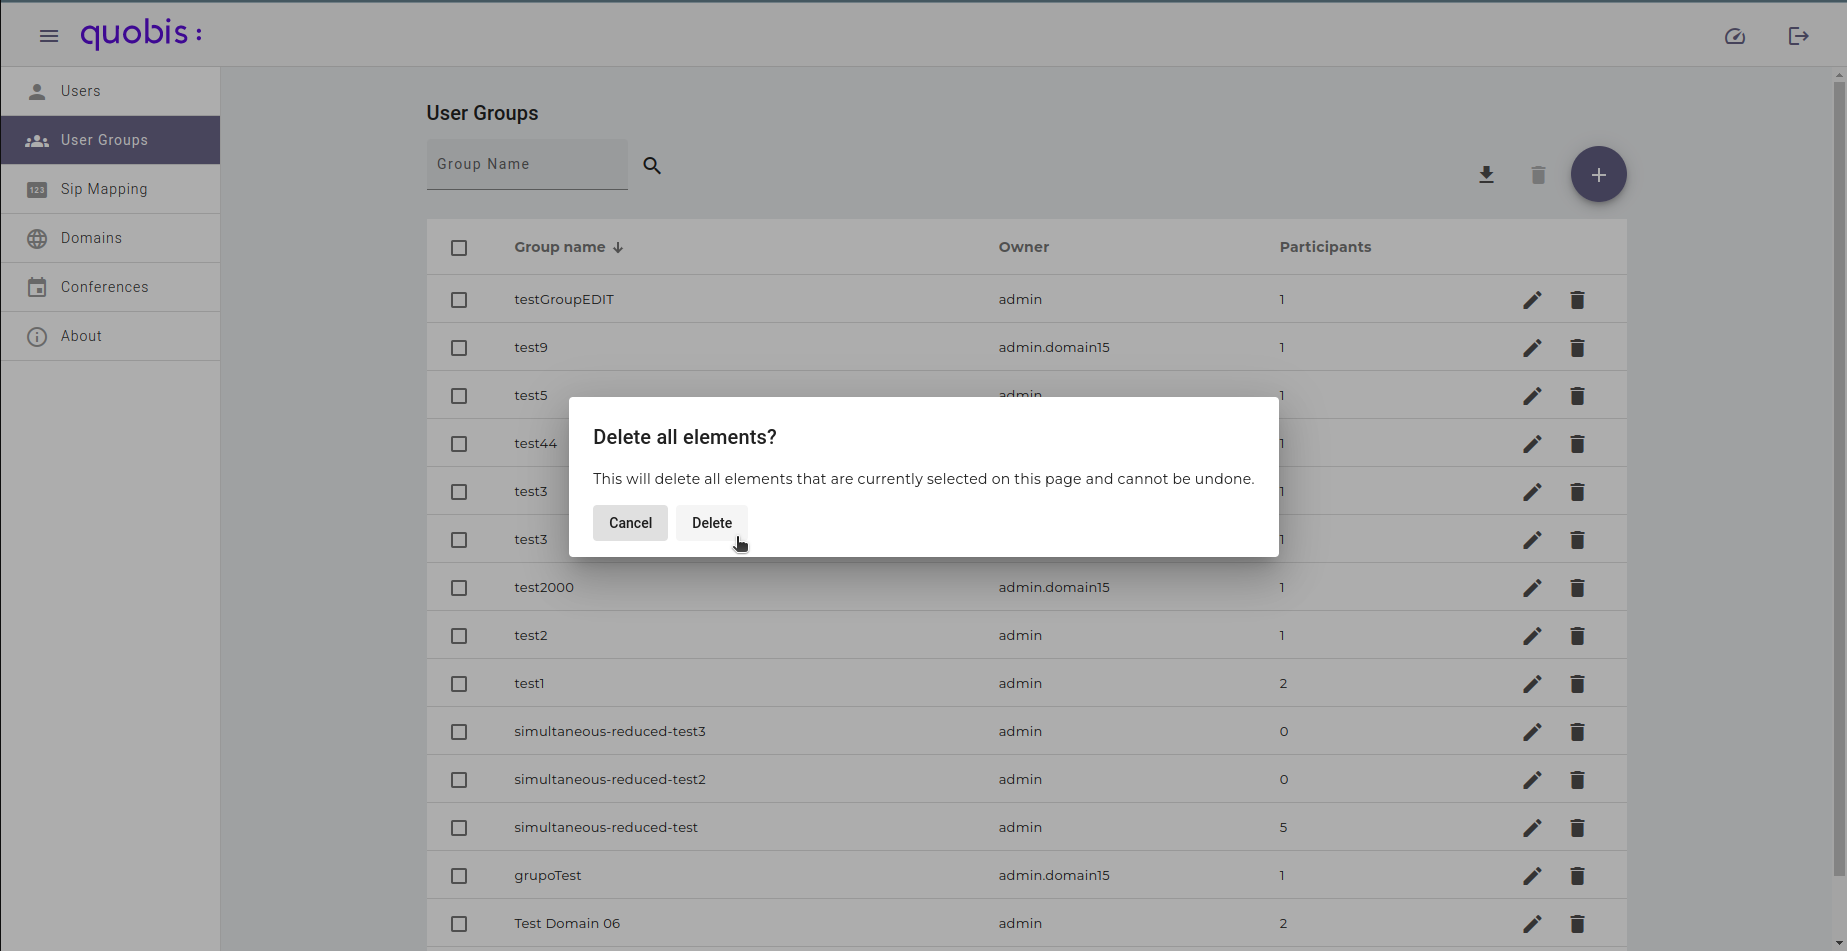
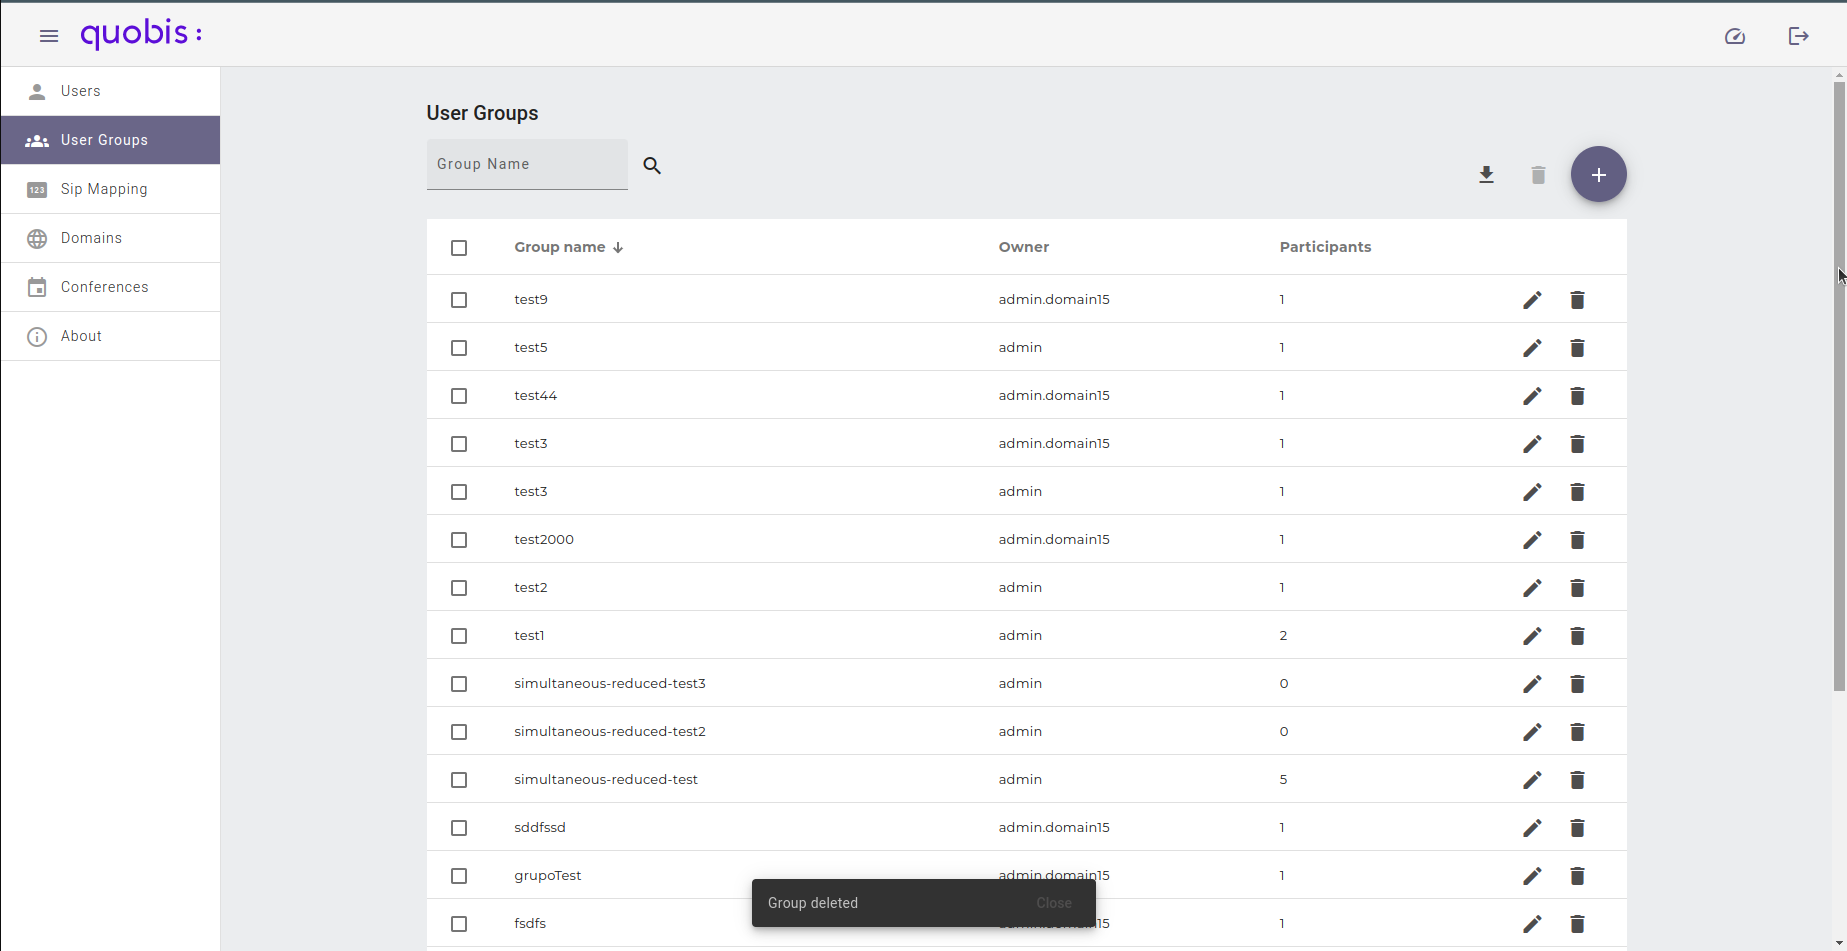
When accepted, a notification will appear confirming the action:
SIP Mappings
In the left menu click SIP mappings. A list will come up displaying all SIP mappings registered in the system. This list is composed of the following columns:
Type. Type of owner of the SIP mapping: user or user group.
Resource. Identifier of the owner of the SIP mapping. Clicking on it opens the SIP mapping edit screen.
Username / Name. The username or group name of the owner of the SIP mapping.
Domain. Domain of the owner of the SIP mapping.
SIP username. The SIP username of the mapping.
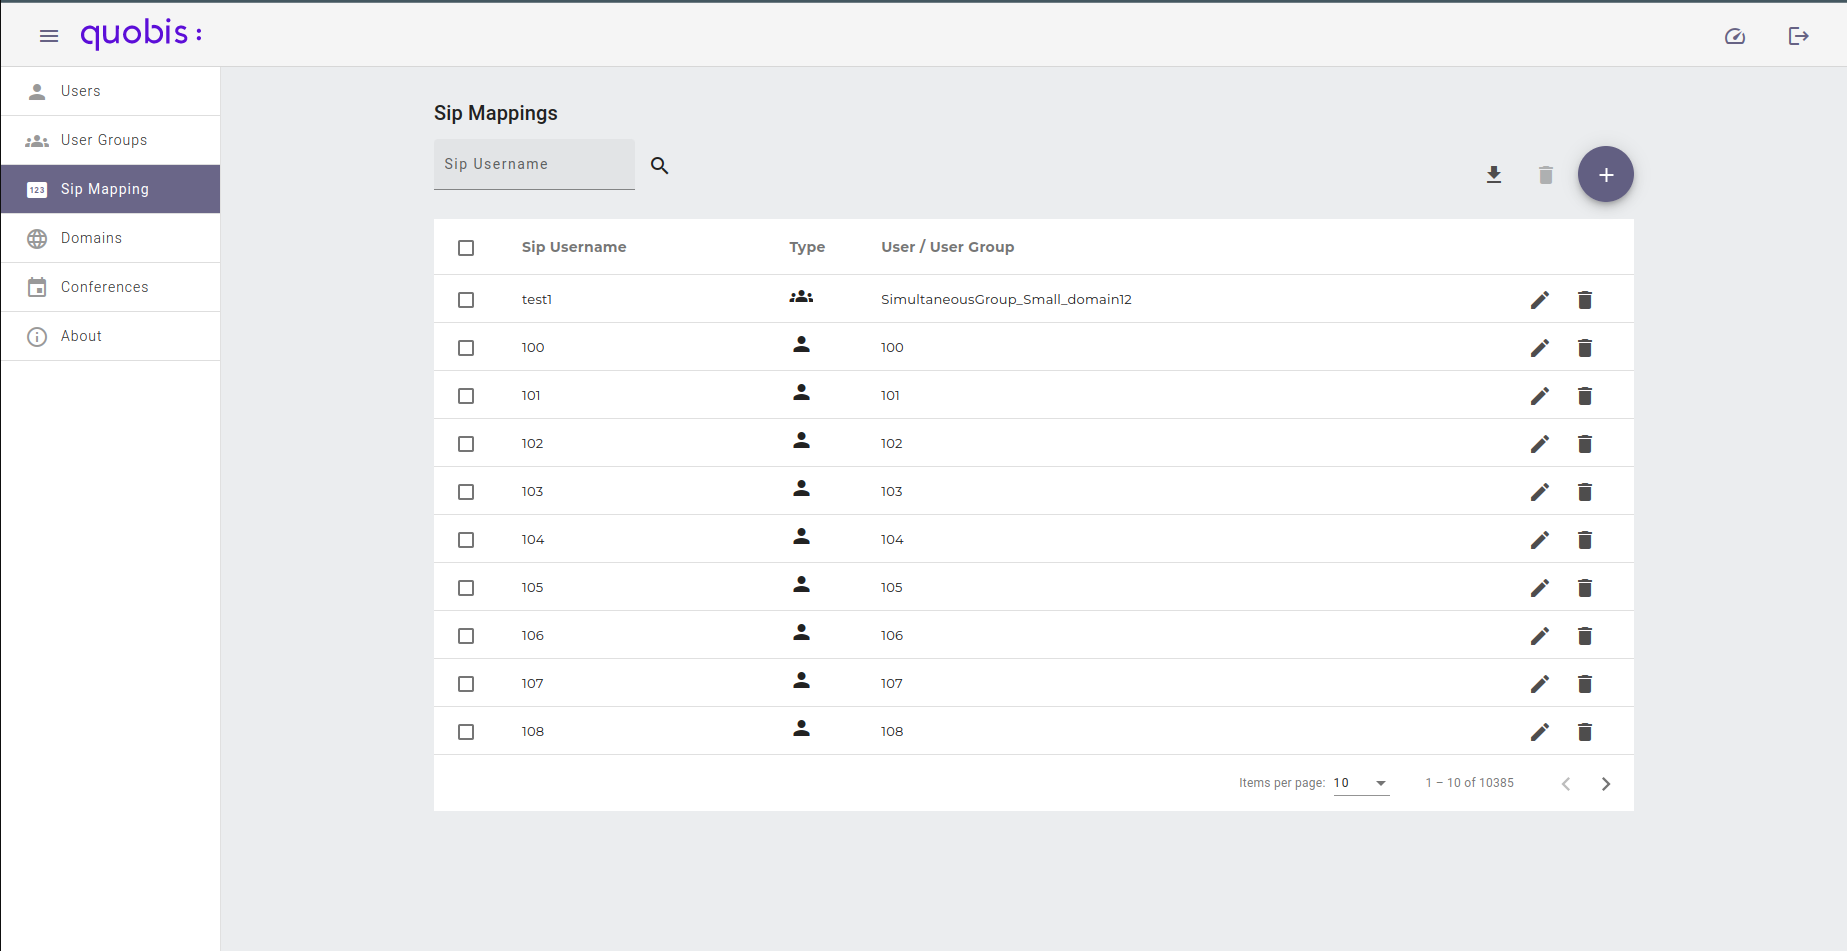
SIP mappings can be filtered by SIP username, Username or Group name: choose the field in the Filter by selector, type the value and click on the search button. The whole list can be exported into a CSV file using the Download all SIP mappings button, and several SIP mappings can be deleted at once by selecting them and clicking the Delete SIP mappings button.
Add a new SIP Mapping
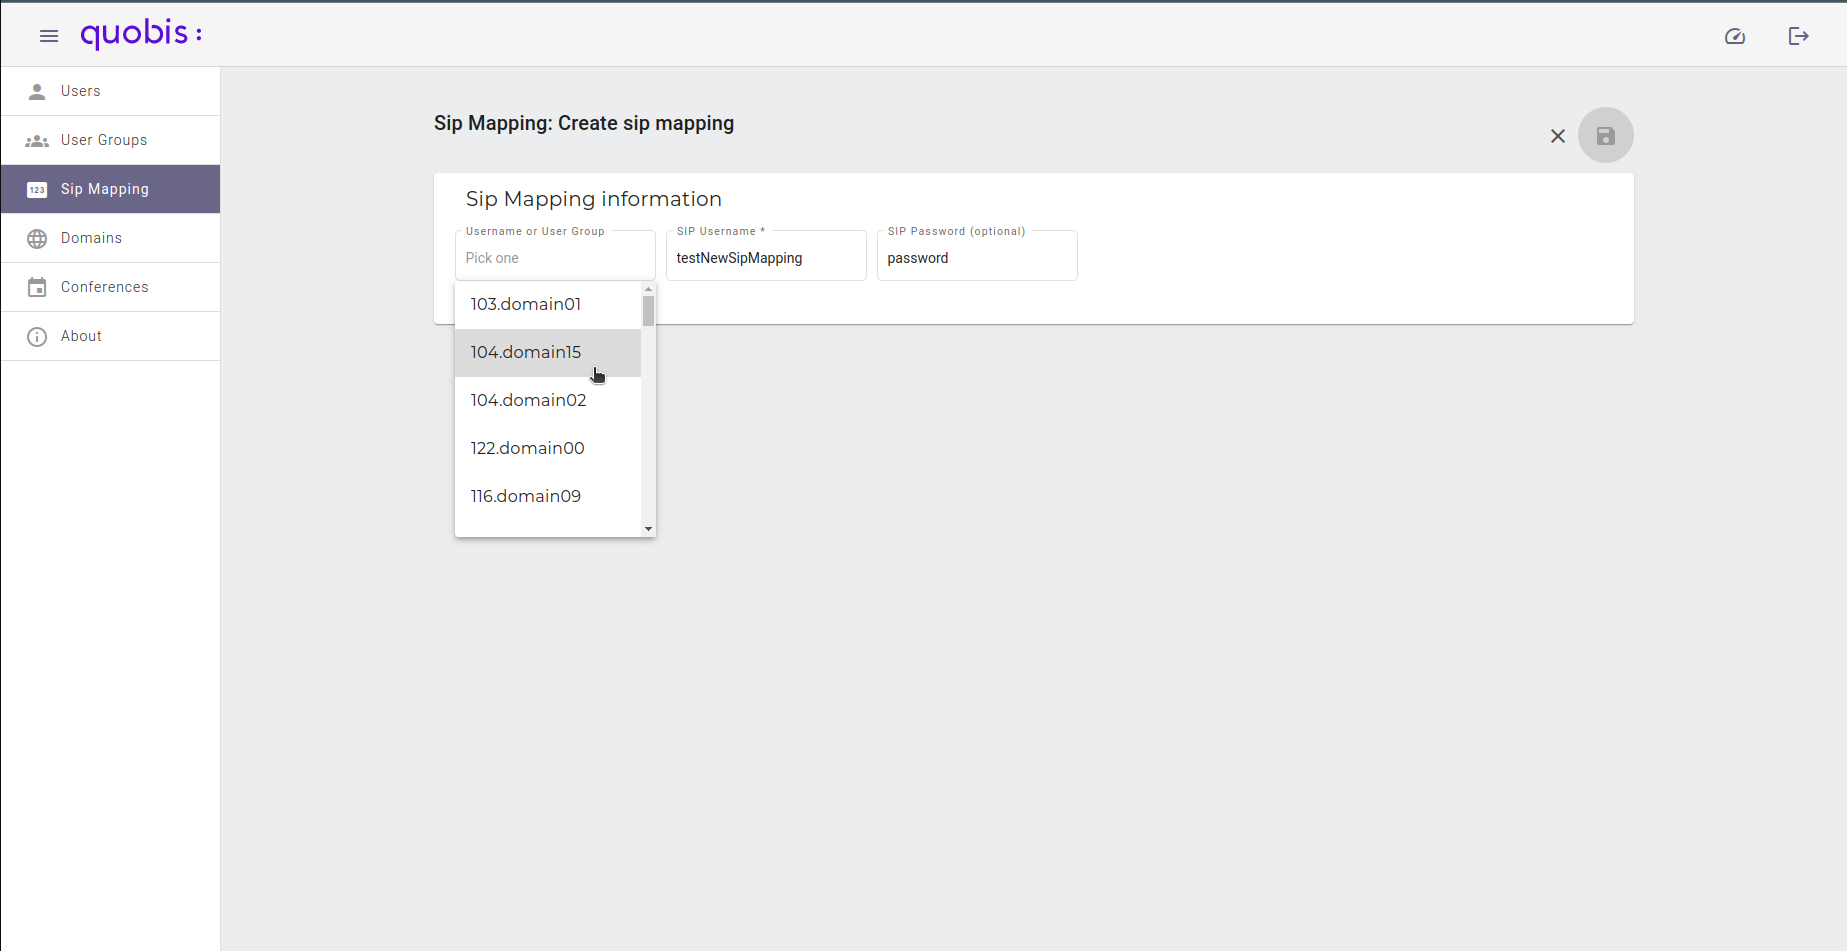
To add a new SIP mapping click on the “plus” icon on the upper right corner of the screen. A new form will appear in order to configure the following attributes:
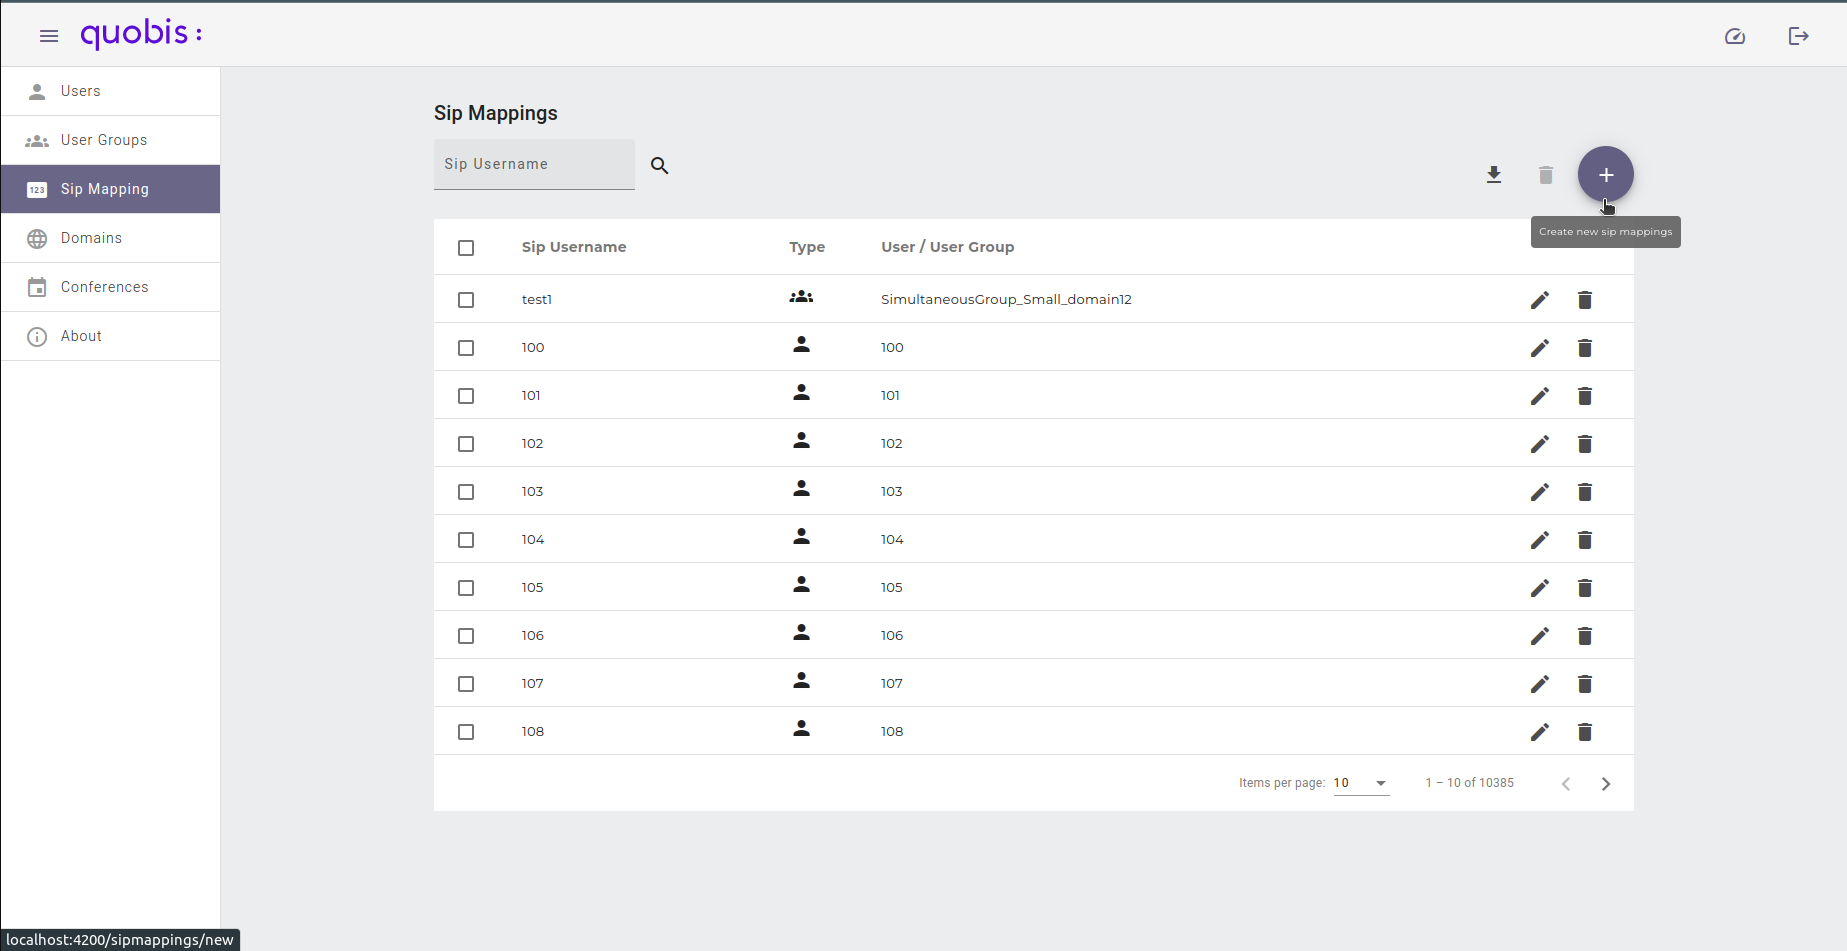
Username or group. The user or user group that owns the SIP mapping. Type part of the name and select it from the list of suggestions.
SIP mapping username. The SIP username.
SIP mapping password. The SIP password (optional).
SIP domain. The SIP domain (optional).
SIP auth proxy. The SIP proxy used for authentication (optional).
SIP auth username. The username used for SIP authentication, if different from the SIP username (optional).
Note
All required fields are marked with an asterisk (*). A new SIP mapping cannot be created until all these fields are correctly covered.
After saved, a notification will appear confirming the action:
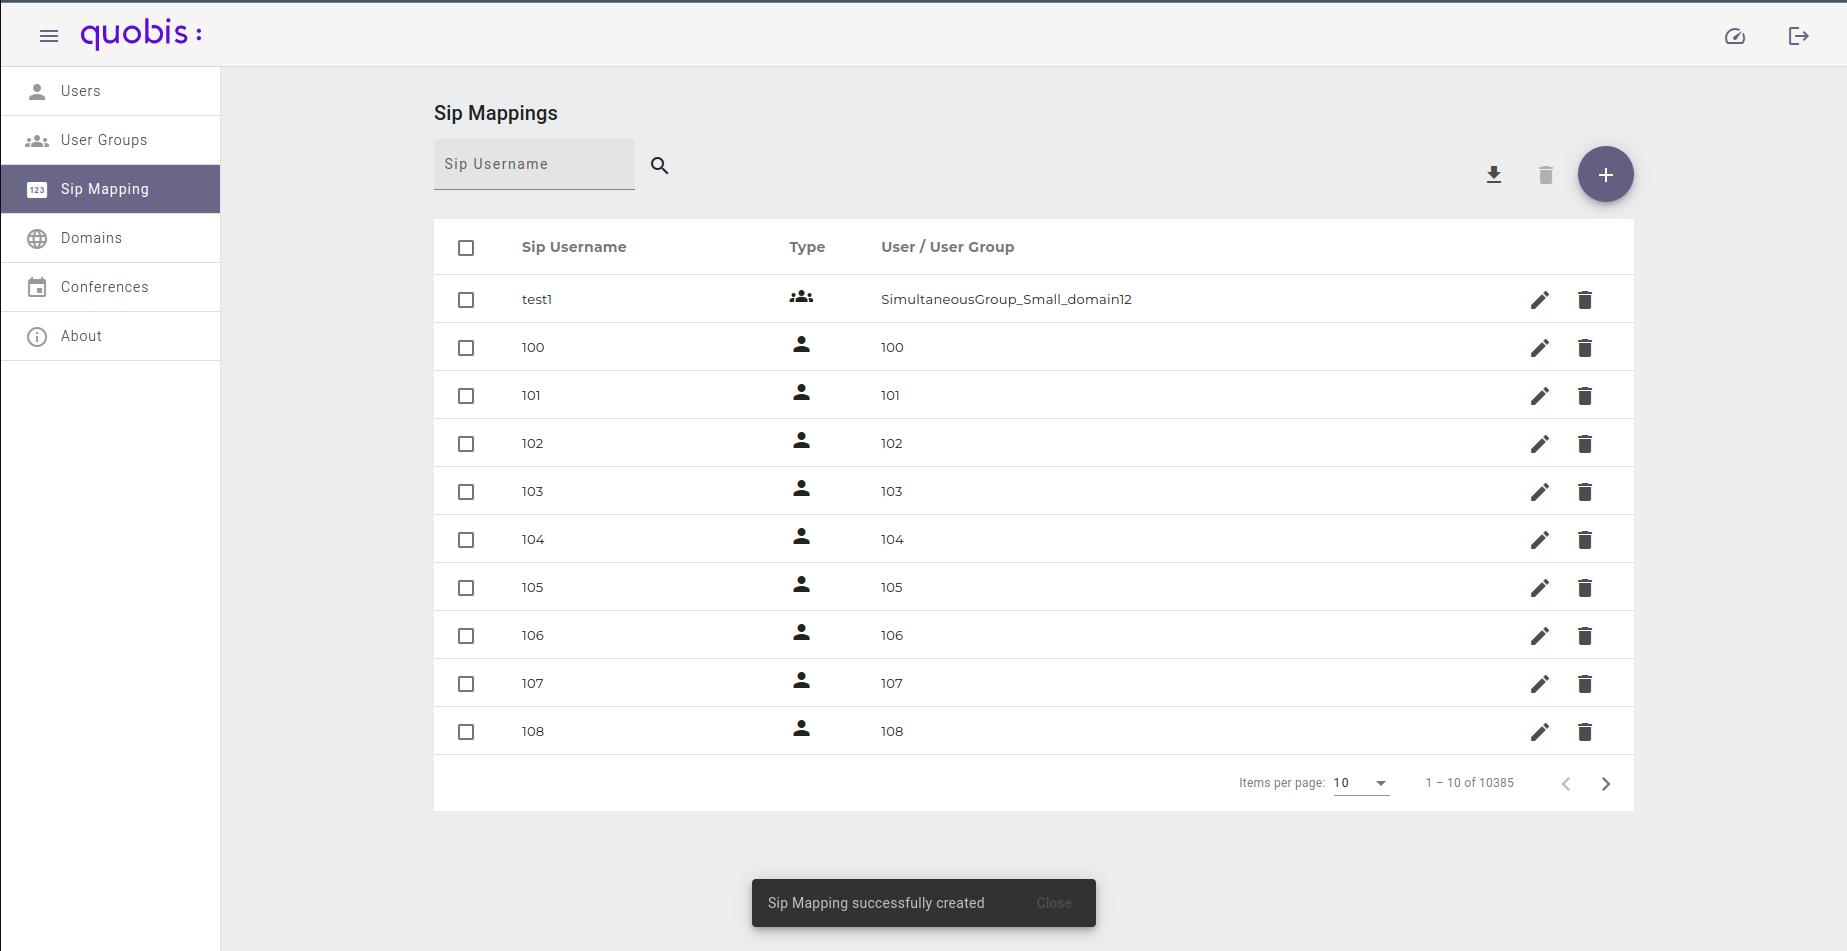
A SIP mapping can also be created from the edit screen of a user, in the SIP mapping information section.
Edit SIP Mappings
To edit a SIP mapping, click on the Edit (pencil) button of the SIP mapping in the list.
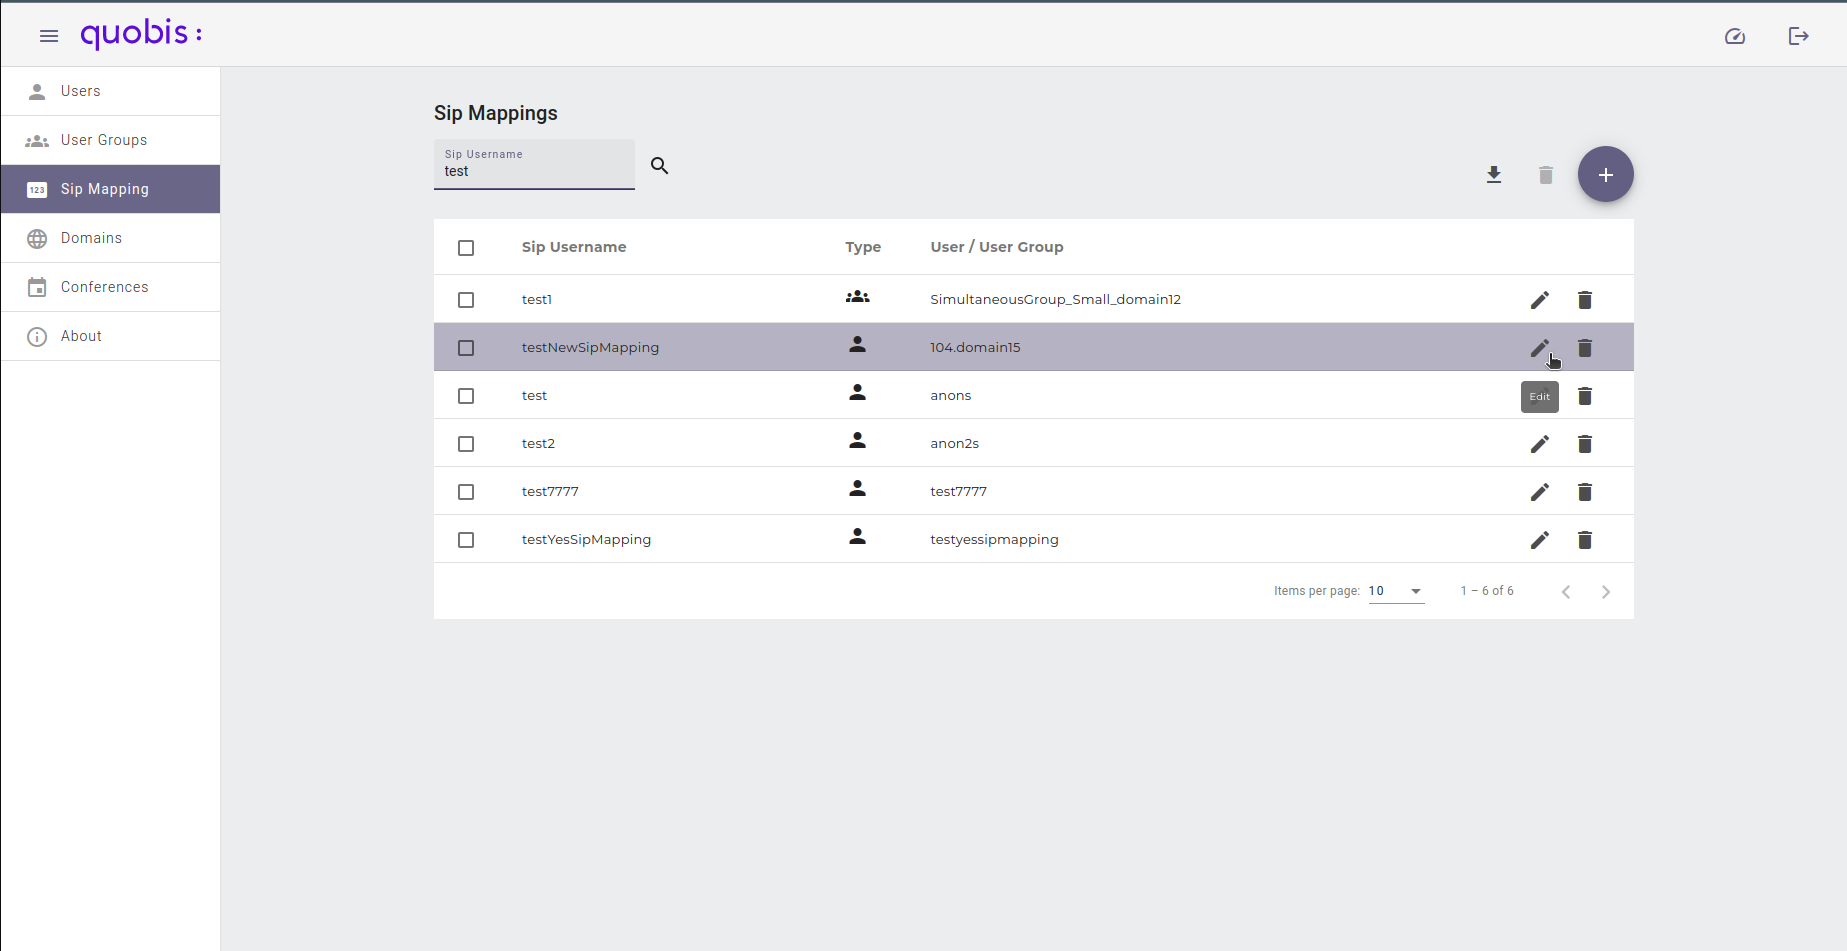
An edit screen will be displayed showing the wac-core ID, username and domain of the owner, where you will be able to change the attributes mentioned when creating a new SIP mapping. Be aware that the owner of the SIP mapping (wac-core ID) cannot be modified.
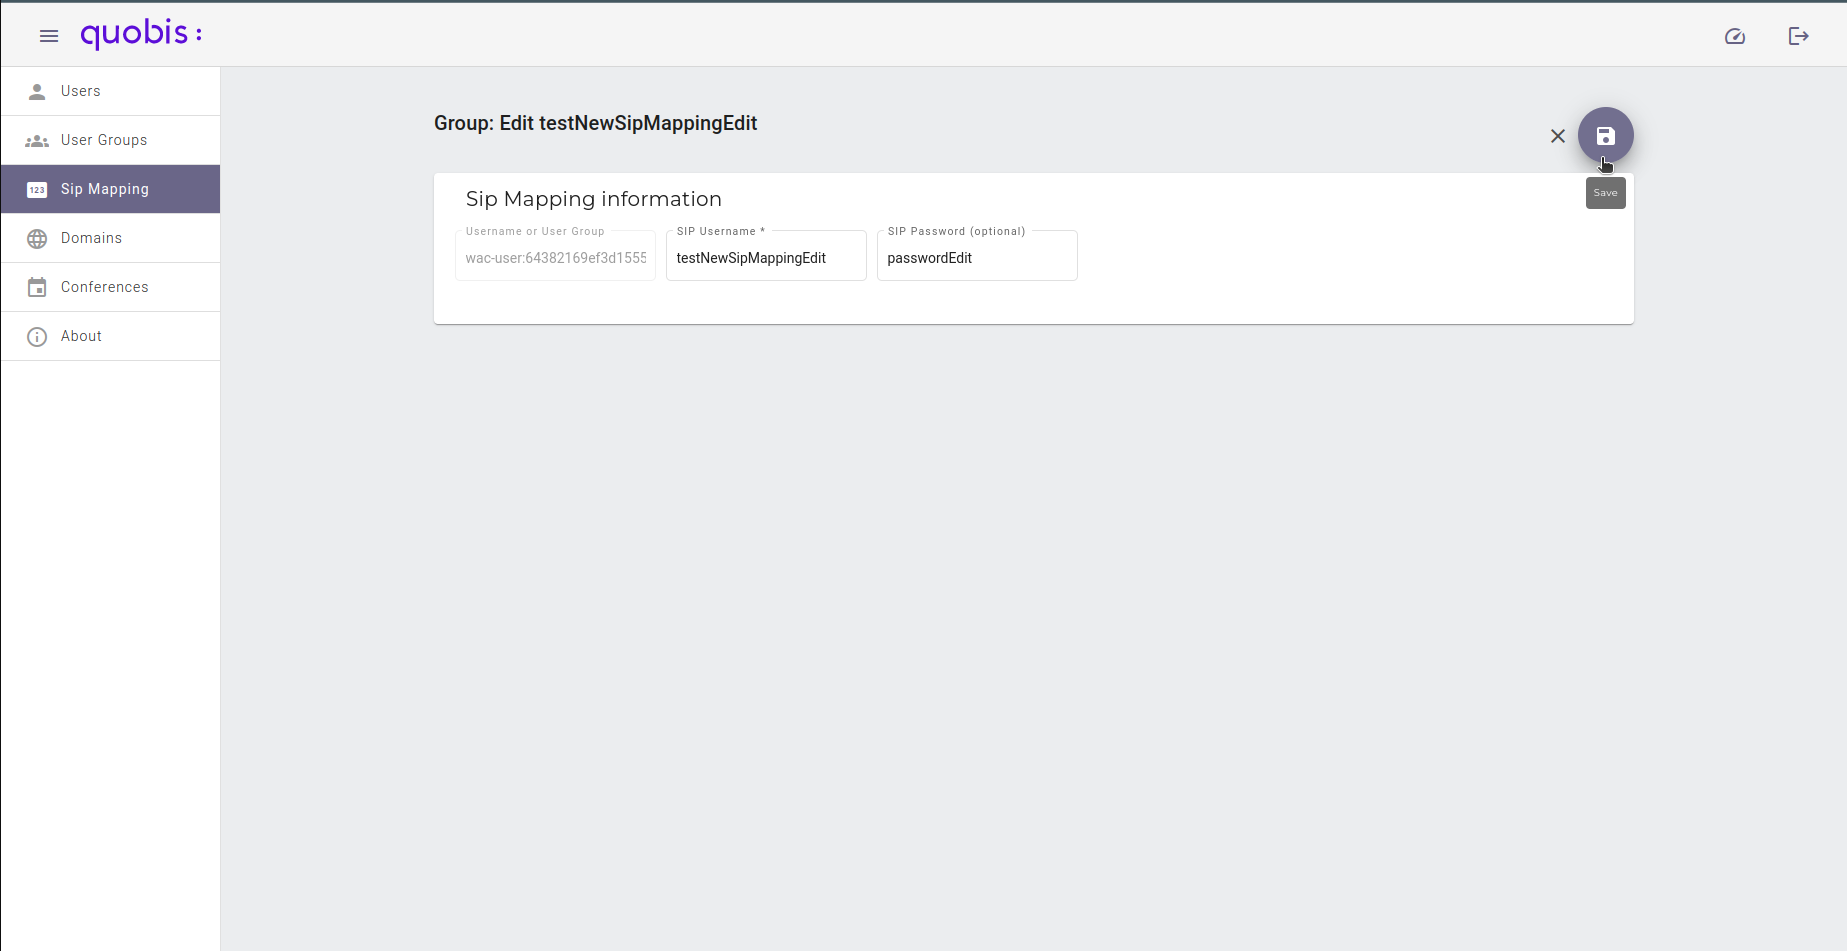
After saved, a notification will appear confirming the action:
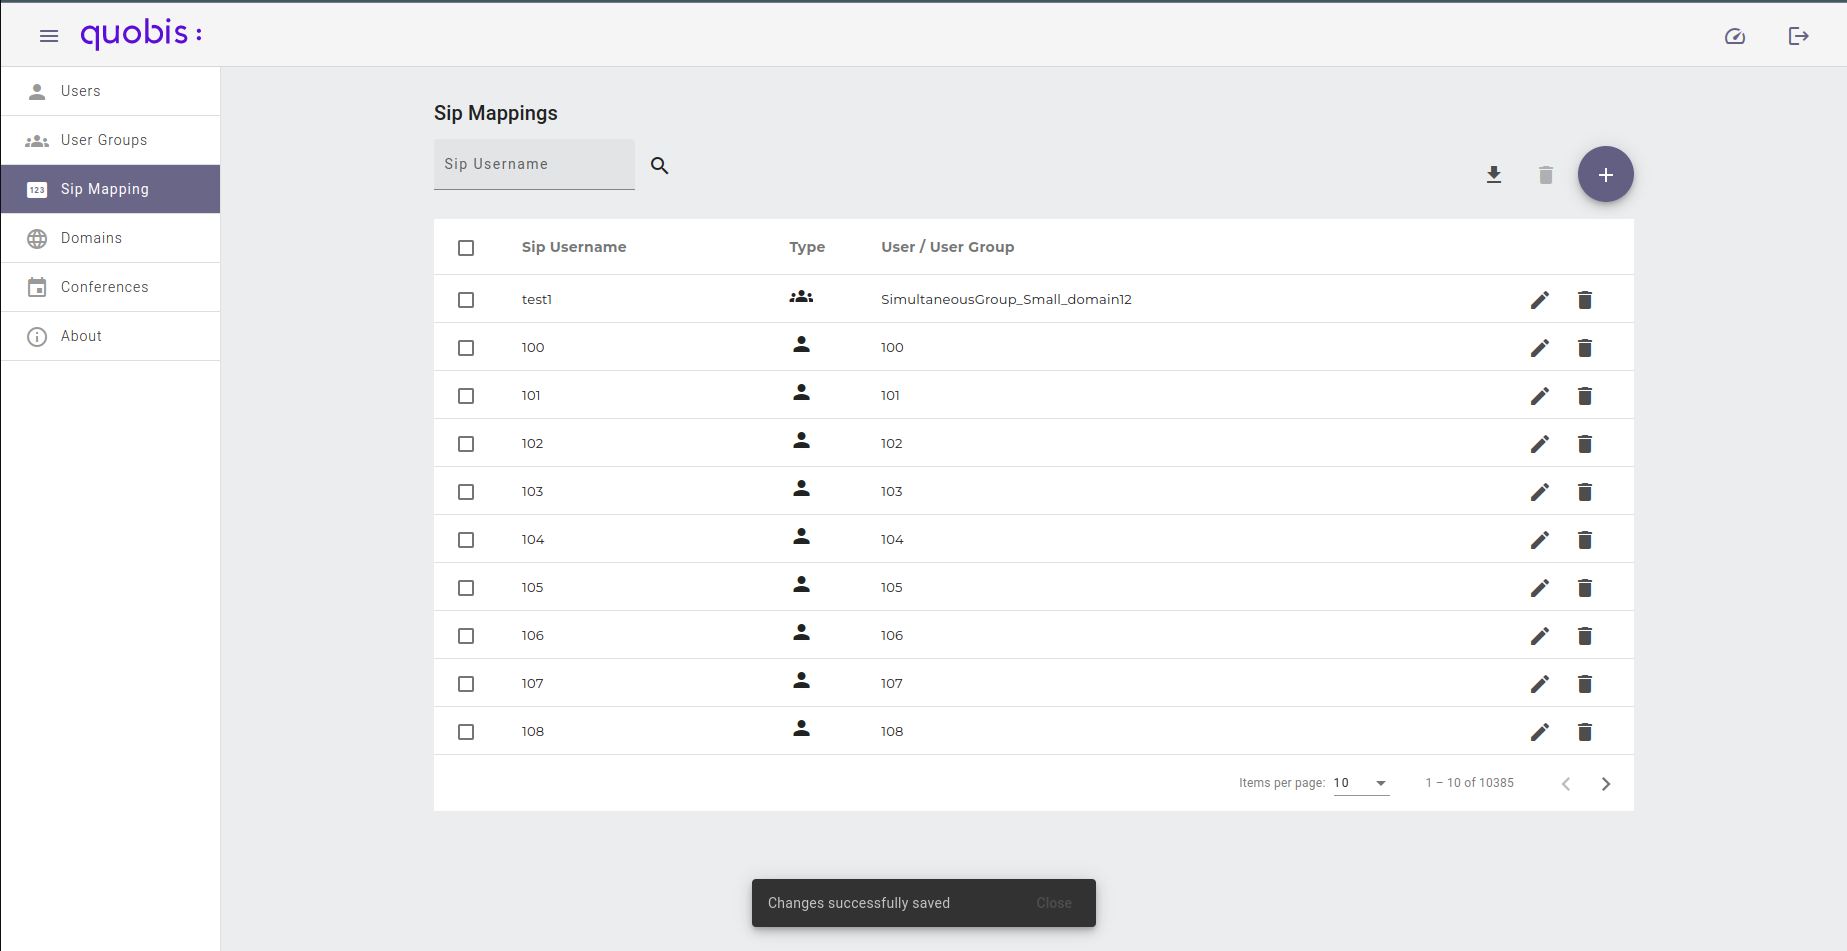
Delete a SIP Mapping
To delete a SIP mapping, click on the Delete (trash) button next to the Edit button. This will show a confirmation dialog:
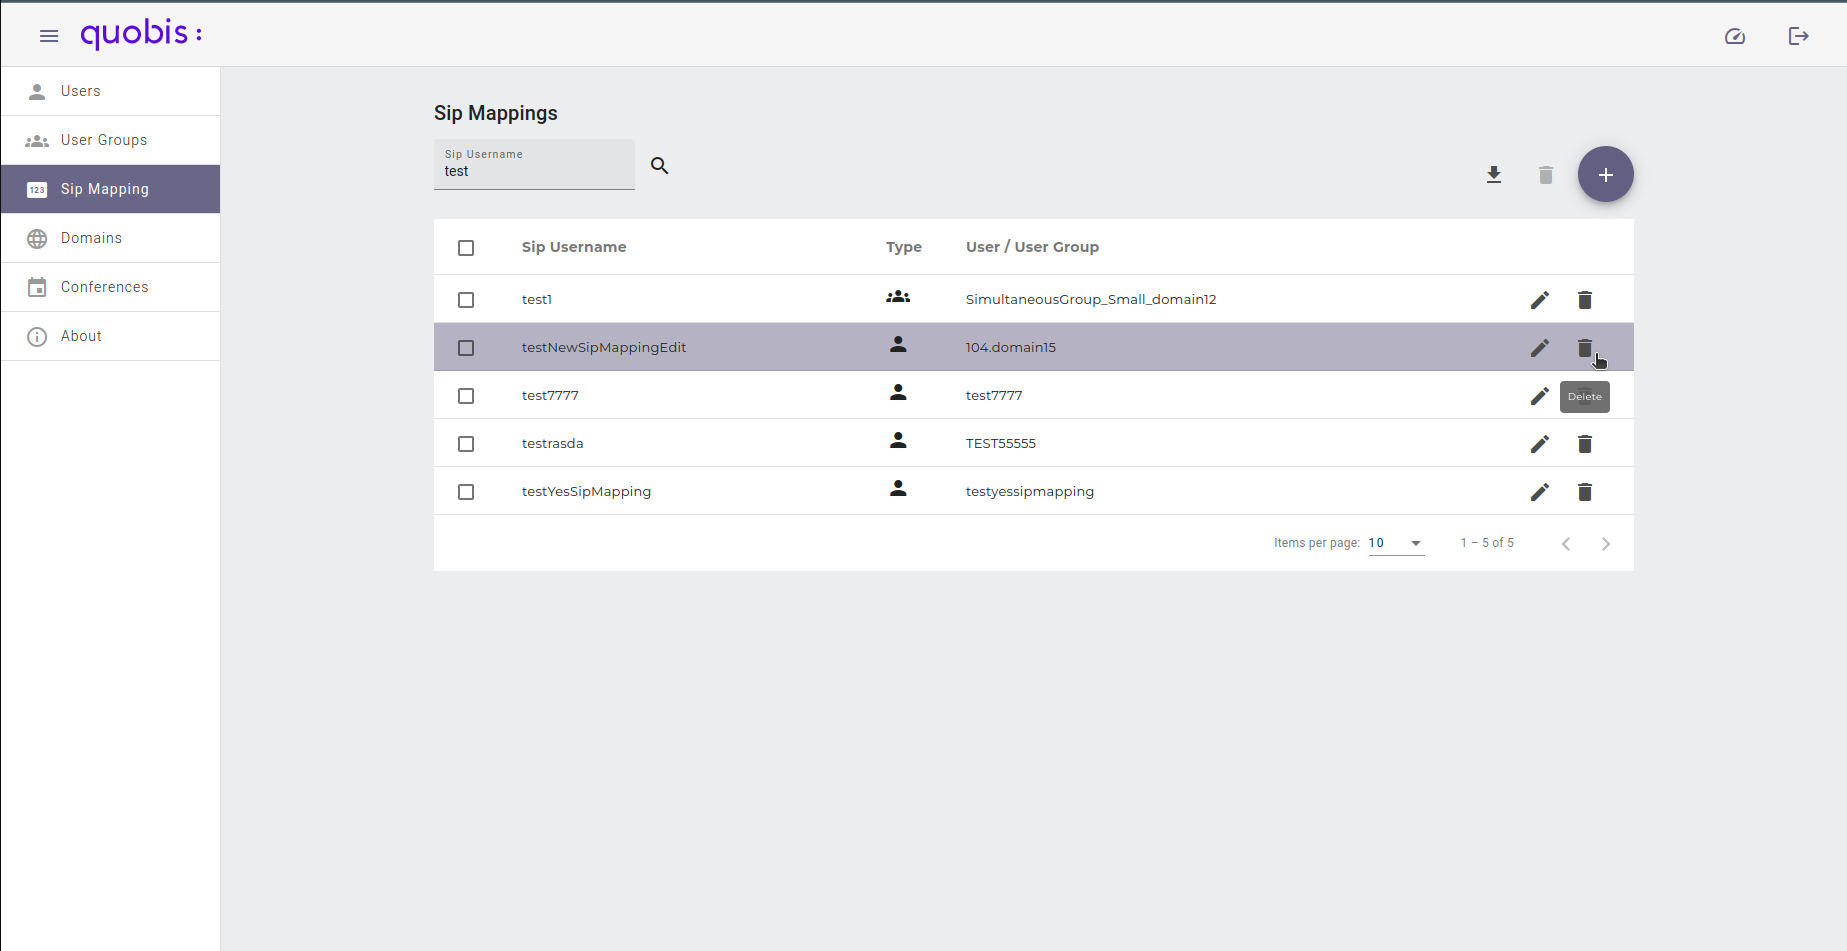
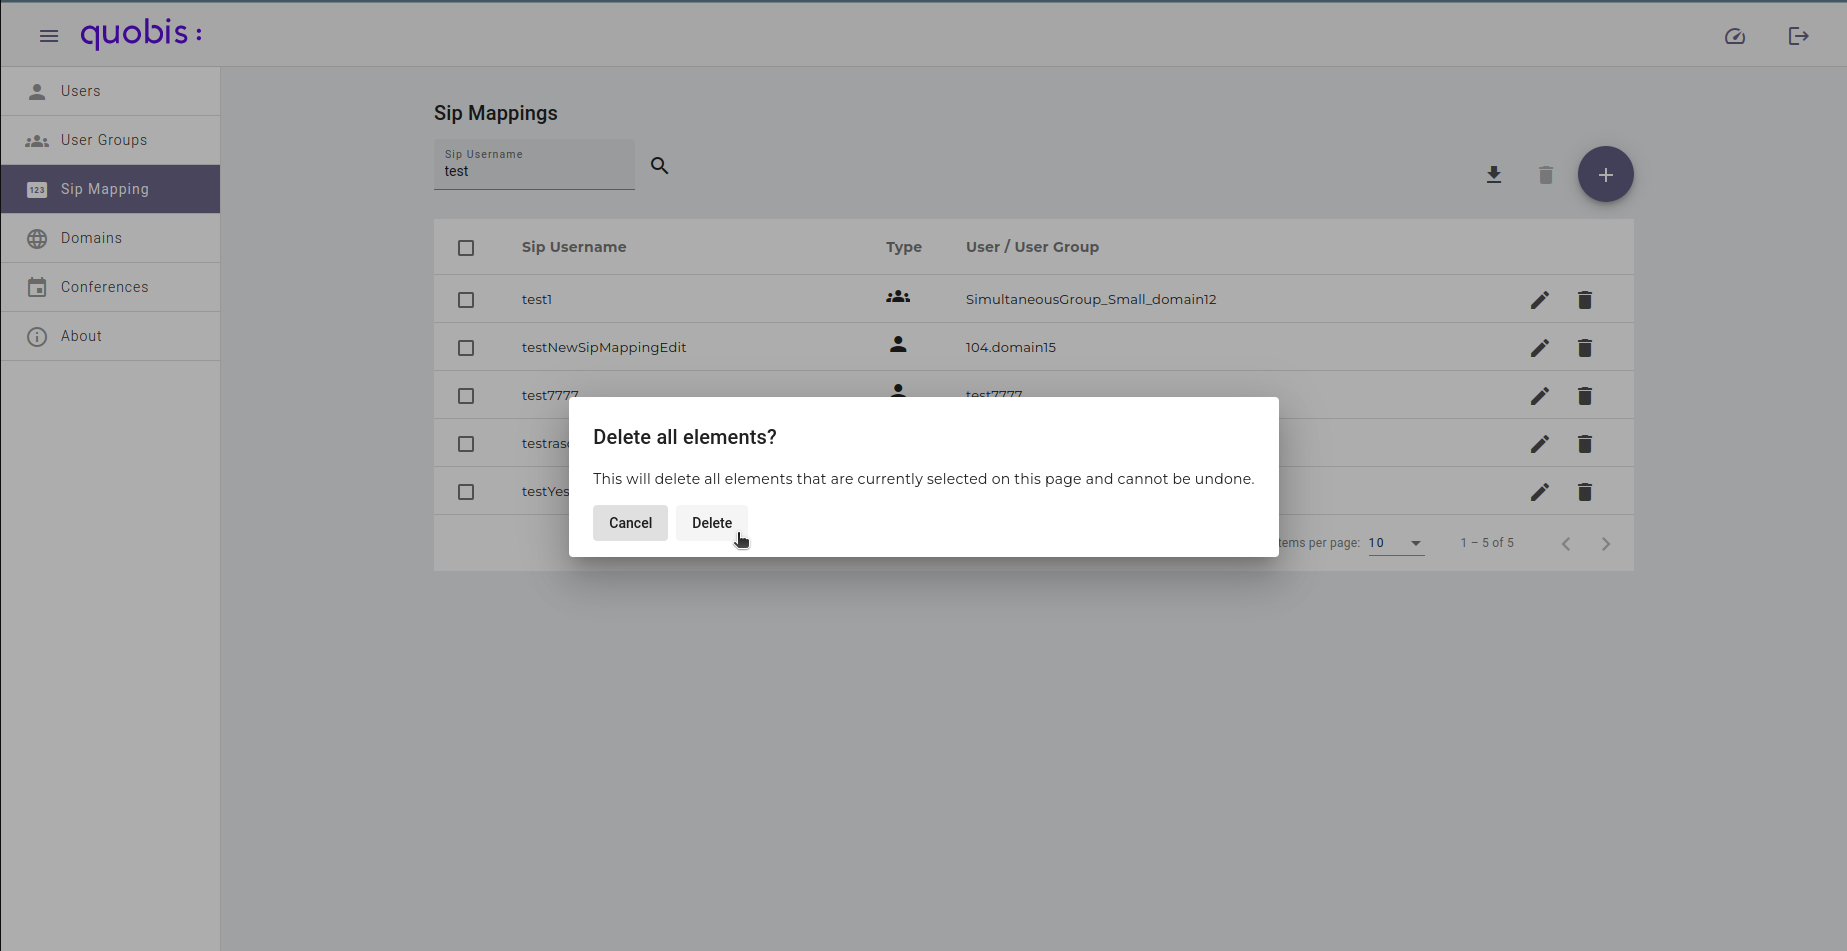
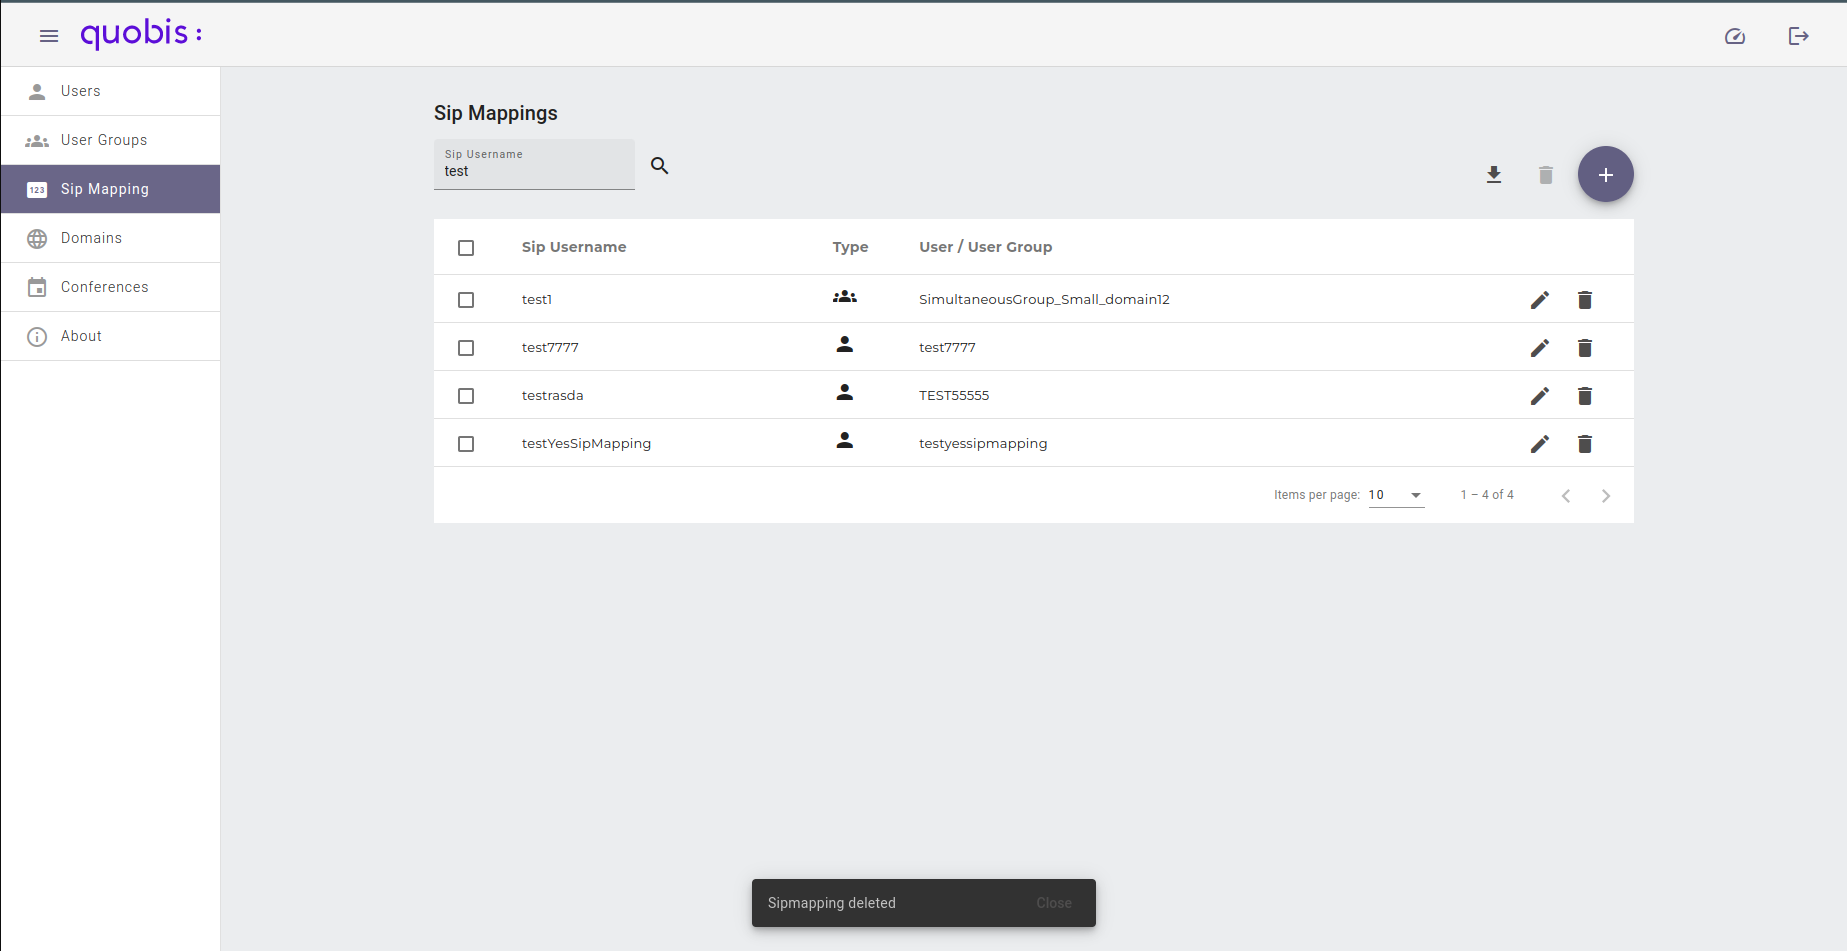
When accepted, a notification will appear confirming the action:
Domains
Selecting “Domains” in the left panel will display a table of all the available domains for the requesting user. This will show by default three columns:
Domain. Unique domain name.
Parent. Parent domain name.
Users in this domain. The number of current users in the domain. Clicking on it opens the Users section filtered by that domain.
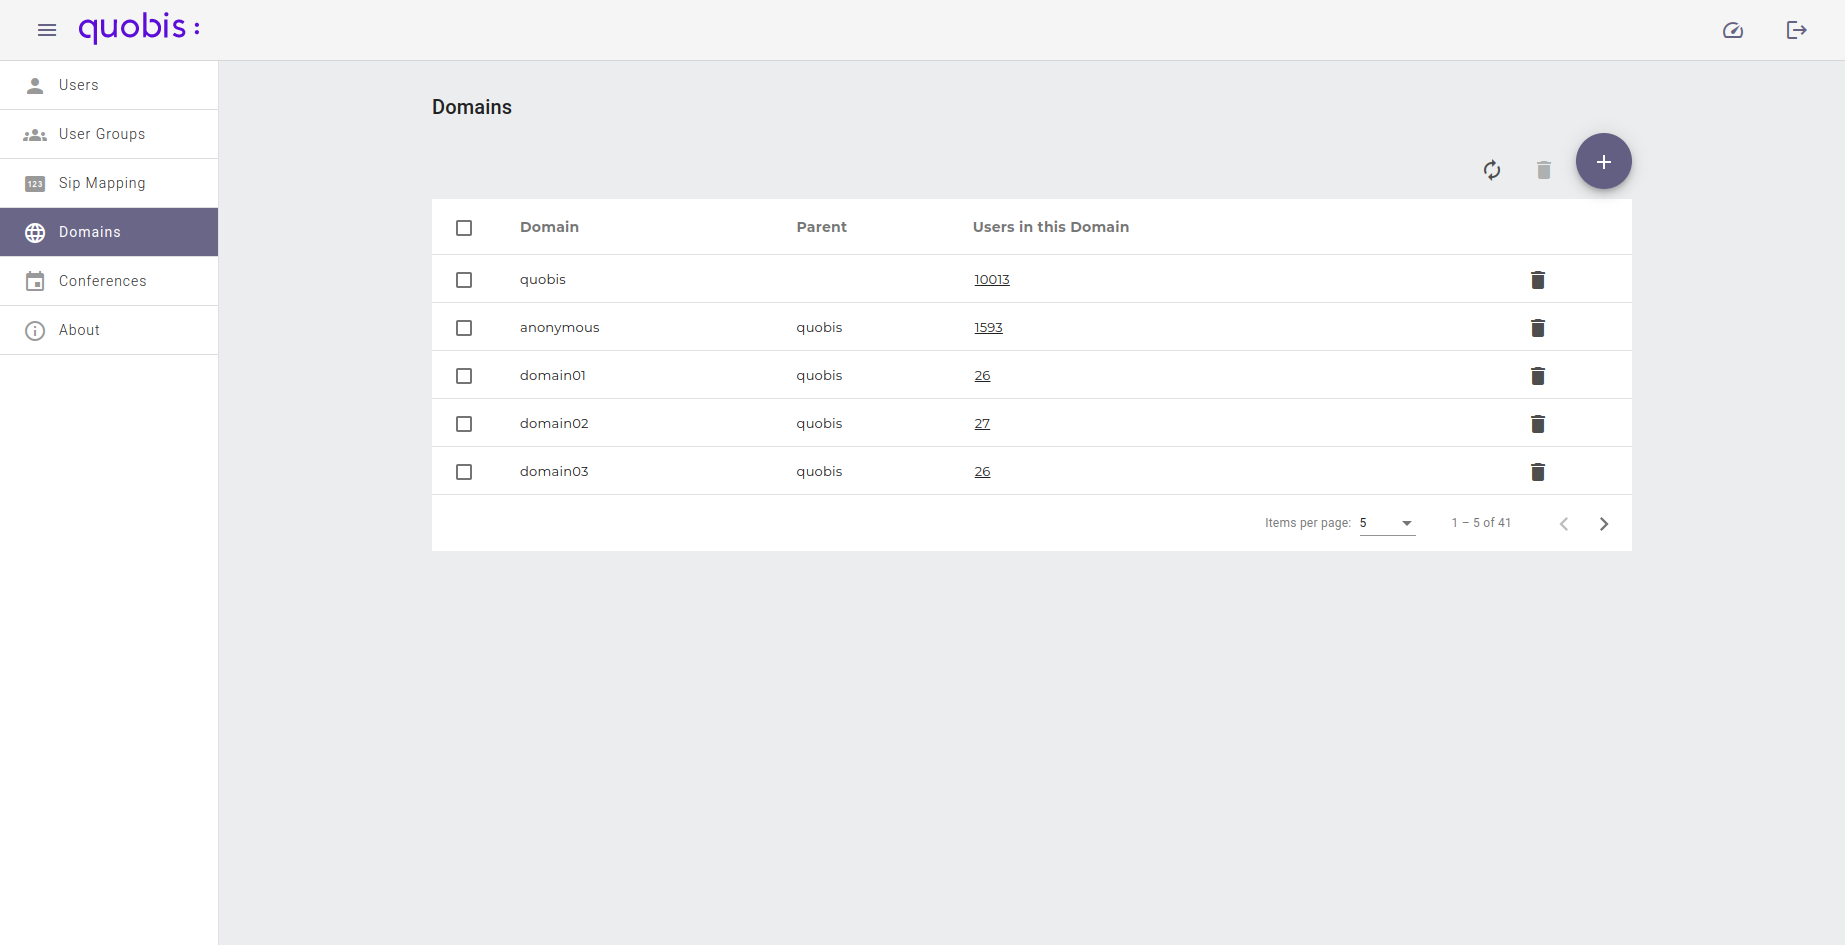
Domains can be filtered by name using the search box located above the table. Several domains can be deleted at once by selecting them and clicking the Delete domains button.
Add a new domain
To add a new domain click on the “plus” icon on the upper right corner of the screen. A new form will appear in order to configure the following attributes:
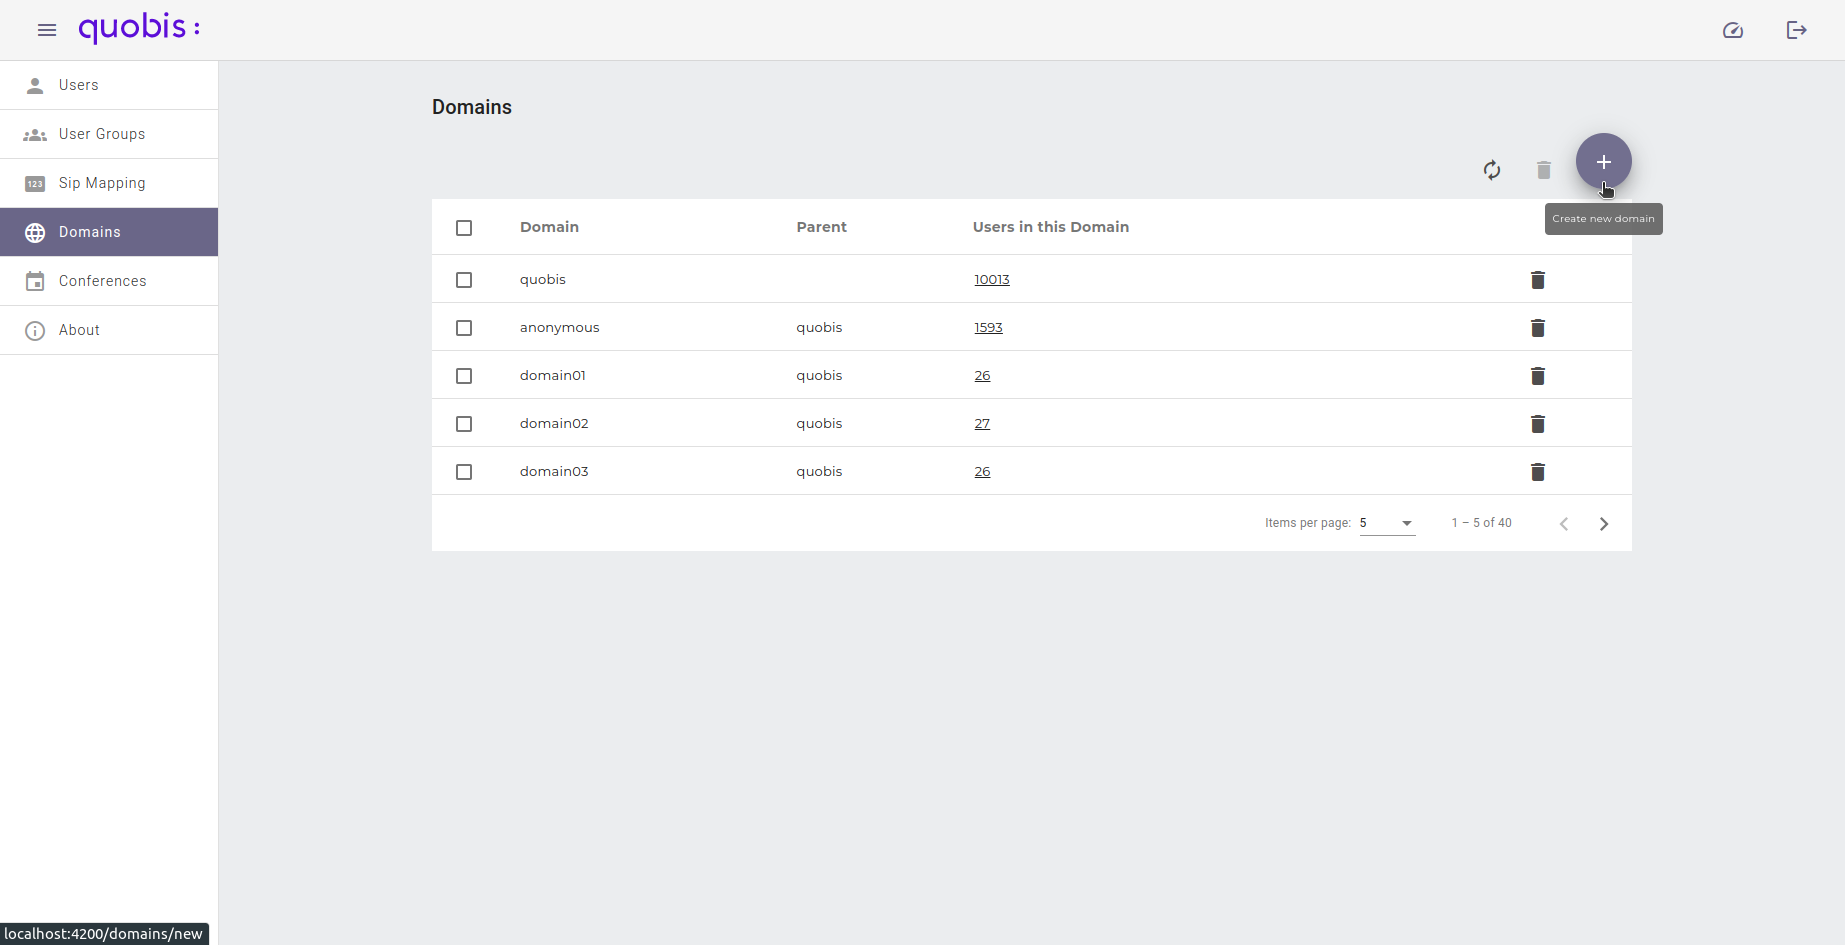
Domain. Unique domain name.
Parent domain. Parent domain name, selected from the list of existing domains.
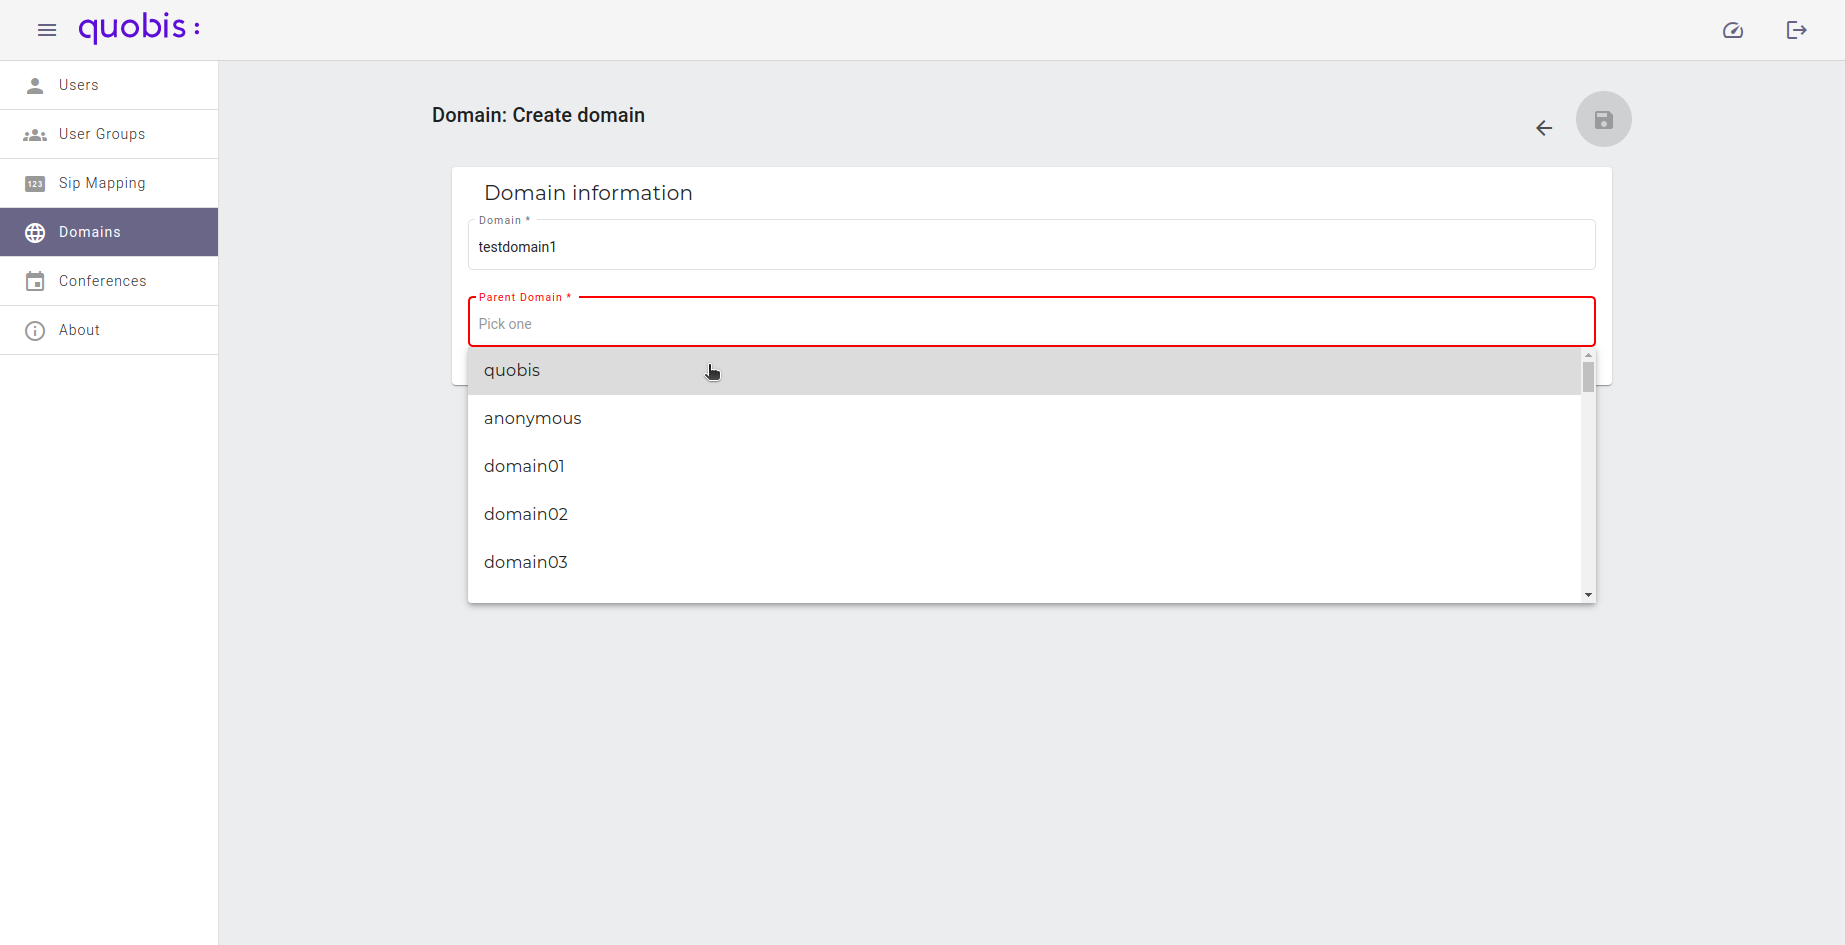
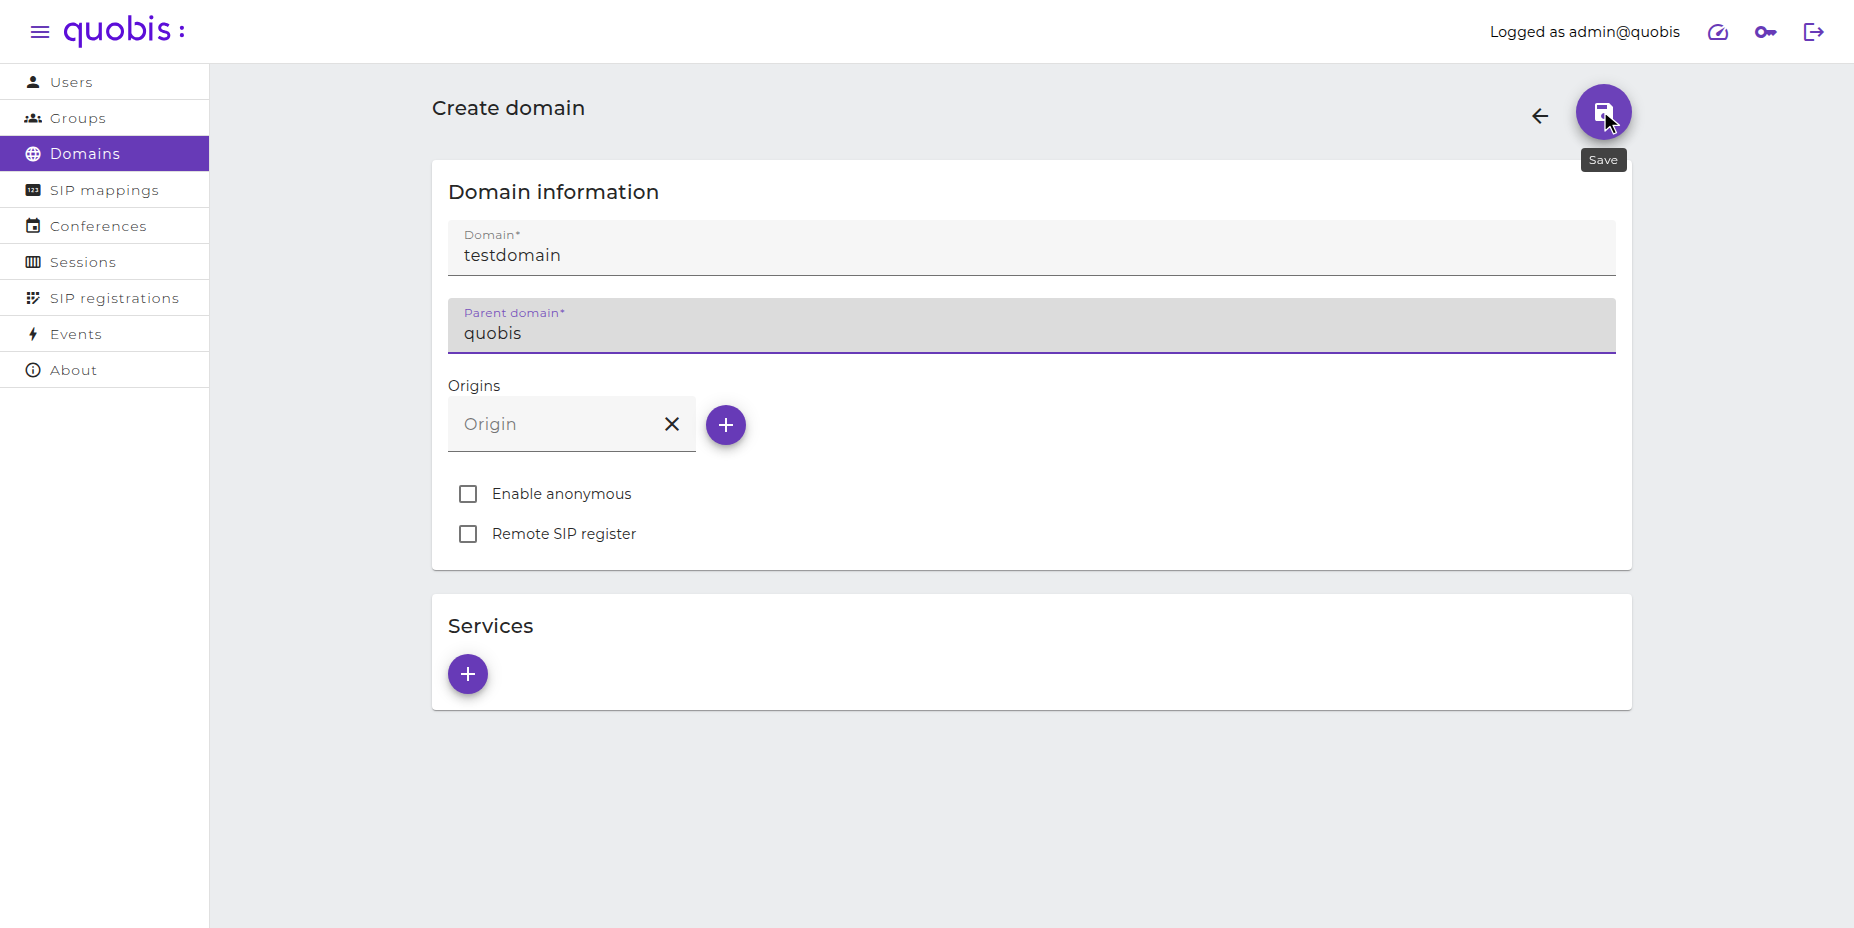
Once the parent domain is selected, the following options are also available:
Origins. List of origins allowed for the domain. More than one origin can be added by clicking the “plus” icon next to the field.
Enable anonymous. Allows anonymous users in the domain.
Remote SIP register. Enables the remote SIP registration for the domain.
Services. Services configured for the domain. Click on the “plus” icon to add a service, select it and add its values.
Note
All required fields are marked with an asterisk (*). A new domain cannot be created until all these fields are correctly covered.
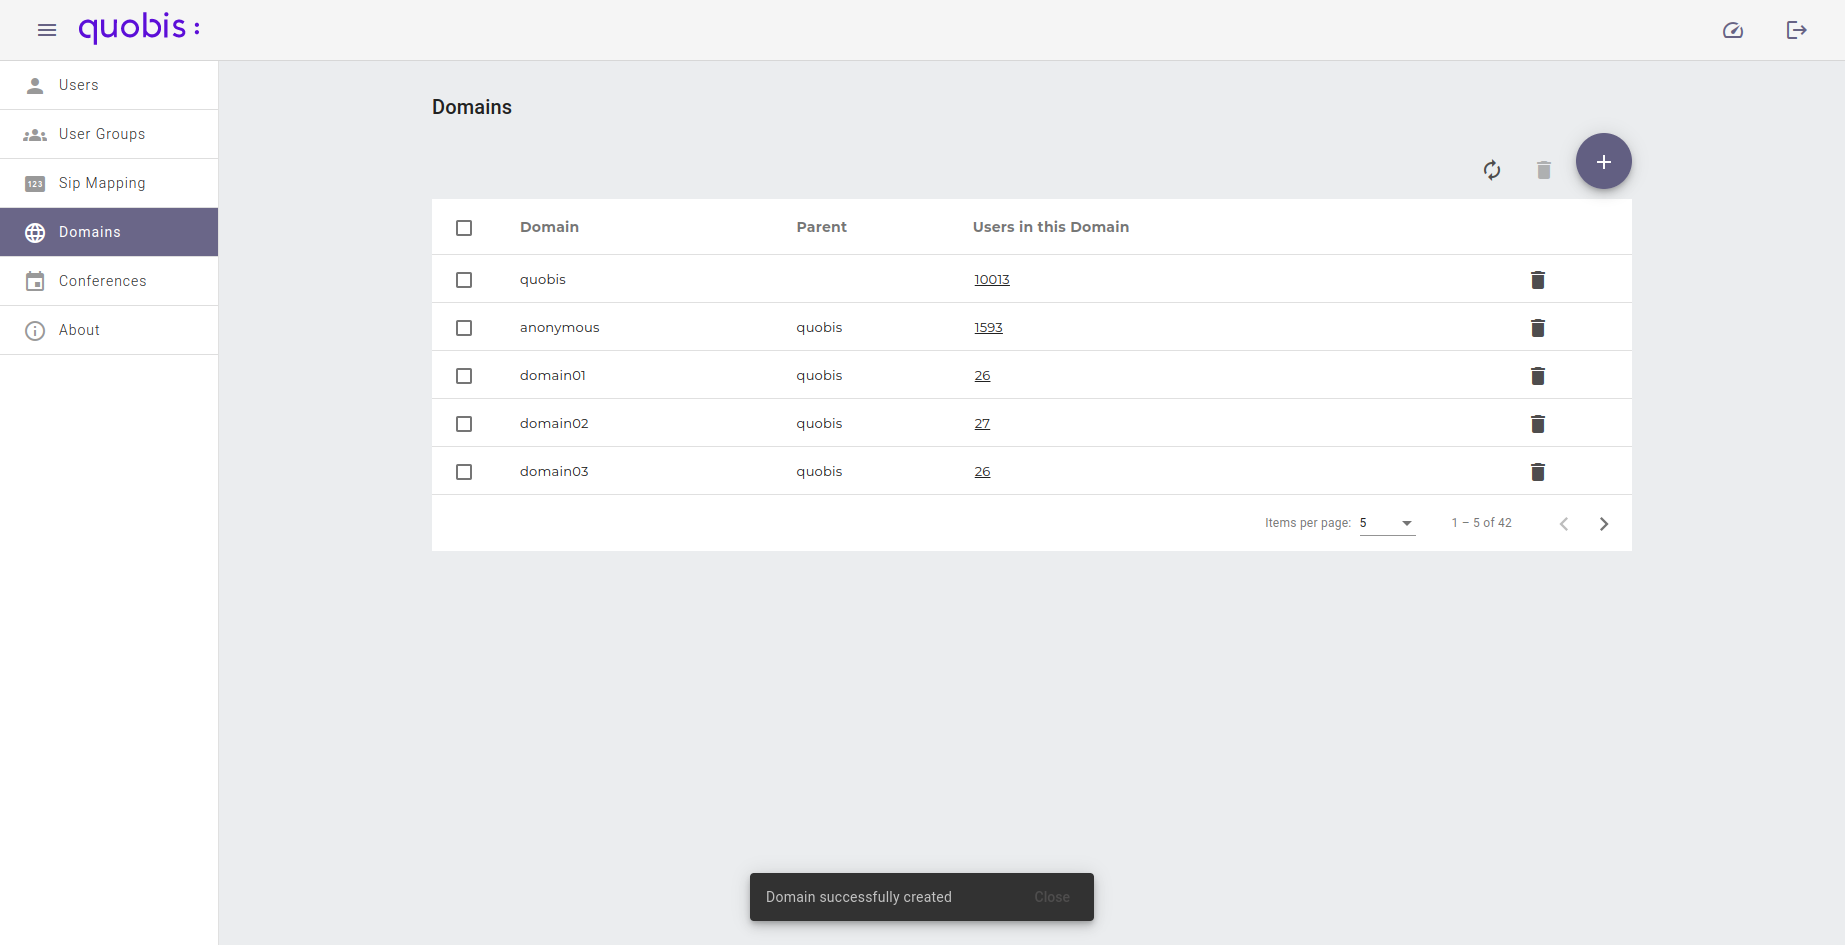
When saved, a notification will appear confirming the action:
Edit a domain
To edit a domain, click on the Edit (pencil) button of the domain in the list.
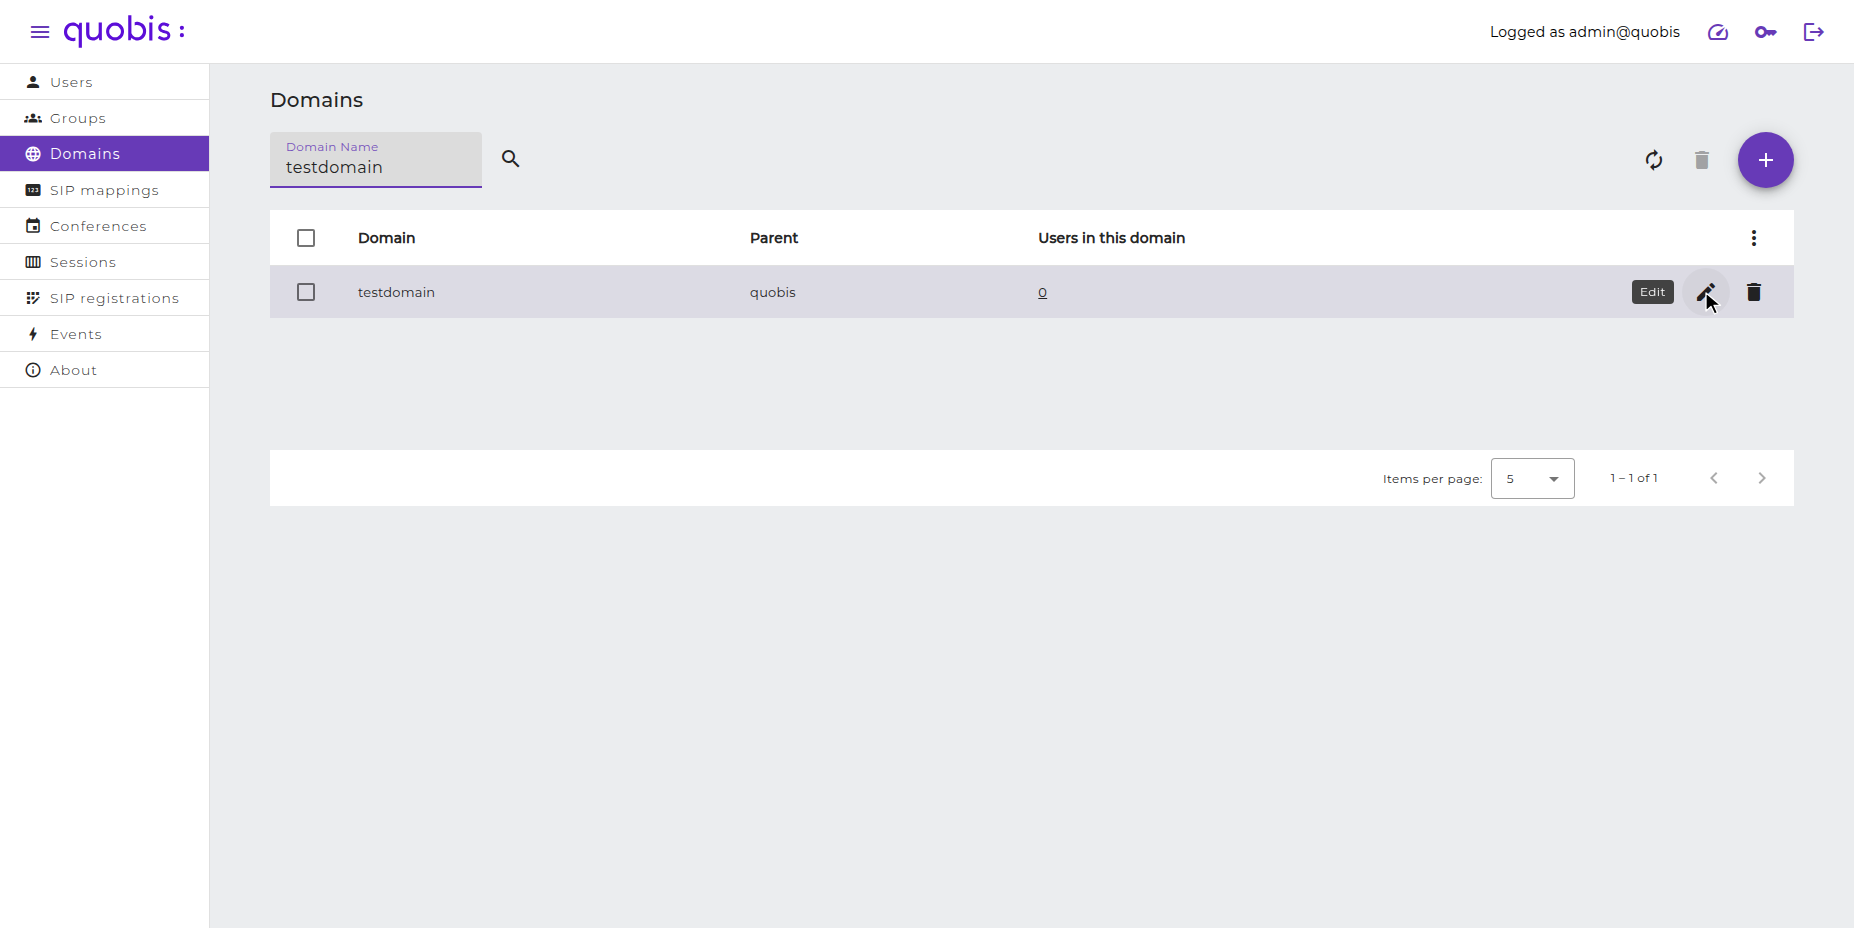
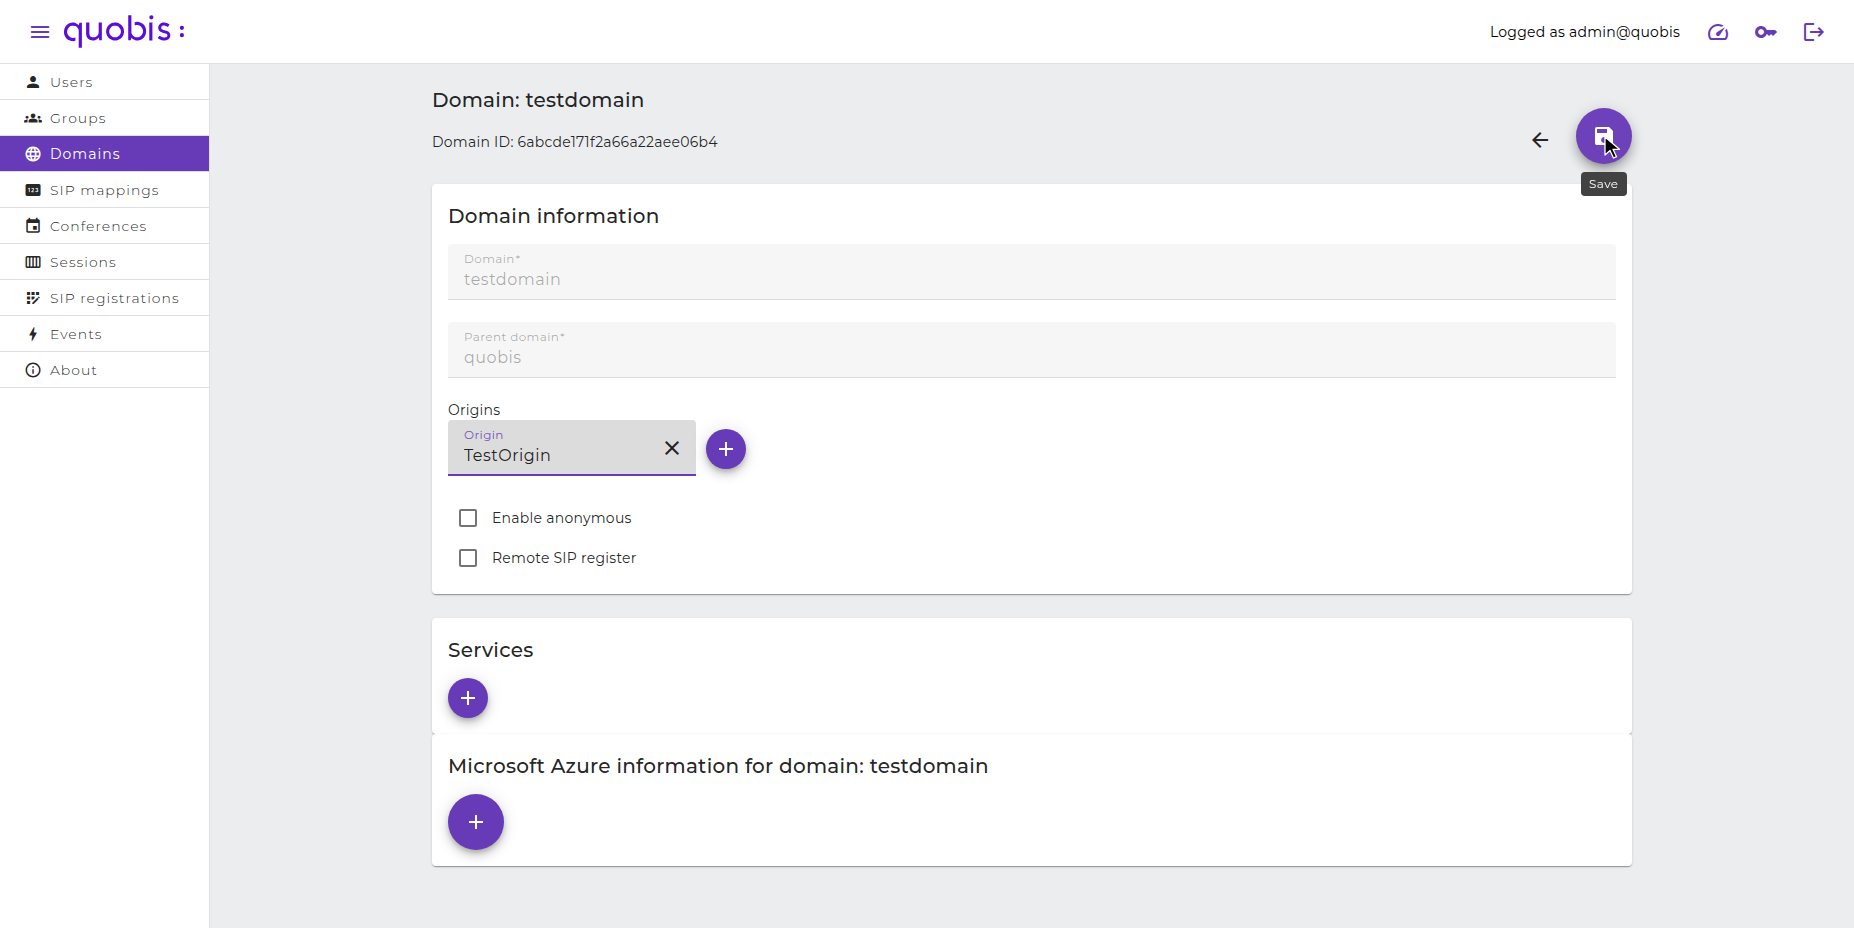
An edit screen will be displayed showing the domain ID, where you will be able to change the origins, options and services of the domain. Be aware that the domain name and the parent domain cannot be modified. This screen also includes a Microsoft Azure information section to configure the Microsoft Azure registration of the domain.
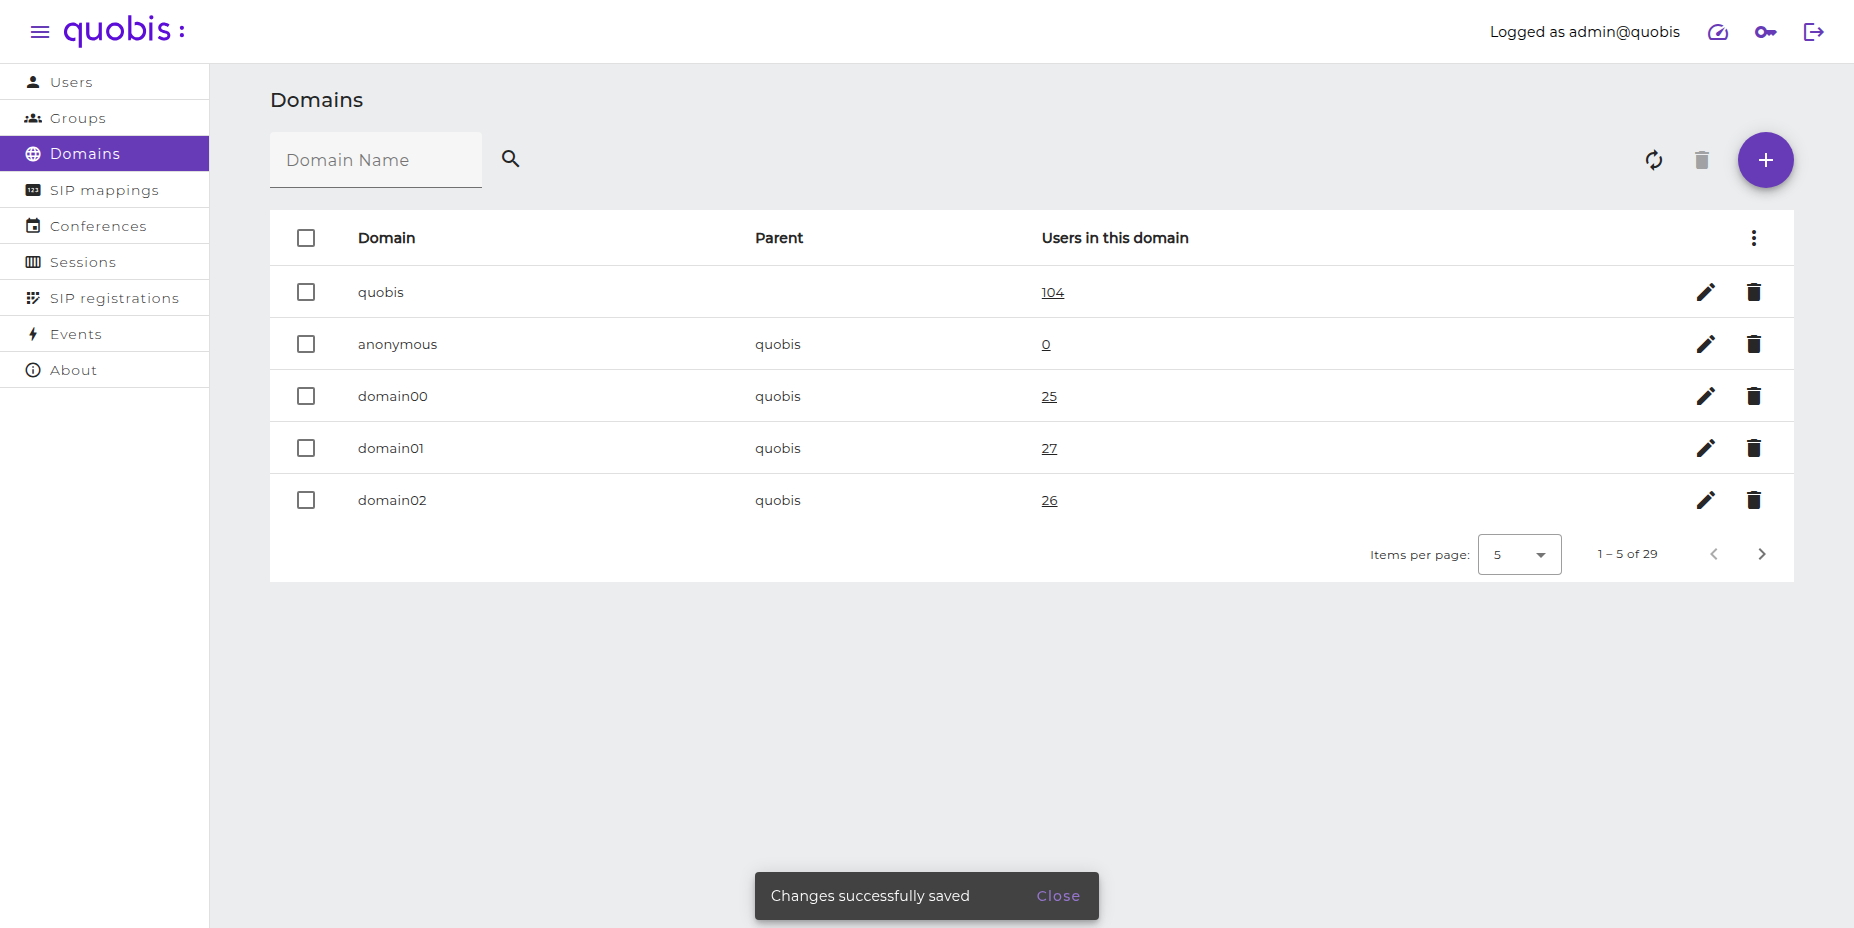
When saved, a notification will appear confirming the action:
Delete a domain
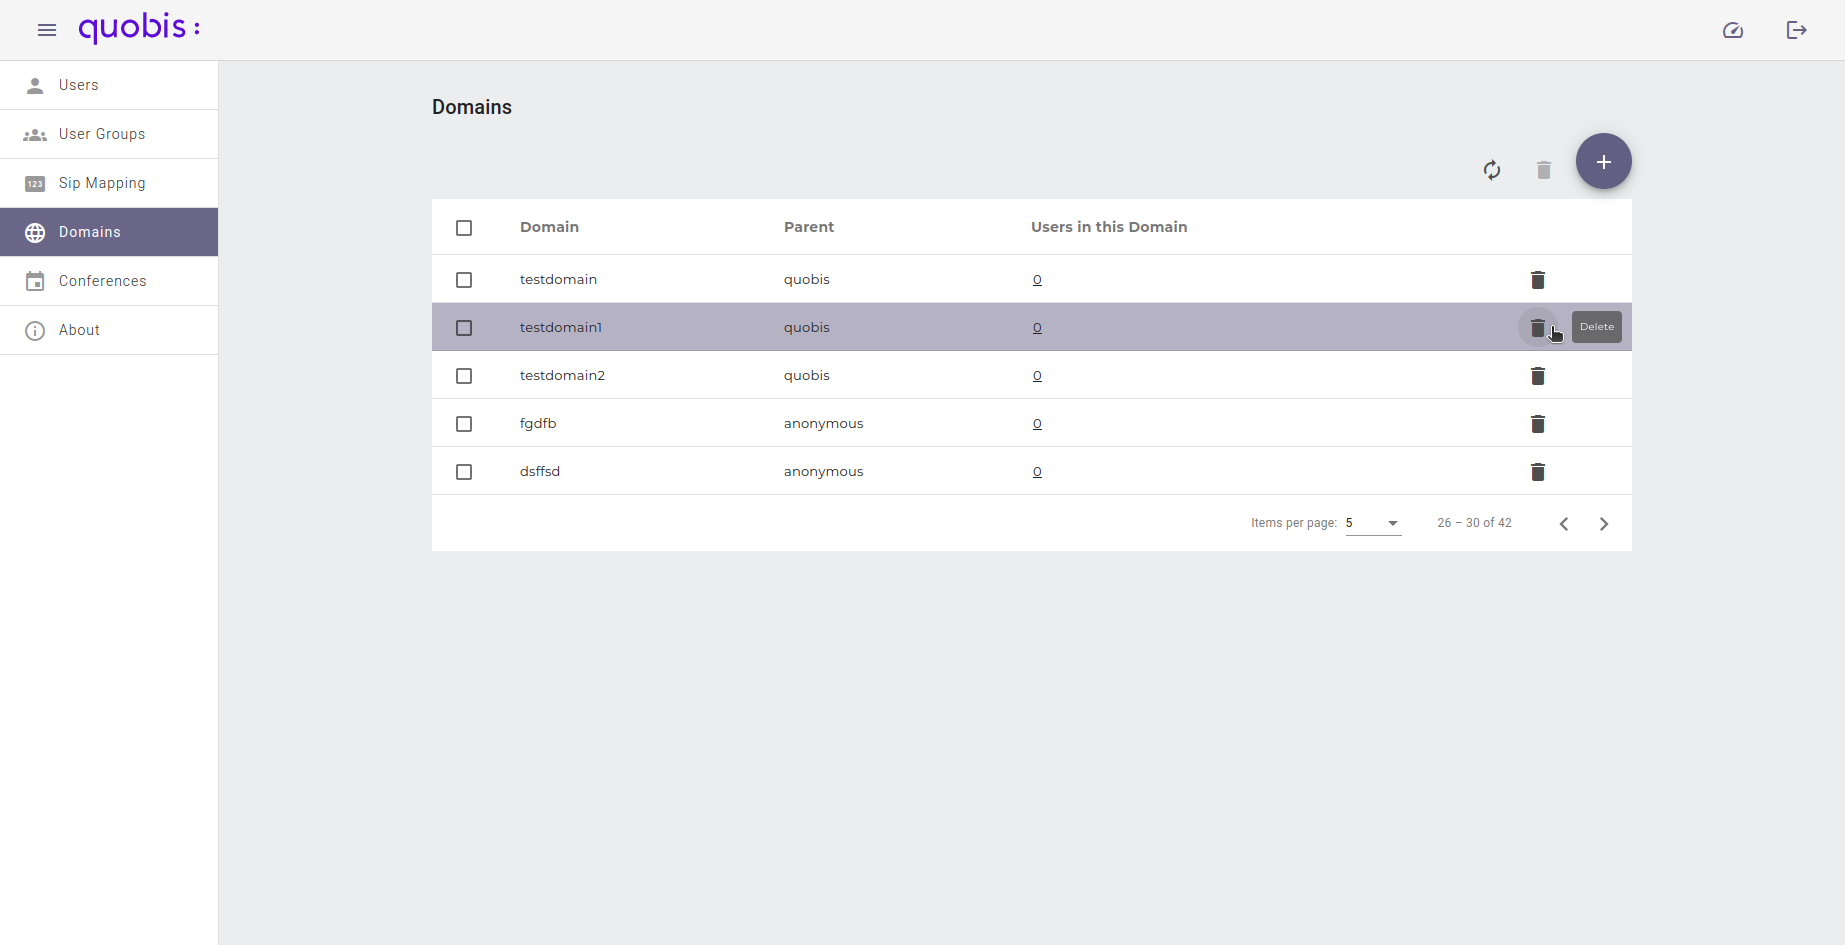
To delete a domain, click on the Delete (trash) button next to the Edit button. This will show a confirmation dialog:
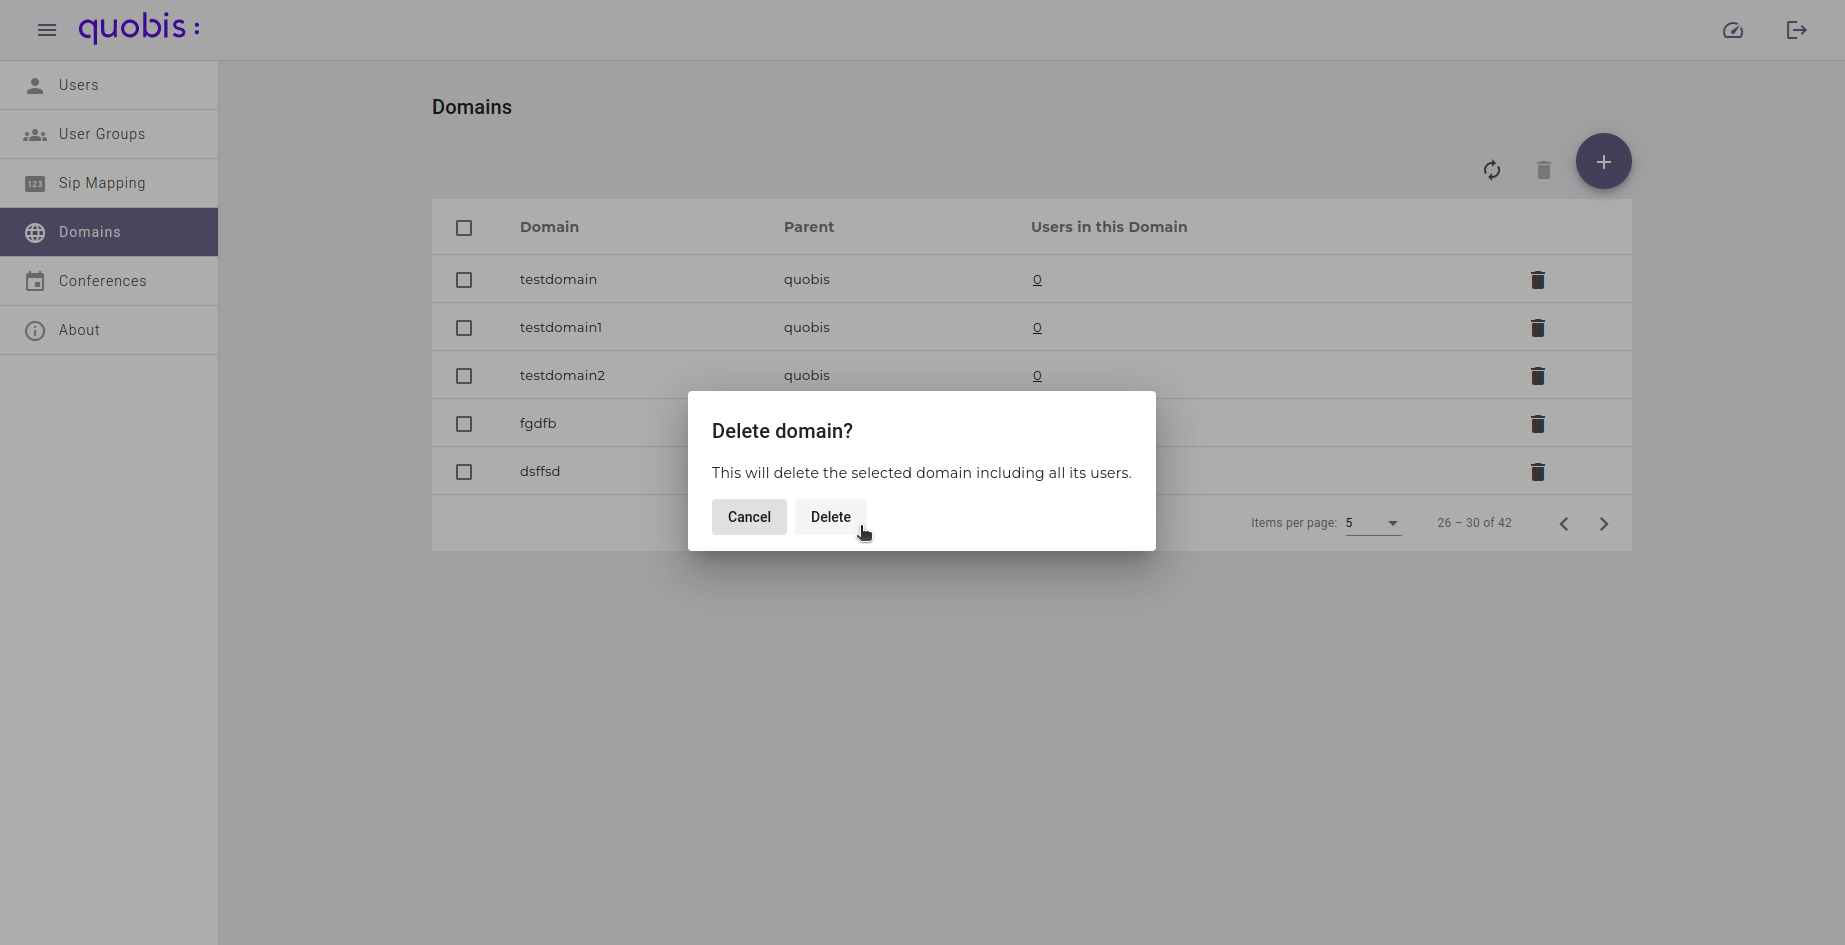
Warning
Deleting a domain also deletes all its users.
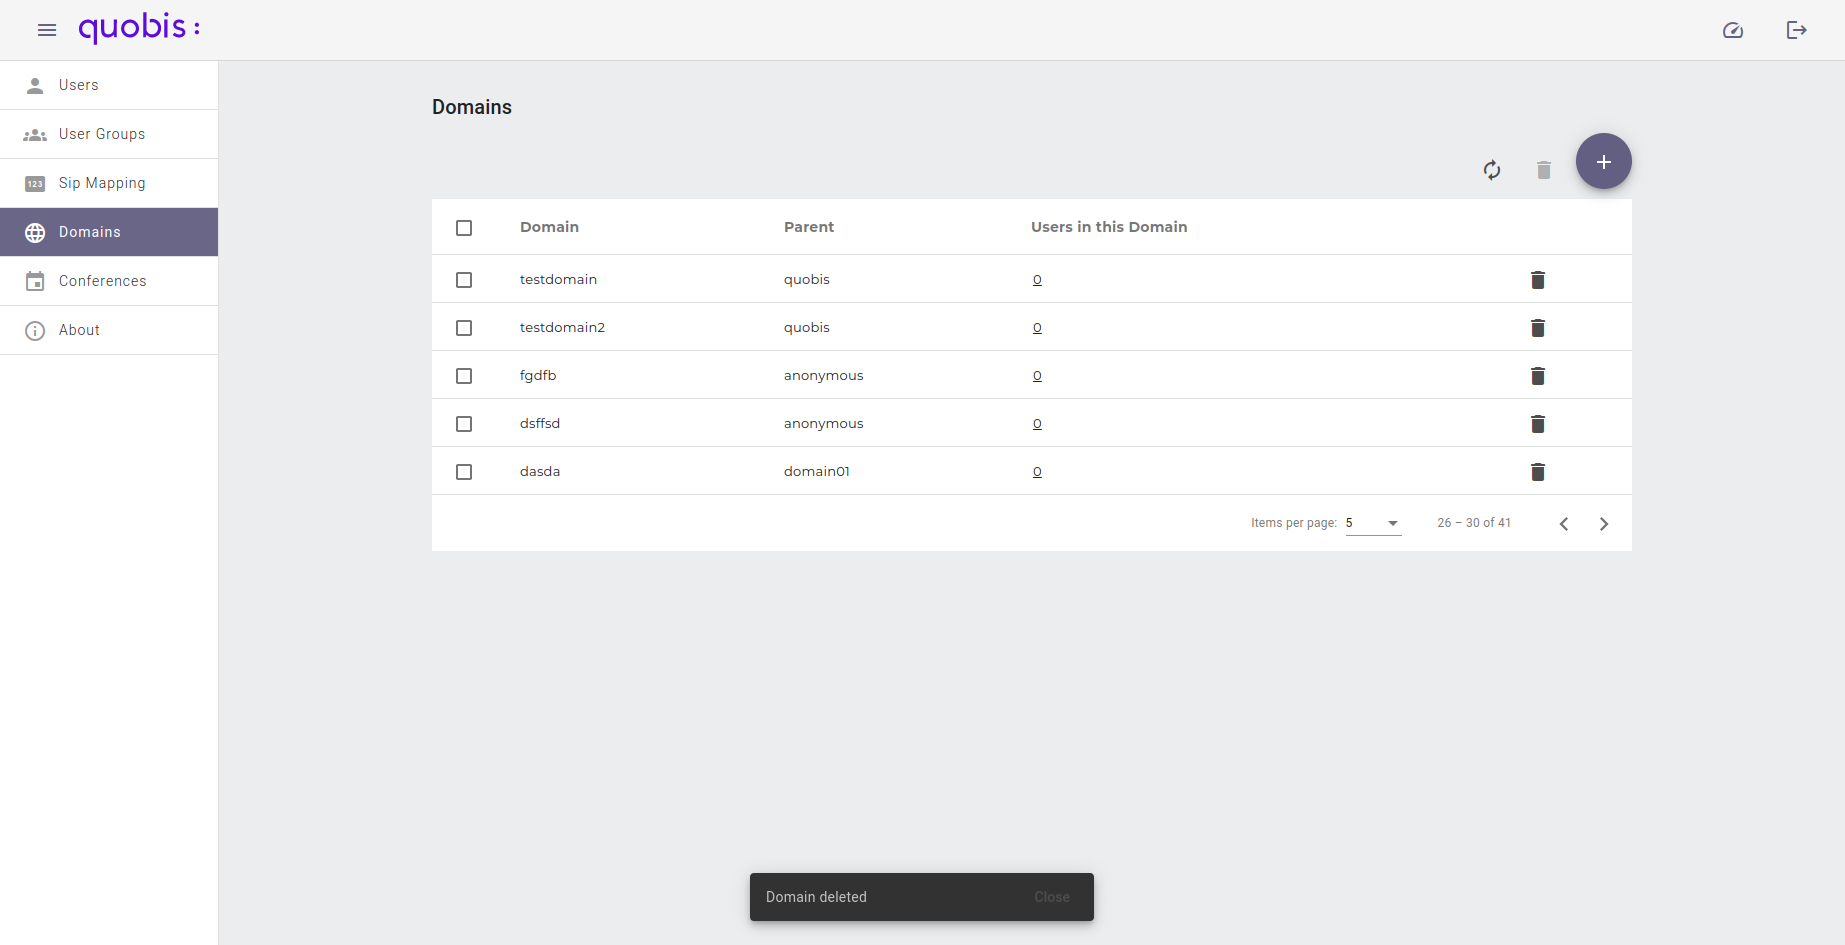
When accepted, a notification will appear confirming the action:
Conferences
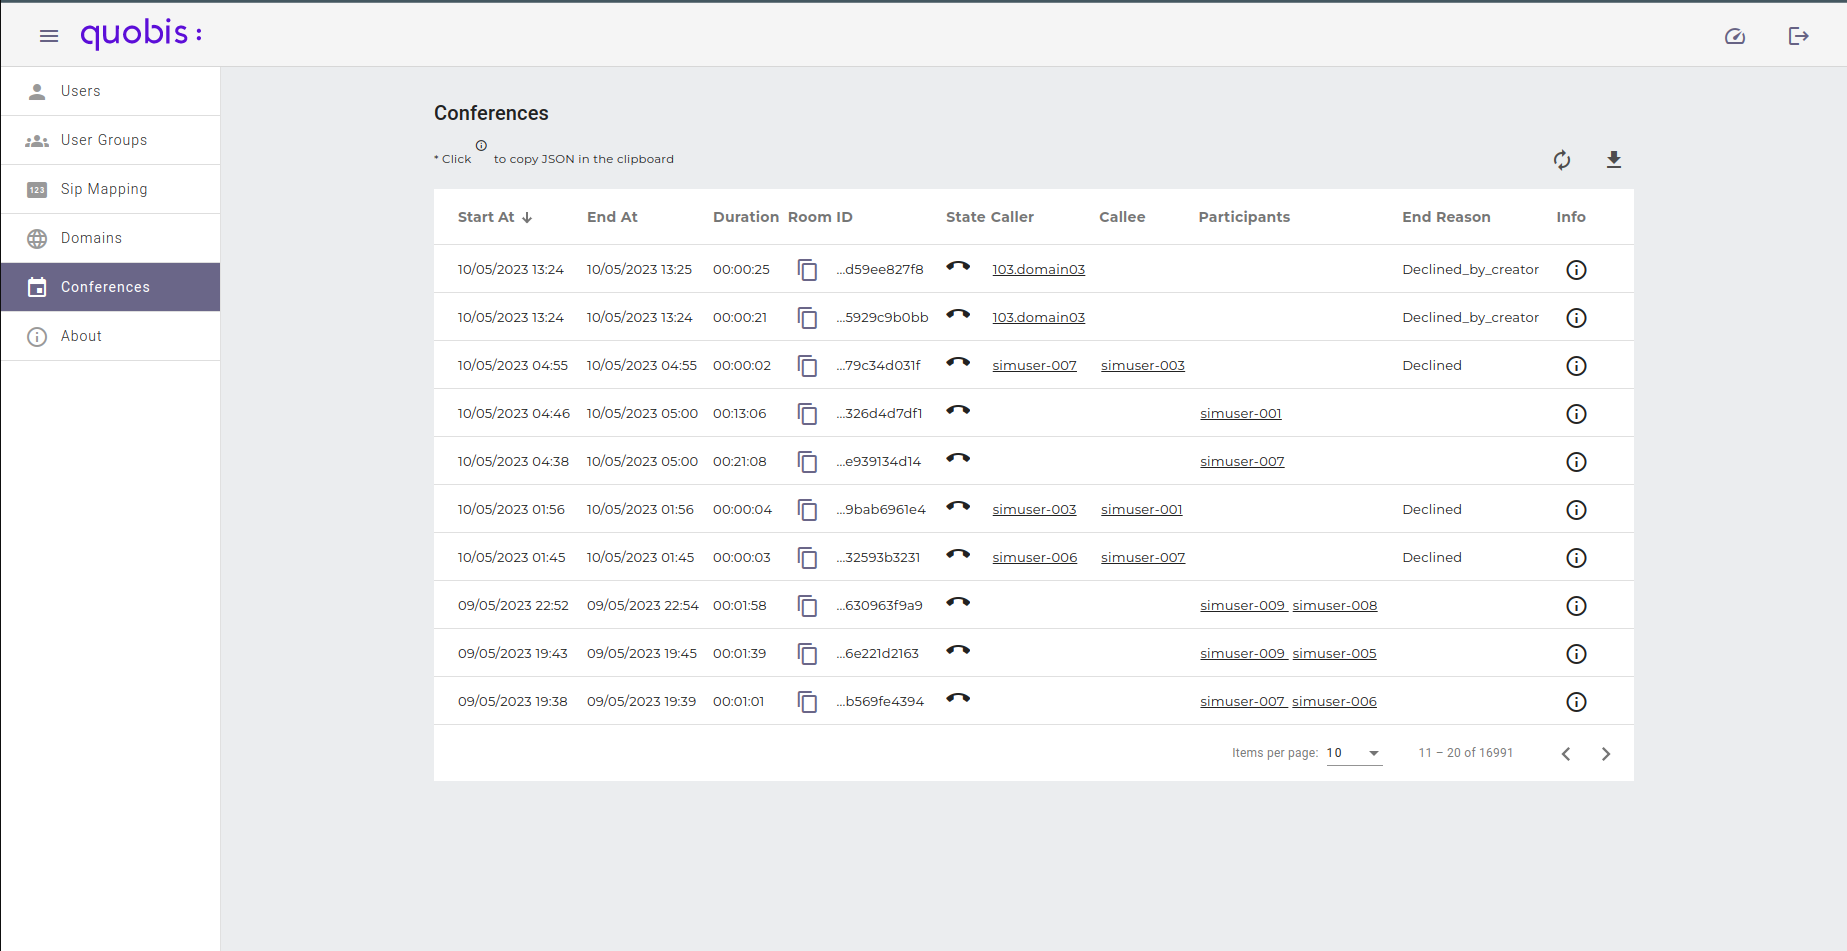
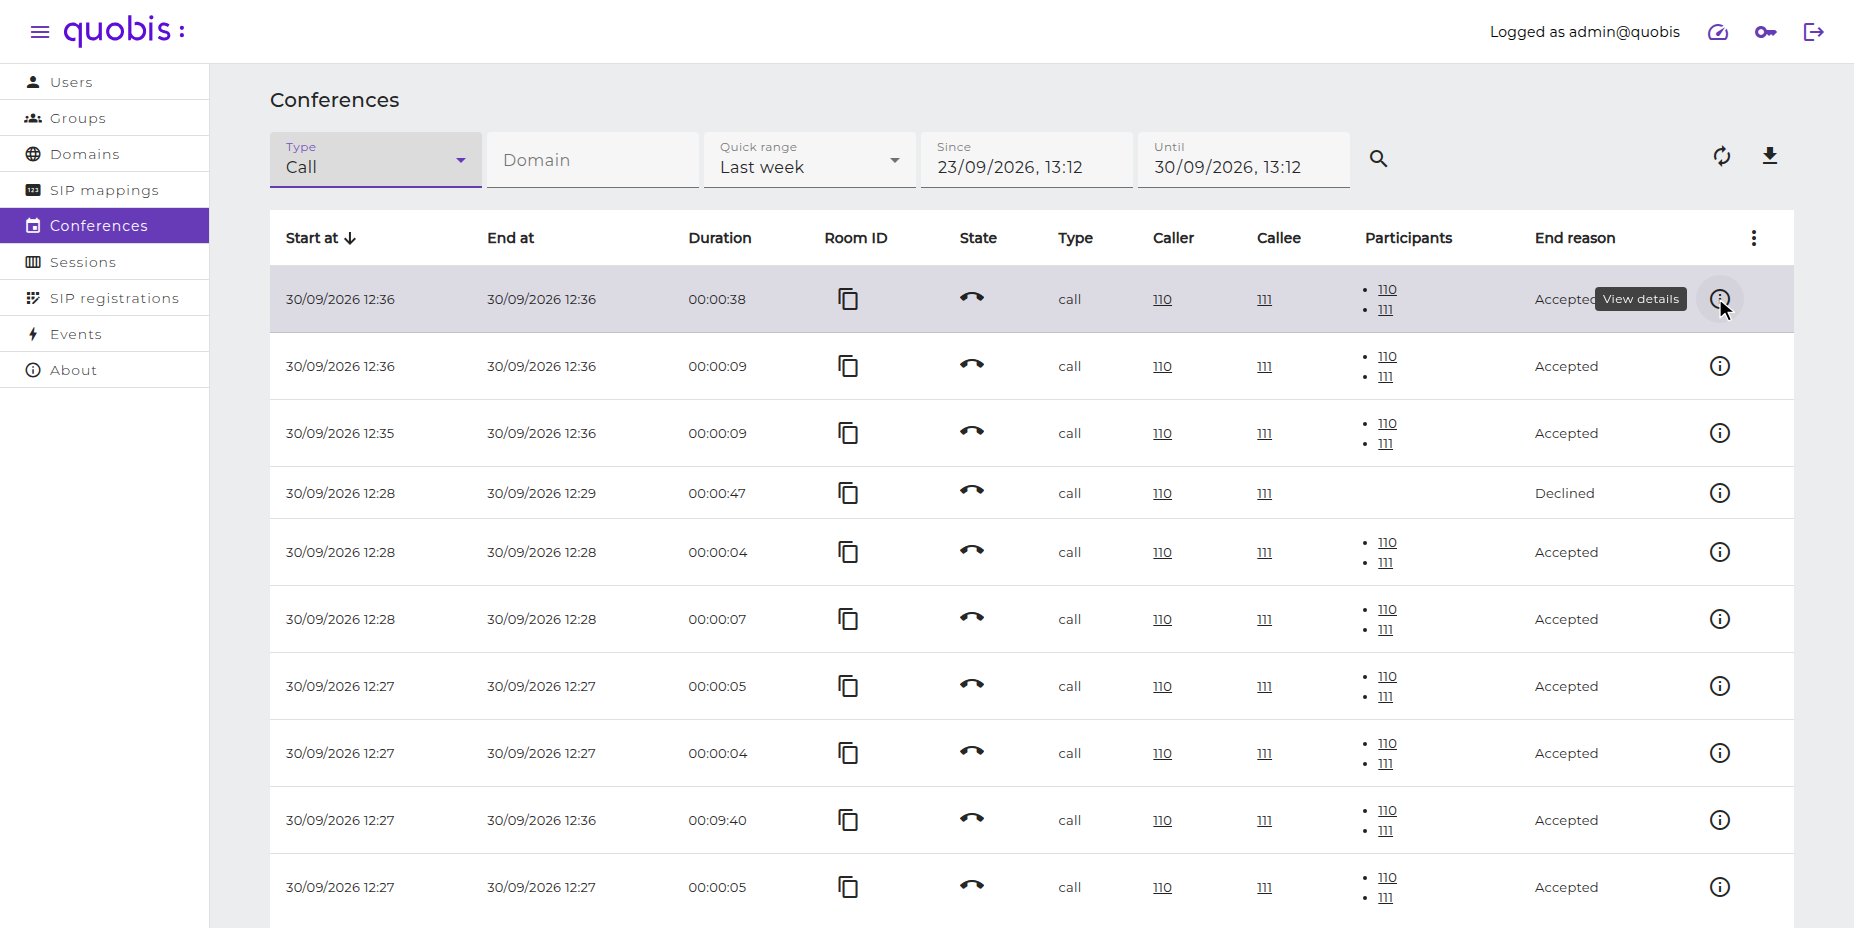
Consists of a detailed record of all conferences (one to one calls or multi-user conference calls) performed on the platform. This call detail record contains data fields that describe an instance of a call transaction, but does not include the content of the transaction itself.
Attributes of each record are divided into columns:
Start at. Room creation timestamp (or first user joining the call timestamp).
End at. Room destruction timestamp (or last user abandoning the call timestamp).
Duration. Time between call start and call finish.
Room ID. Transaction unique identifier, used for cross referencing with system logs. Click on the icon to copy it to the clipboard.
State. State of the conference.
Type. Type of the conference: call, meeting or quick conference.
Caller. The user who starts the conference.
Callee. The user who accepts or declines the conference.
Participants. The users who participated in the conference.
End reason. Last status received from the conference or call, for example Accepted or Declined.
Info. Opens the detailed view of the conference.
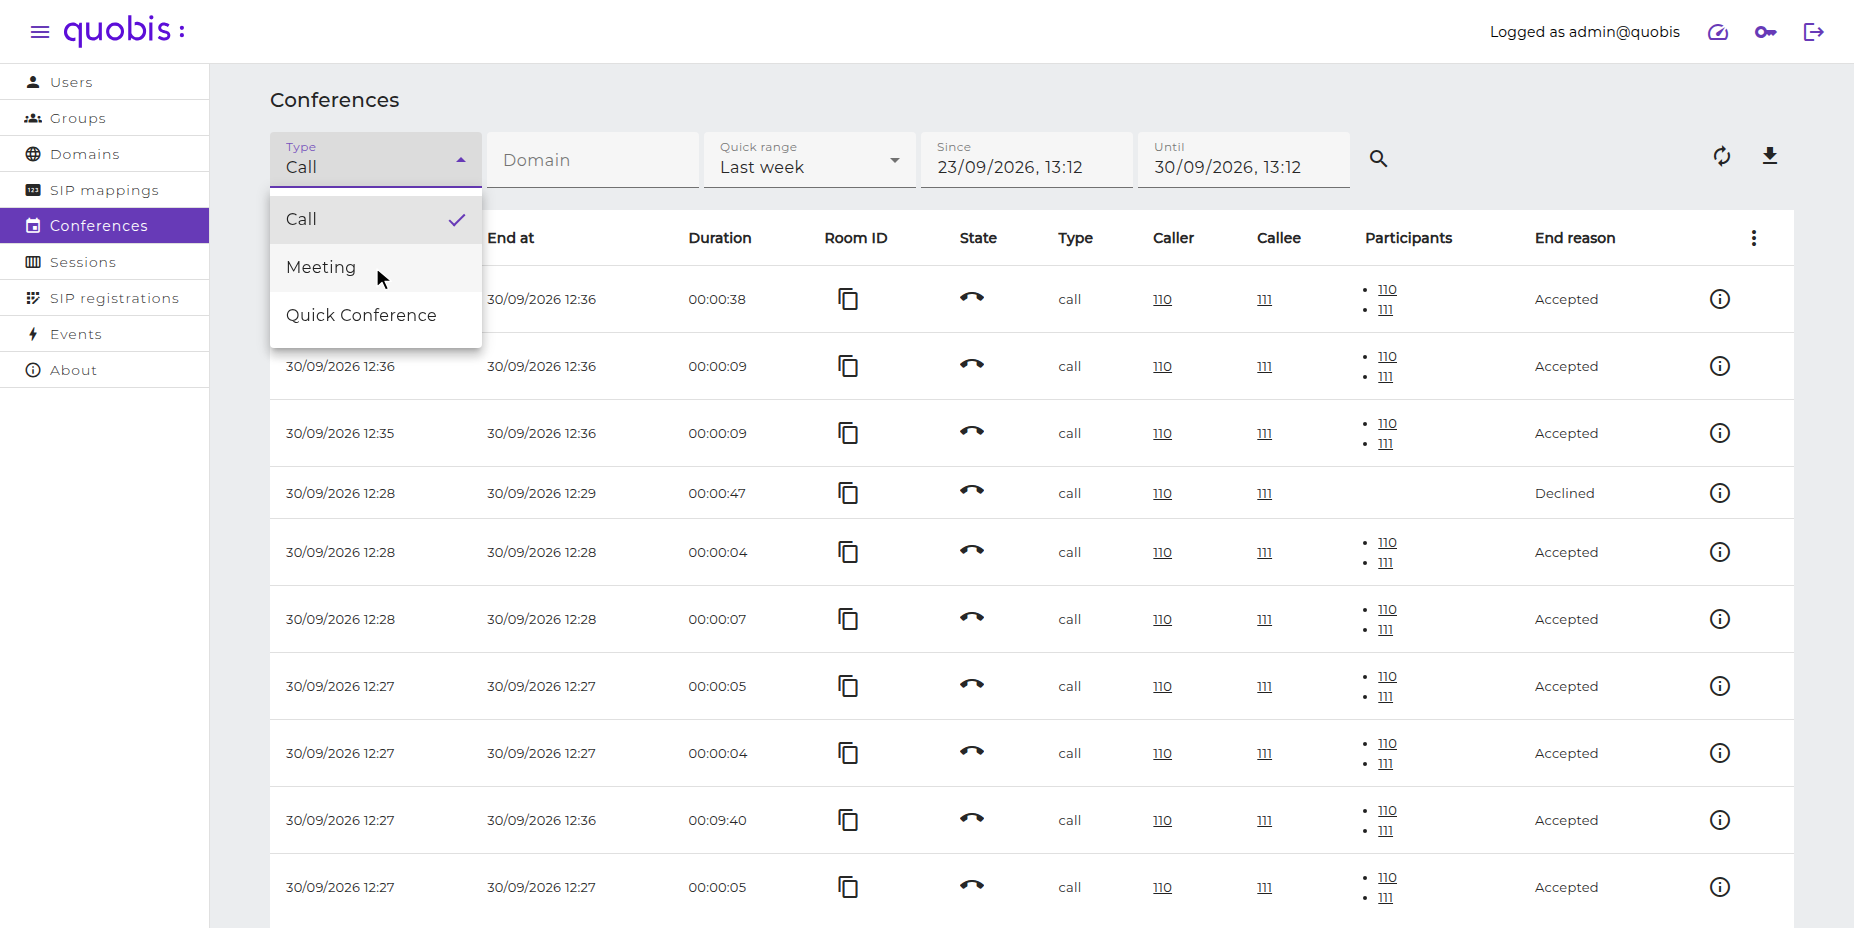
In order to locate one or several conferences you can use the following filters, and then click on the search button:
Type. Type of conference to display: Call, Meeting or Quick Conference.
Domain. Domain of the conference.
Quick range. Predefined time ranges (Last 5 minutes, Last 30 minutes, Last hour, Last 24 hours, Last week) or Custom to use the Since and Until fields.
Since and Until. Start and end of the time range to search.
Note
By default only the conferences of the last minutes are displayed. Select a wider time range in the Quick range selector to display older conferences.
The whole record can also be exported into a CSV file using the Download all conferences button located in the upper right corner of the screen.
View the details of a conference
To view all the information stored for a conference, click on the View details button (the “i” icon) at the end of its row.
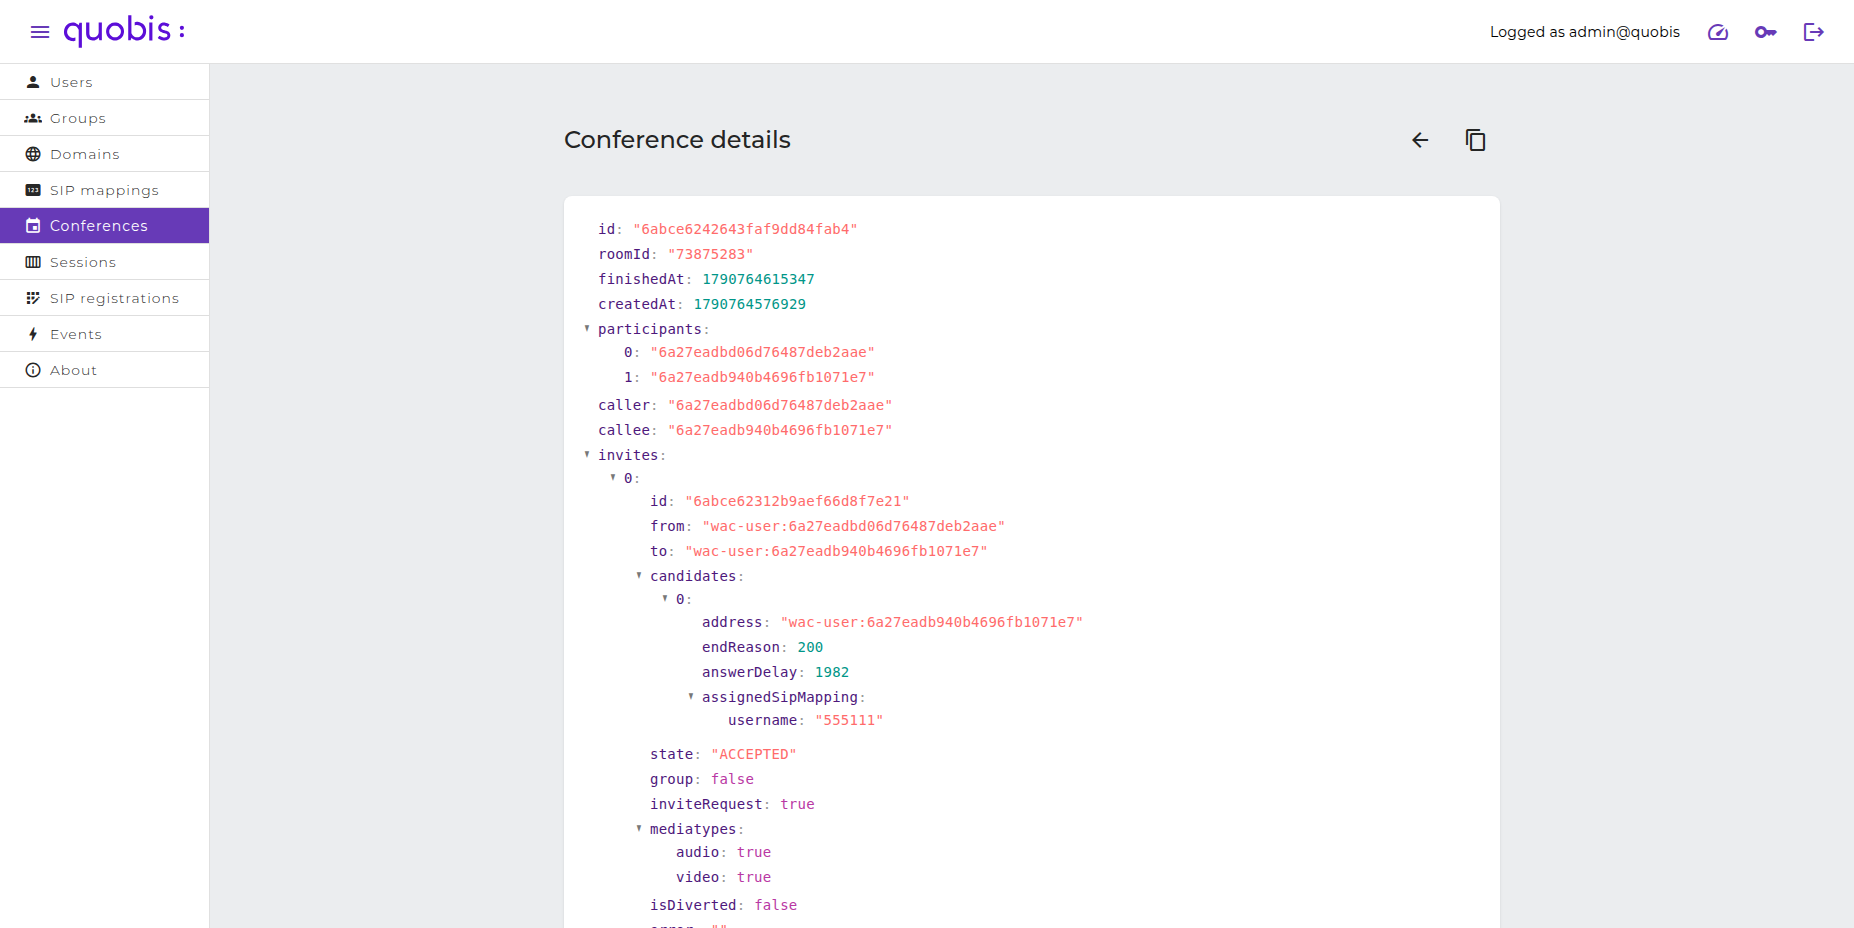
The Conference details screen will be displayed, showing all the data of the conference (participants, invites, media types, end reasons, etc.). The copy button located in the upper right corner copies all this information to the clipboard in JSON format.
Sessions
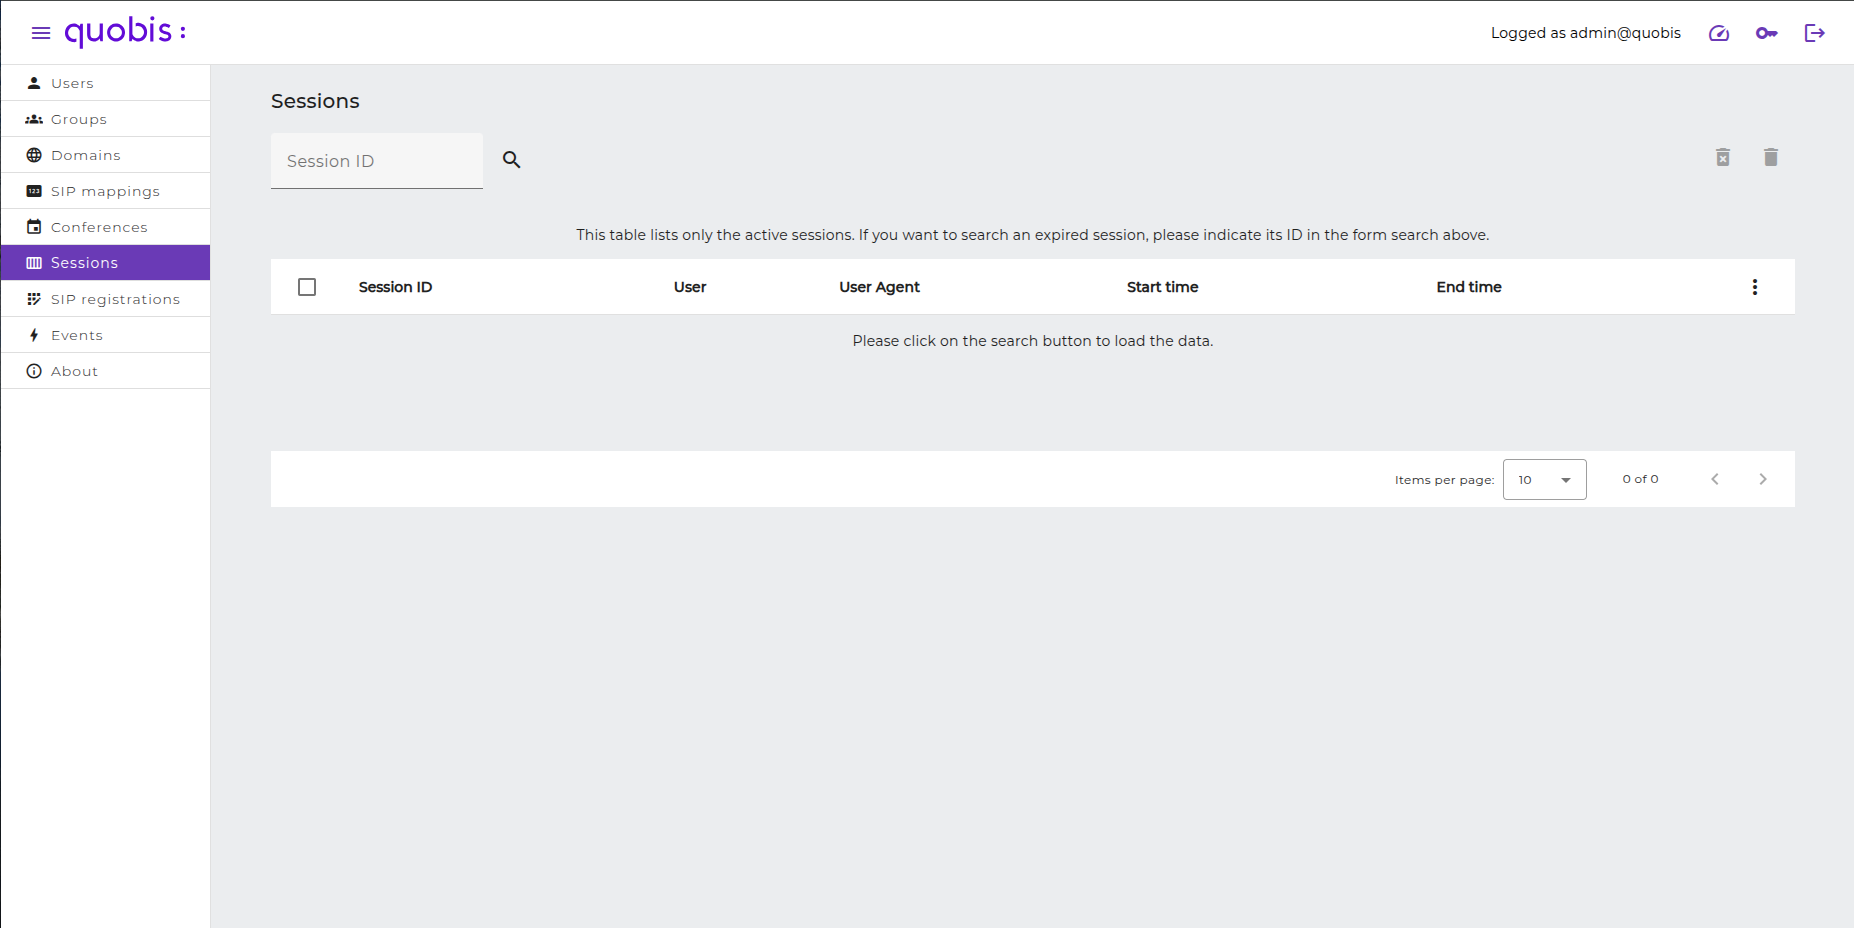
Selecting “Sessions” in the left panel will display an empty table of active sessions on the system.
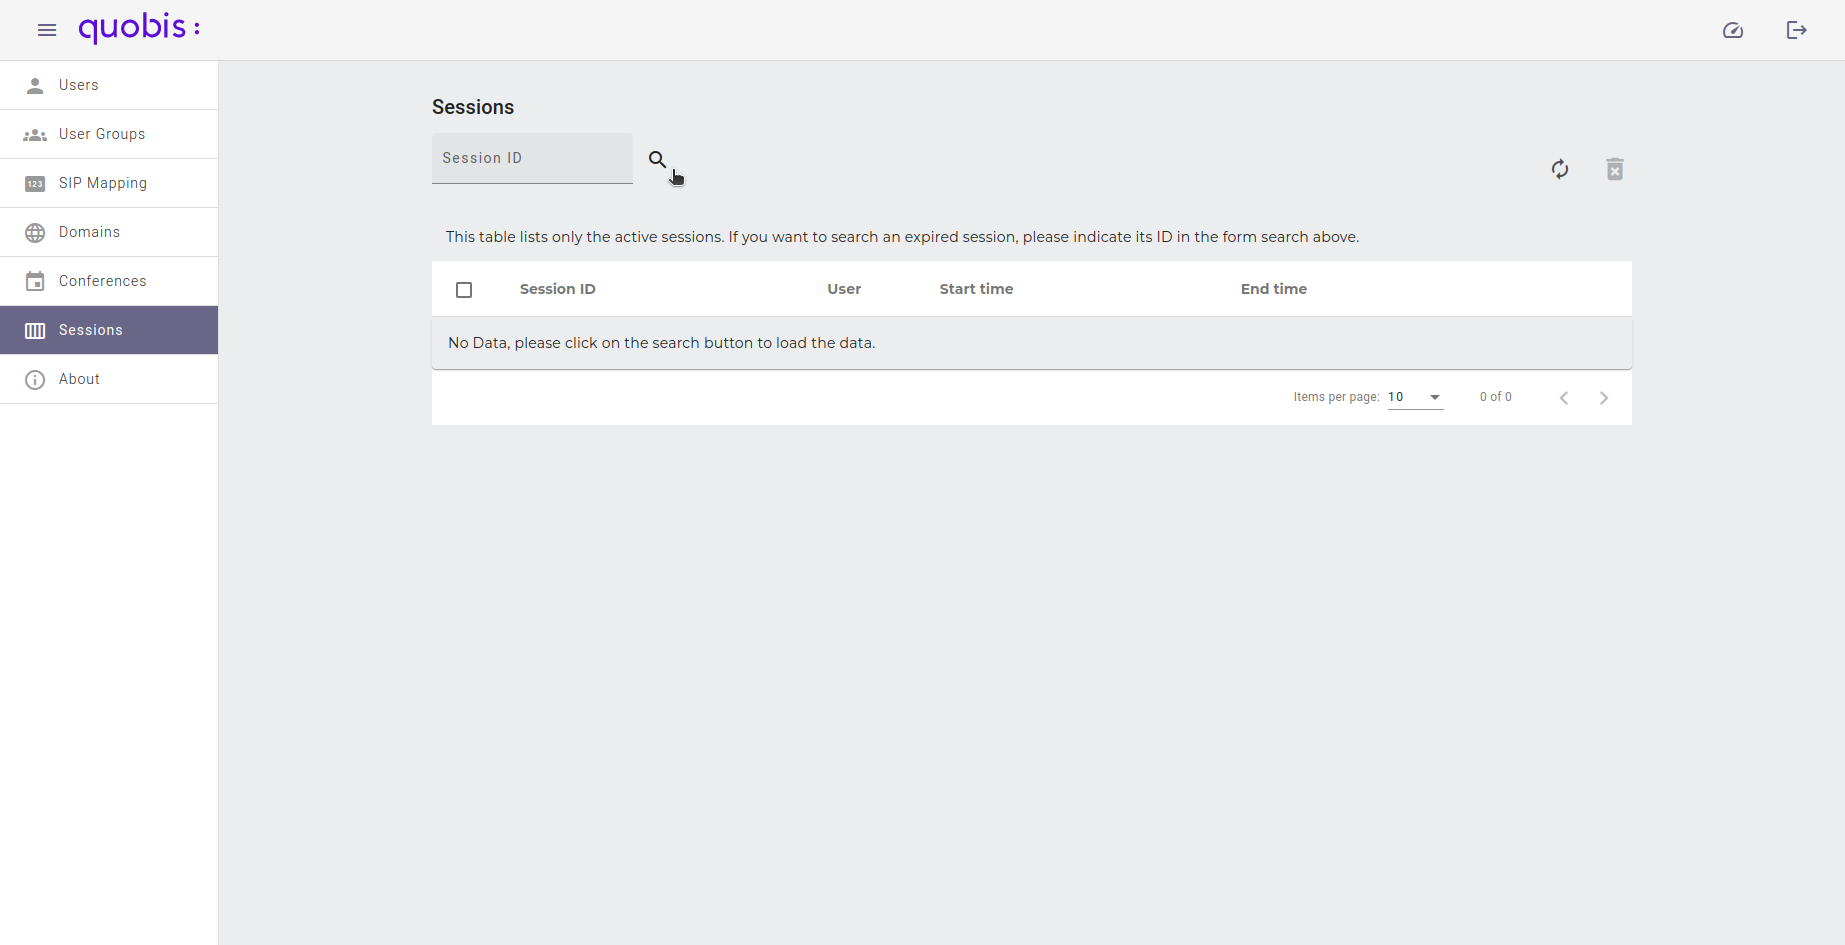
In order to load the data you need to click on the search button above the table. As loading all the sessions could take a few minutes, a confirmation dialog will be shown:
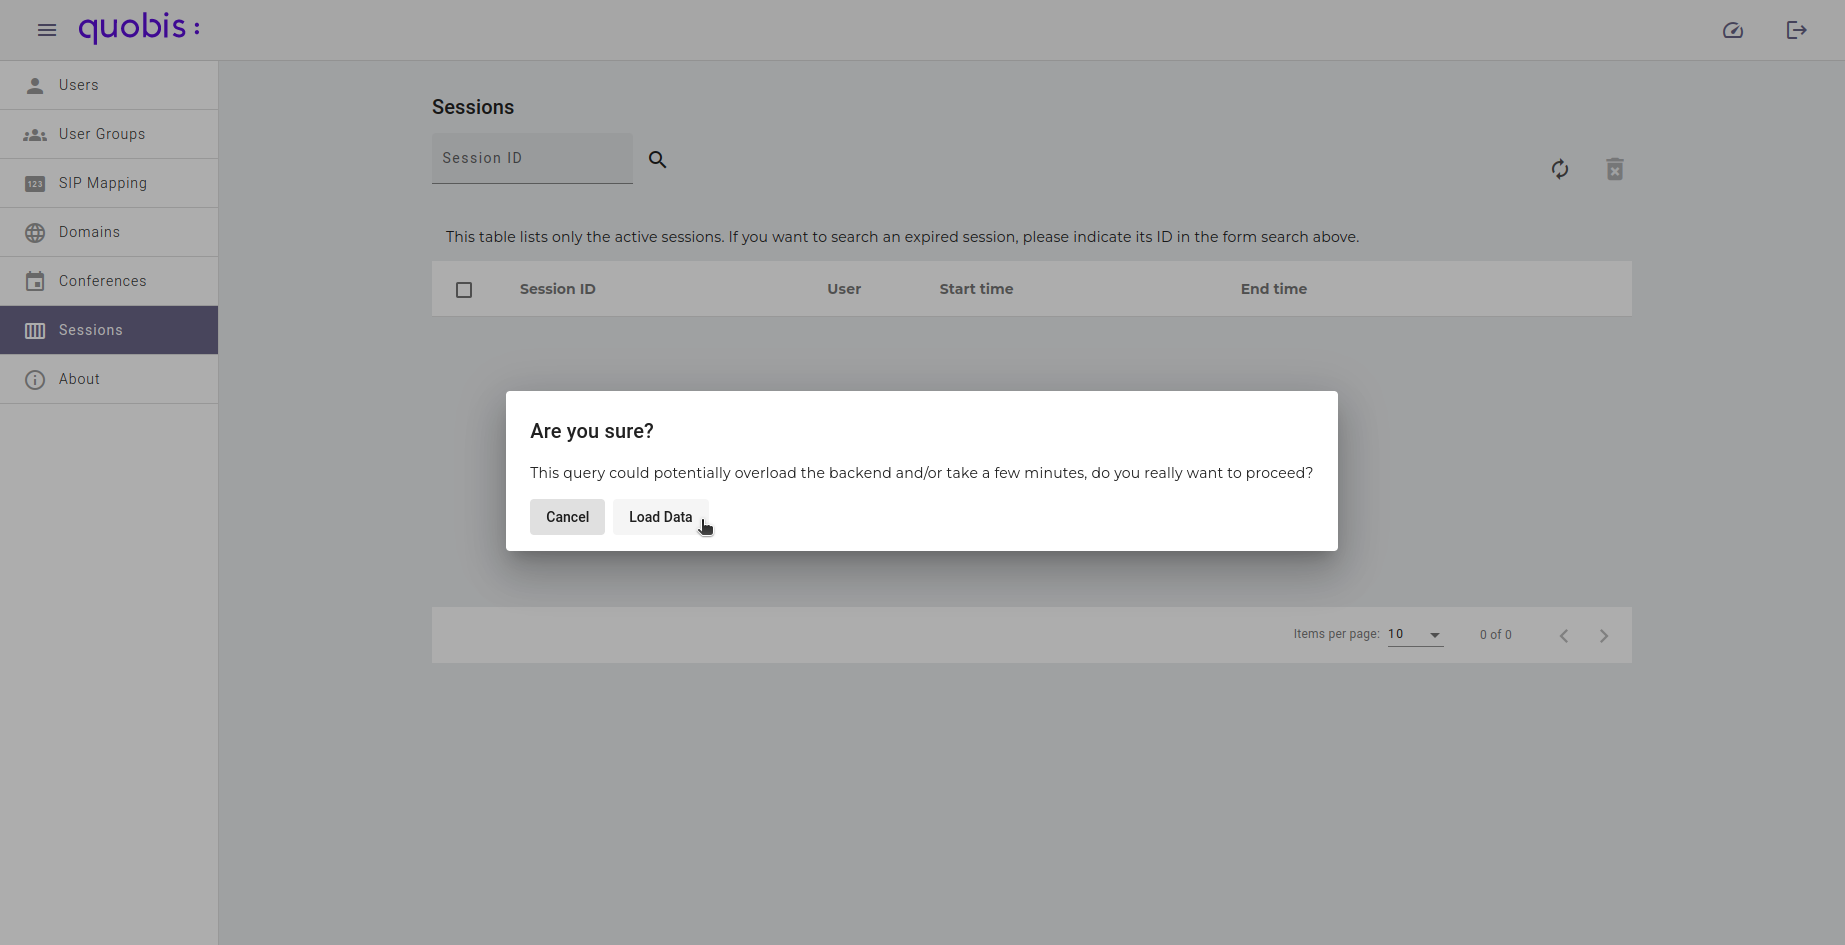
When accepted by clicking on Load Data, the list will show by default the following columns:
Session ID. Unique session identifier.
User. Username of the user this session belongs to, followed by its domain.
User Agent. The browser or application from which the session was created.
Start time. The starting time of the session.
End time. The ending time of the session, or Active if it is still active.
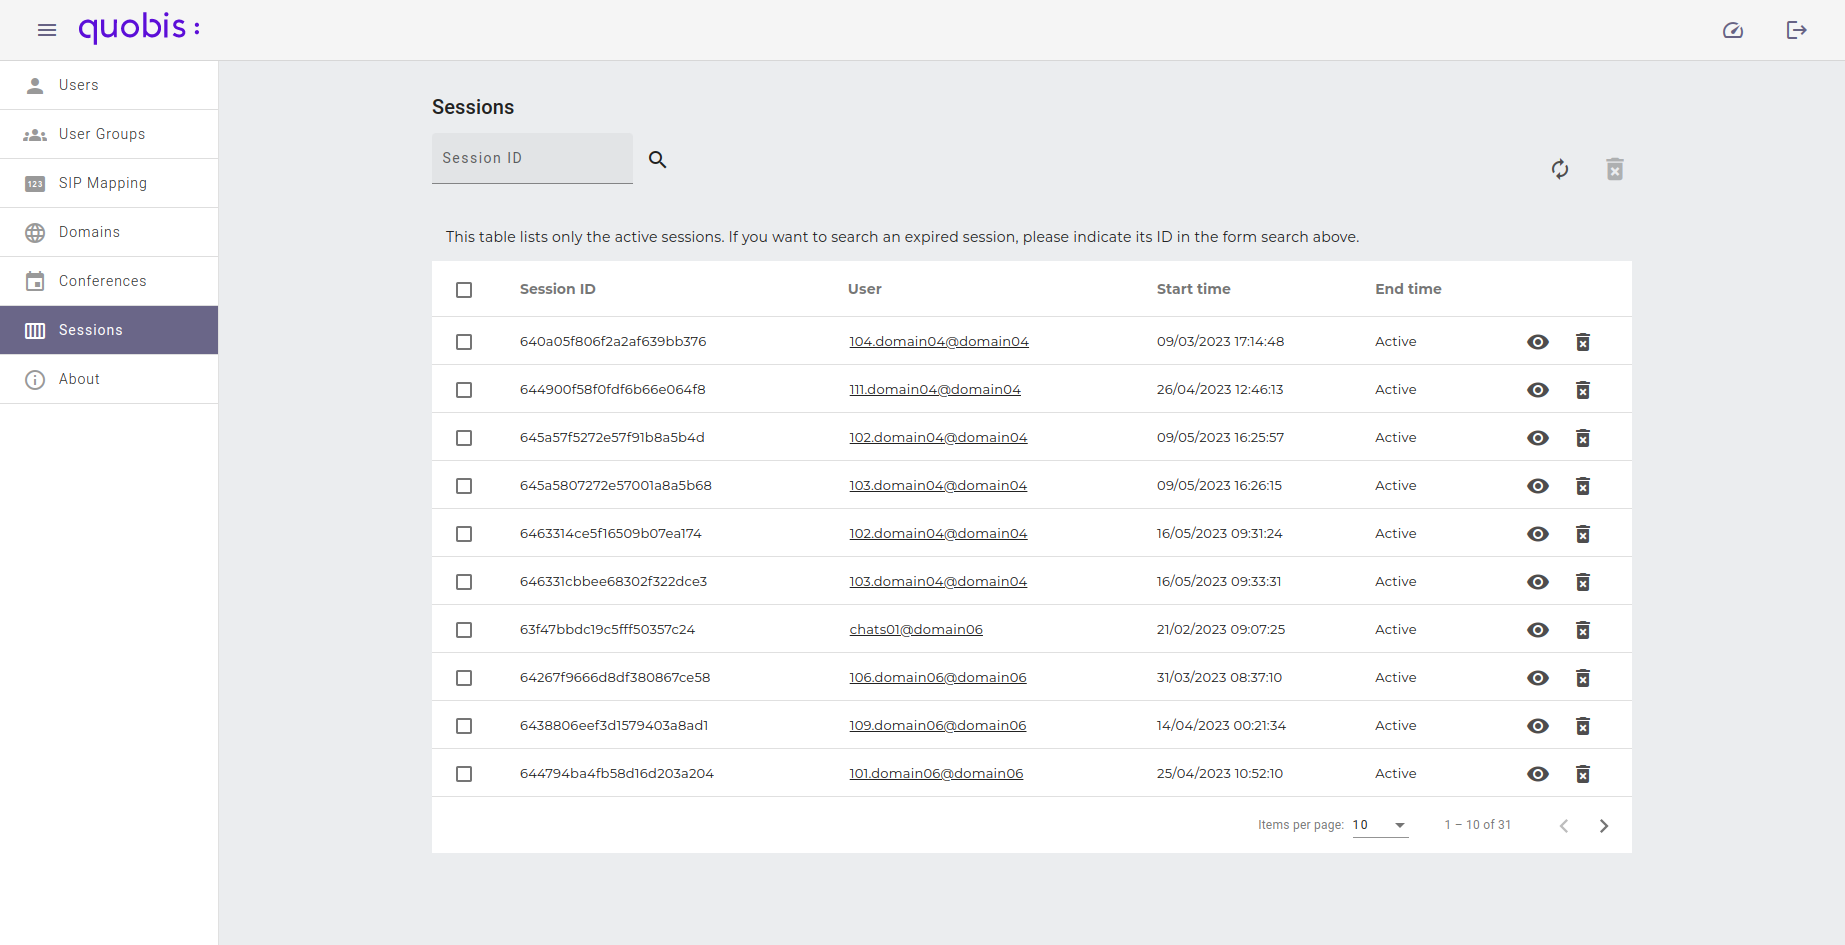
The table only lists the active sessions. If you want to find an expired session, type its ID in the search box above the table.
View a detailed session
To view the information of a session, click on the View (eye) button of the session.
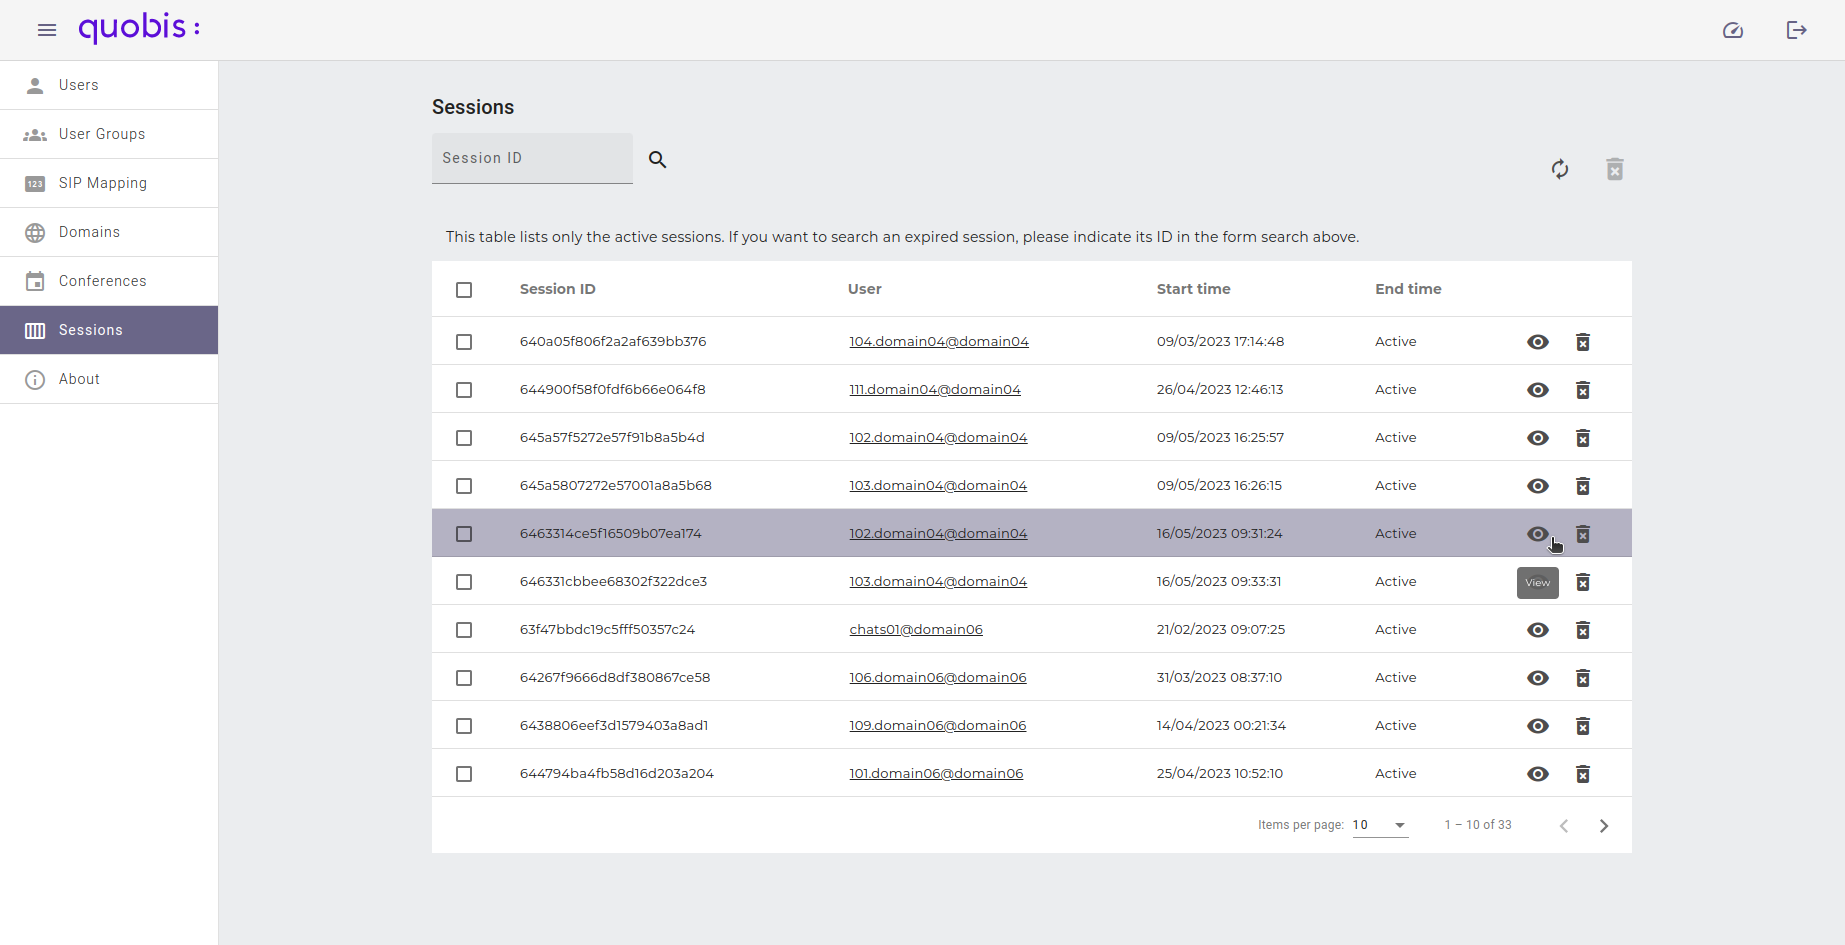
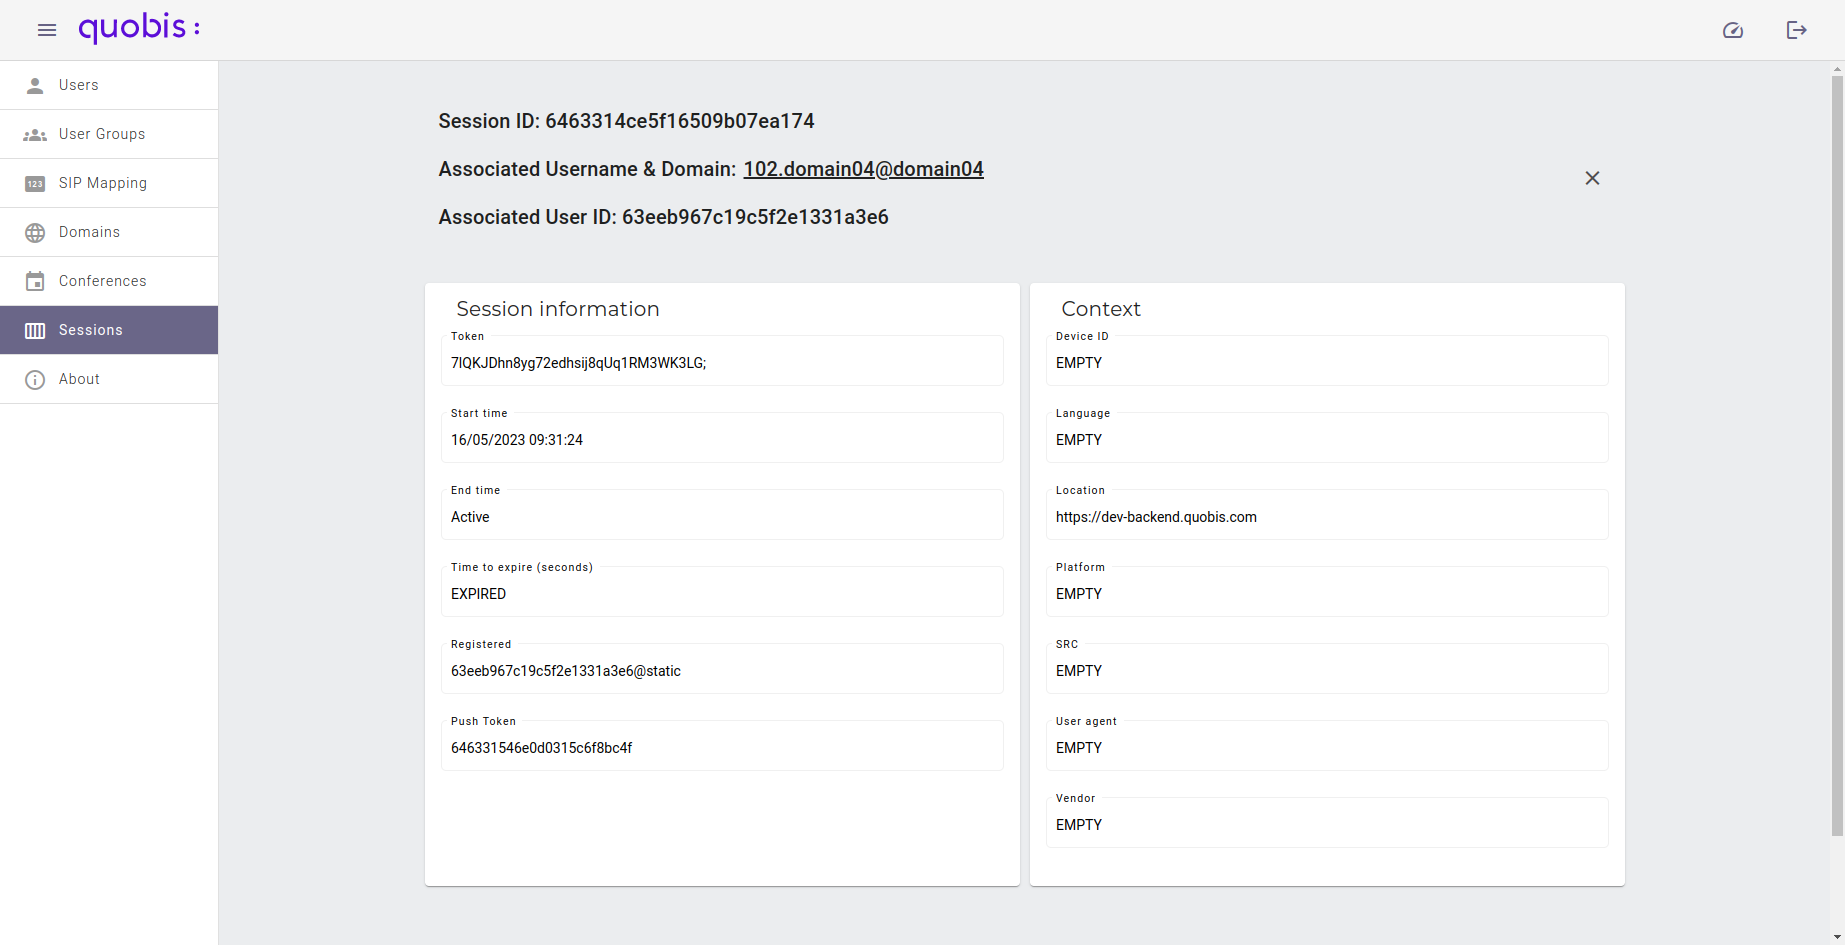
Following the order shown in the image:
Session ID. Unique session identifier.
Associated user. Username of the user this session belongs to, followed by its domain. Clicking on it opens the edit screen of the user.
Associated user ID. Unique identifier of the user this session belongs to.
Domain. Domain of the user.
Token. The session token, used for authorization.
Start time. The starting time of the session.
End time. The ending time of the session, or ACTIVE if it is still active.
Time to expire. The time left before the session is considered expired if it is not updated.
Registered. The signaling server’s user of the session.
Push token. The registered push token of the session.
Device ID. The unique identifier of the device of the session.
Language. The browser’s or client’s configured language.
Location. The URL from where the client was loaded.
Platform. The operating system of the session context.
SRC. The IP address from where the session was originally created.
User agent. The browser, program version, device data and operating system of the session context.
Vendor. The vendor of the browser of the session context.
The revoke buttons described below are also available in the upper right corner of this screen.
Revoke a session
Quobis manager offers two different ways of revoking a session:
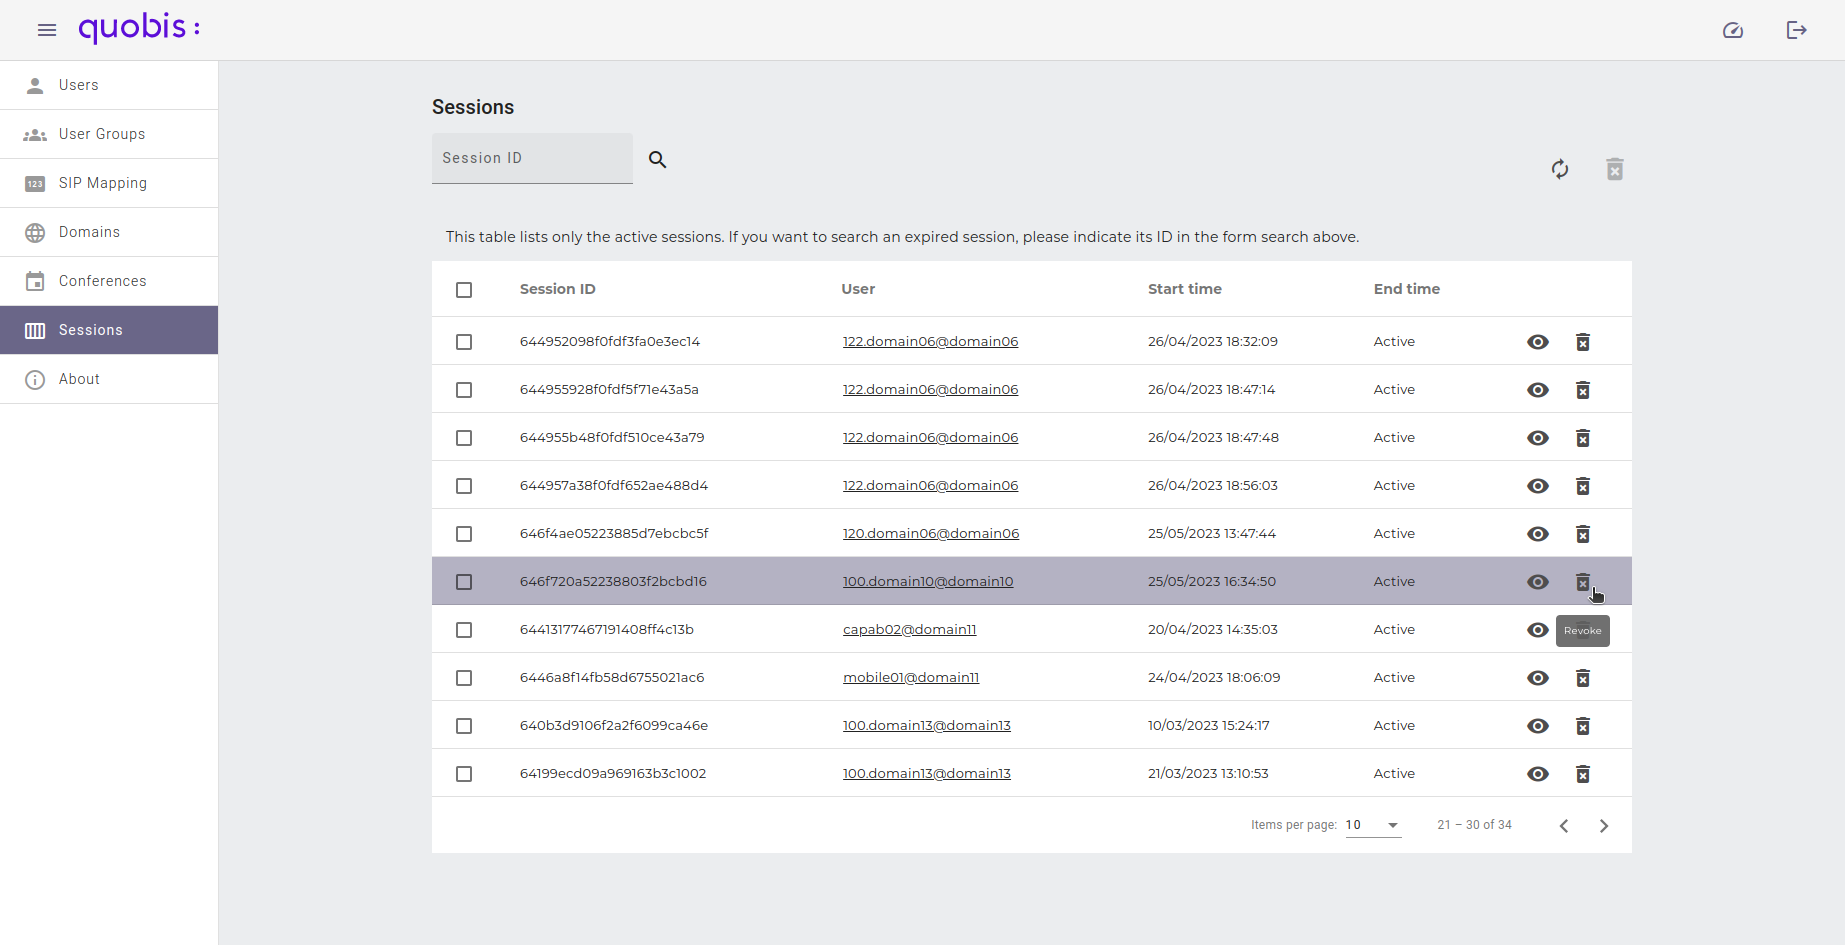
Revoke session. Logs the user out of the platform. Be aware that this terminates all the sessions of the user, not only the selected one.
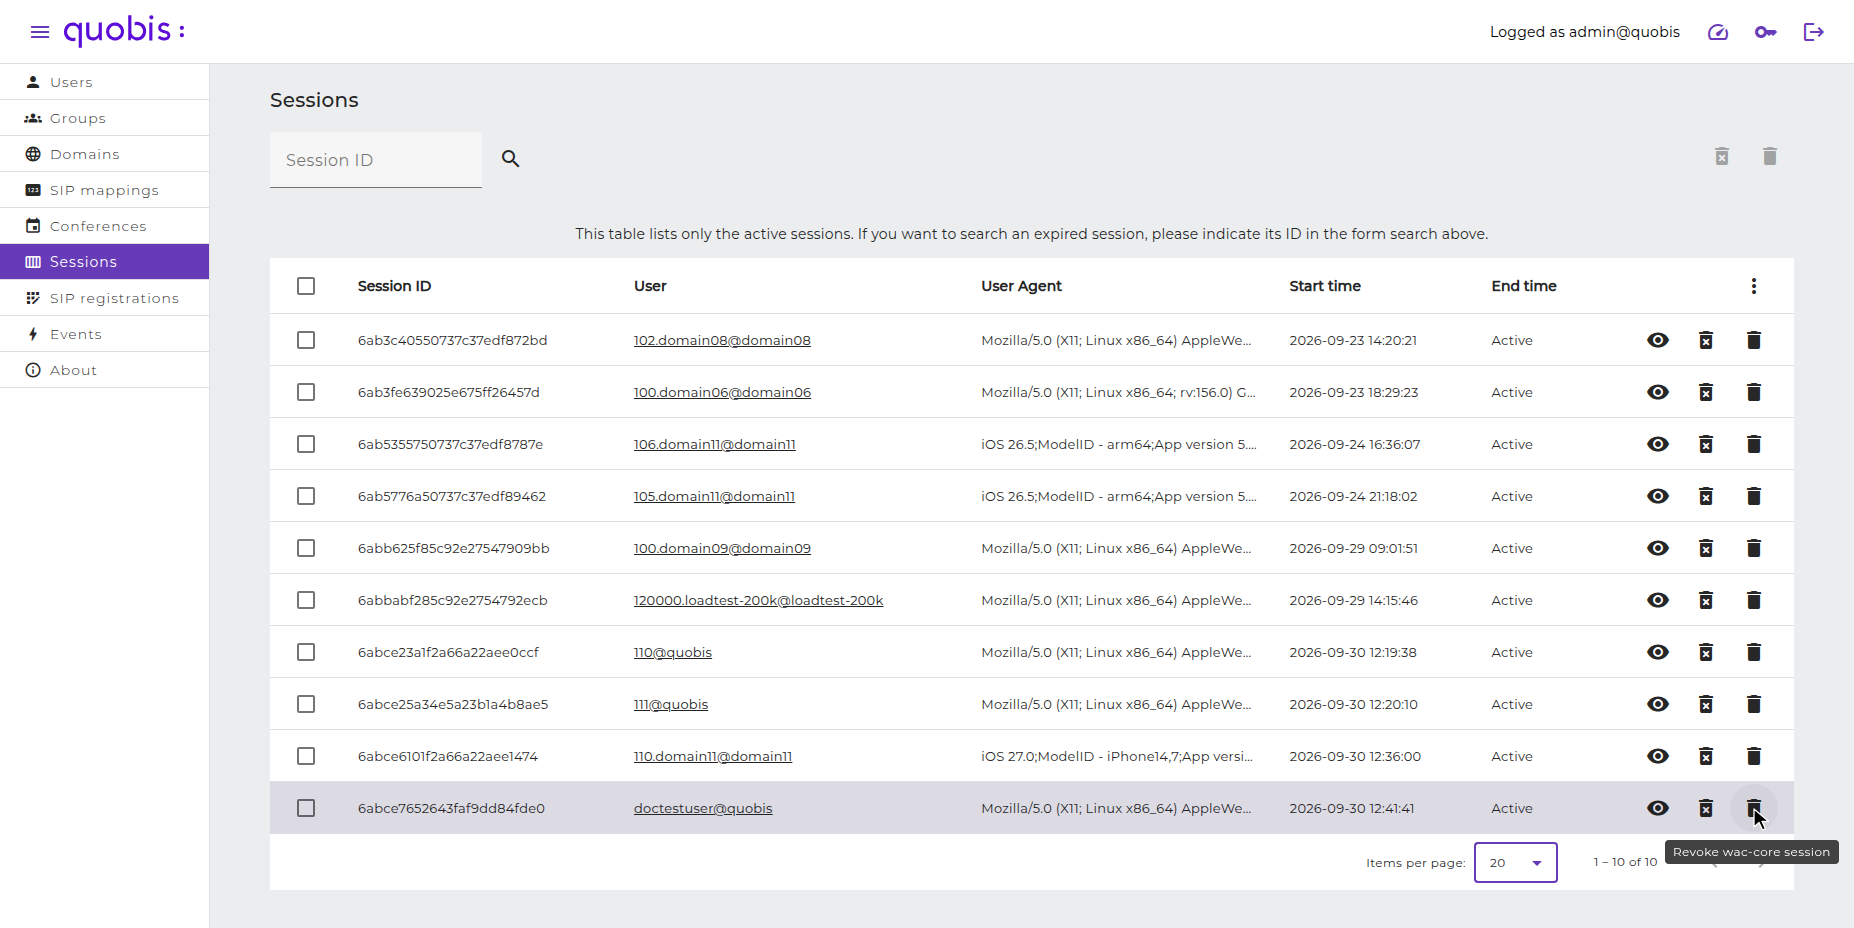
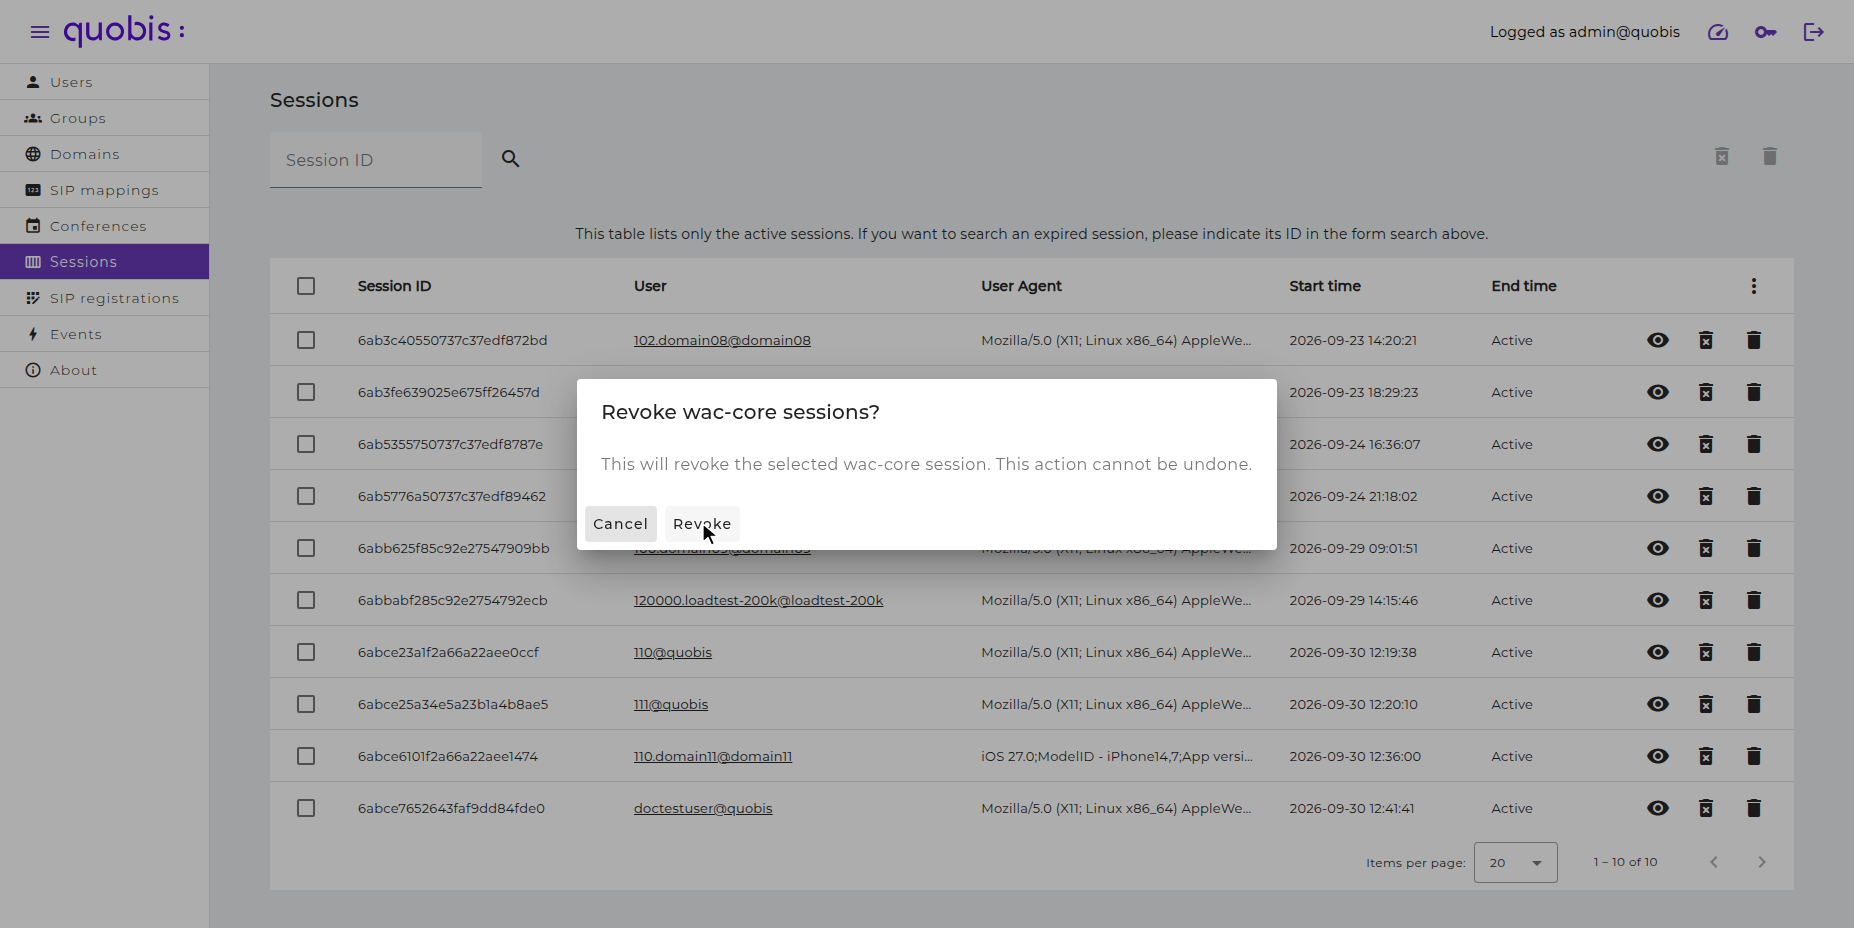
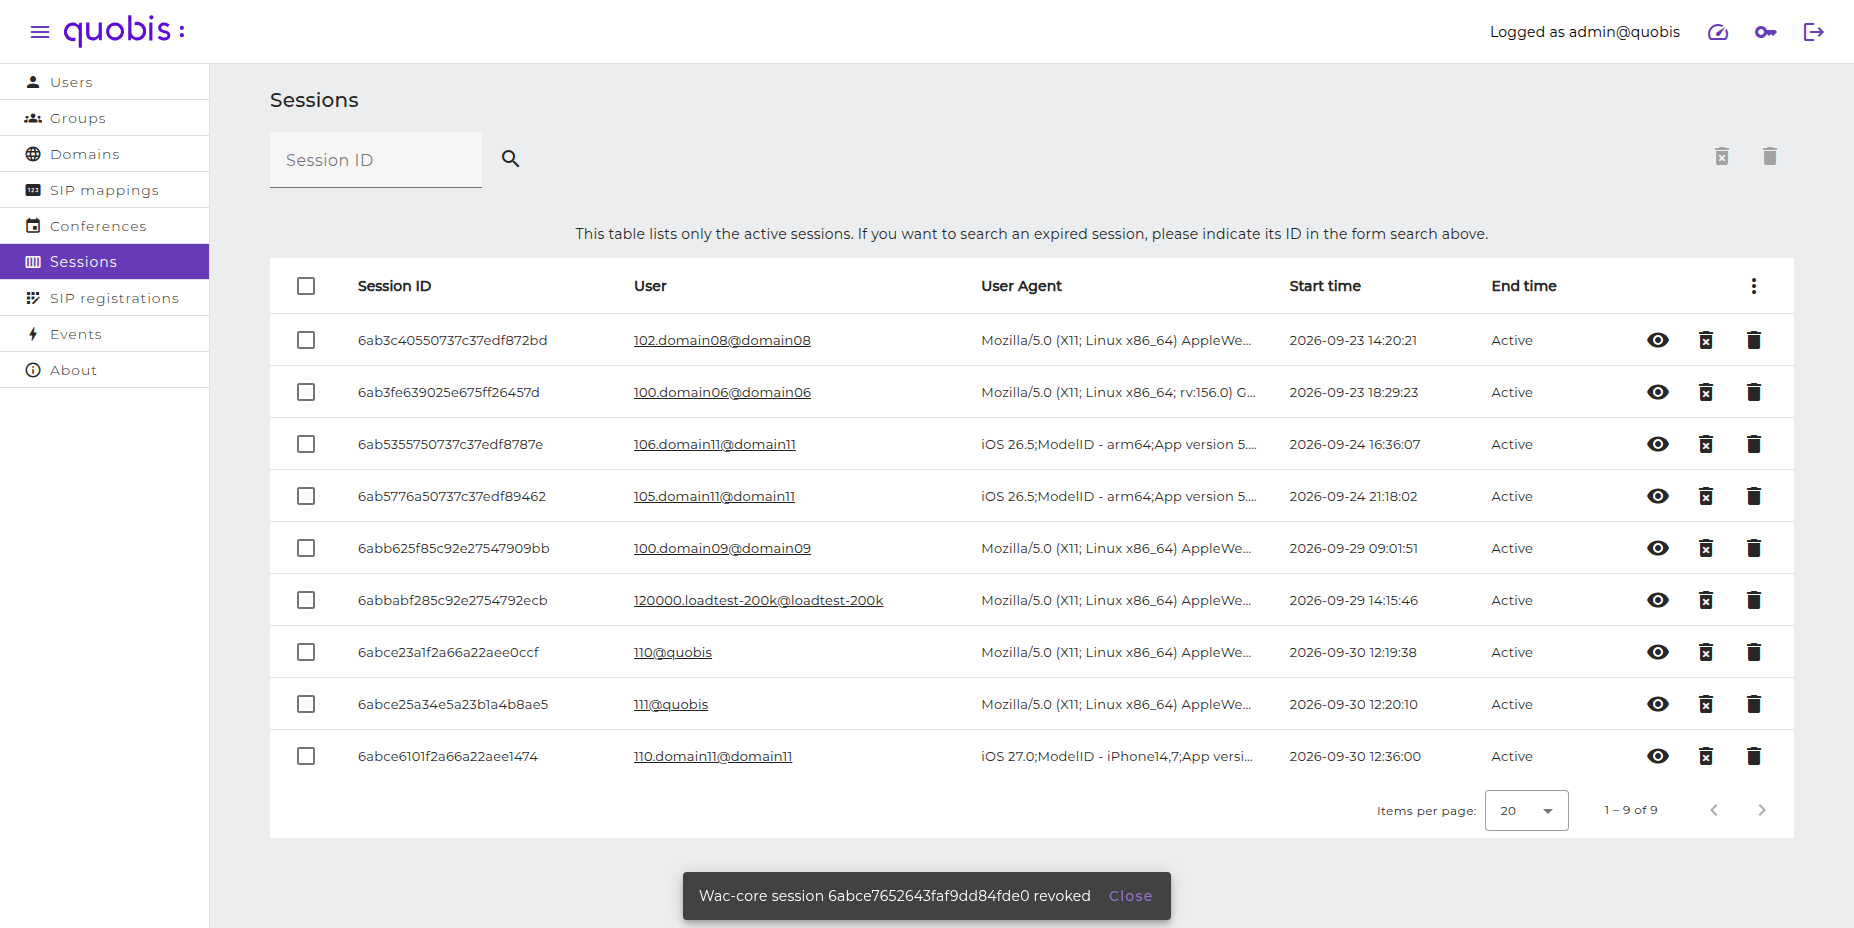
Revoke wac-core session. Terminates only the selected wac-core session. The client application may start a new session automatically if the user is still logged in.
To revoke a session, click on the Revoke session button (the trash icon with a cross) of the session. This will show a confirmation dialog:
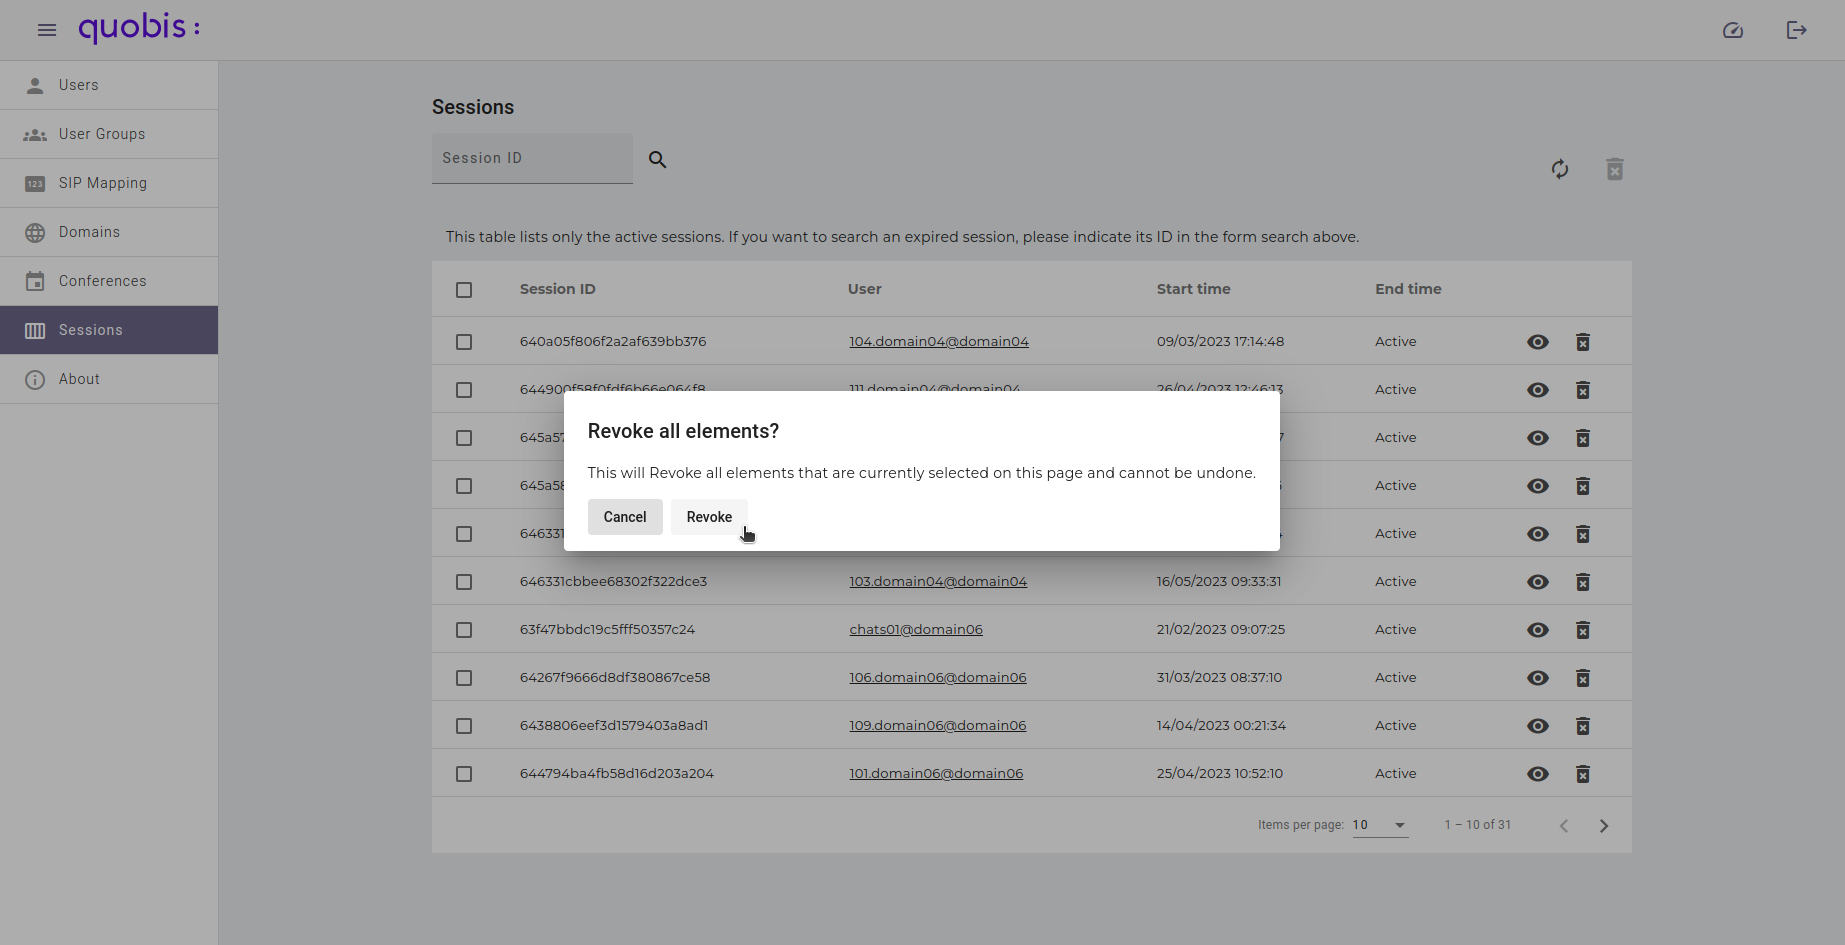
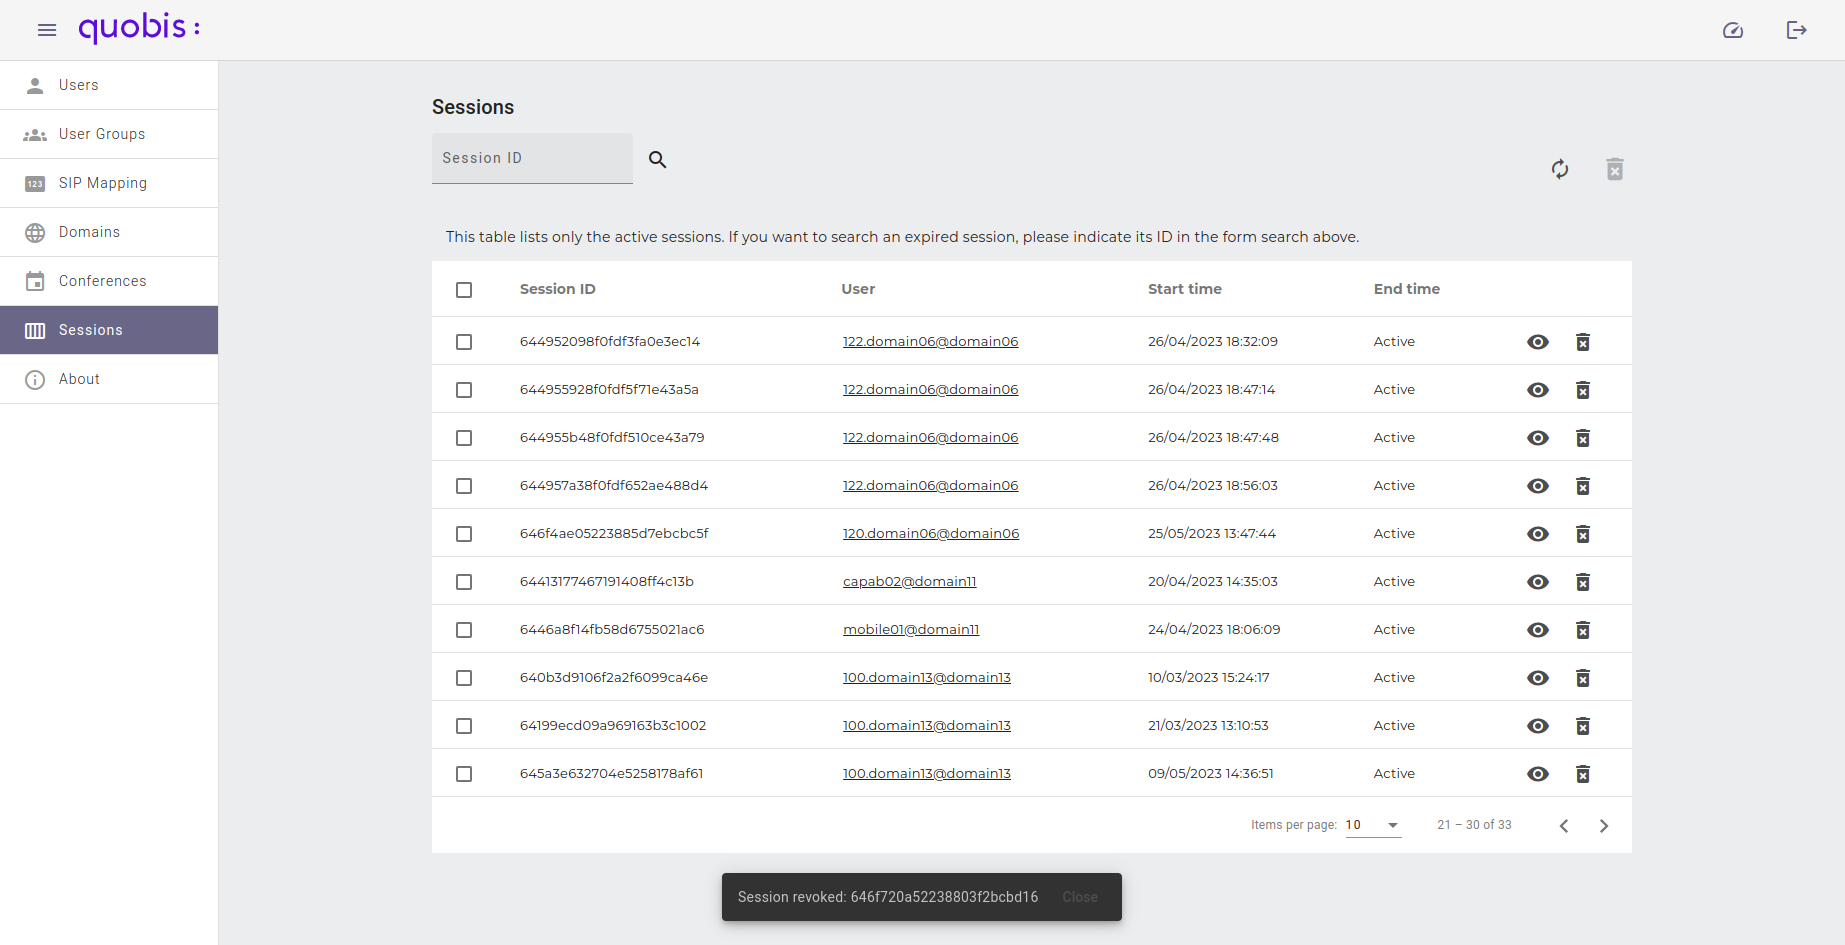
When accepted, a notification will appear confirming the action:
To revoke only the wac-core session, click on the Revoke wac-core session button (the trash icon) of the session. This will show a confirmation dialog:
When accepted, a notification will appear confirming the action:
Several sessions can be revoked at once by selecting them and clicking the Revoke sessions or Revoke wac-core sessions buttons located above the table.
SIP registrations
Selecting “SIP registrations” in the left panel will display the SIP registrations of the users of the platform. This list is composed of the following columns:
WAC username. Username of the user. Clicking on it opens the edit screen of the user.
WAC ID. Unique identifier of the user.
WAC domain. Domain of the user. Clicking on it opens the edit screen of the domain.
SIP username. SIP username of the registration. Clicking on it opens the SIP mapping of the user.
SIP domain. SIP domain of the registration.
SIP auth username. Username used for SIP authentication.
SIP auth proxy. SIP proxy used for the registration.
Last SIP registration. Date and time of the last SIP registration.
Contact. SIP contact of the registration.
Actions. Allows to copy the registration information.
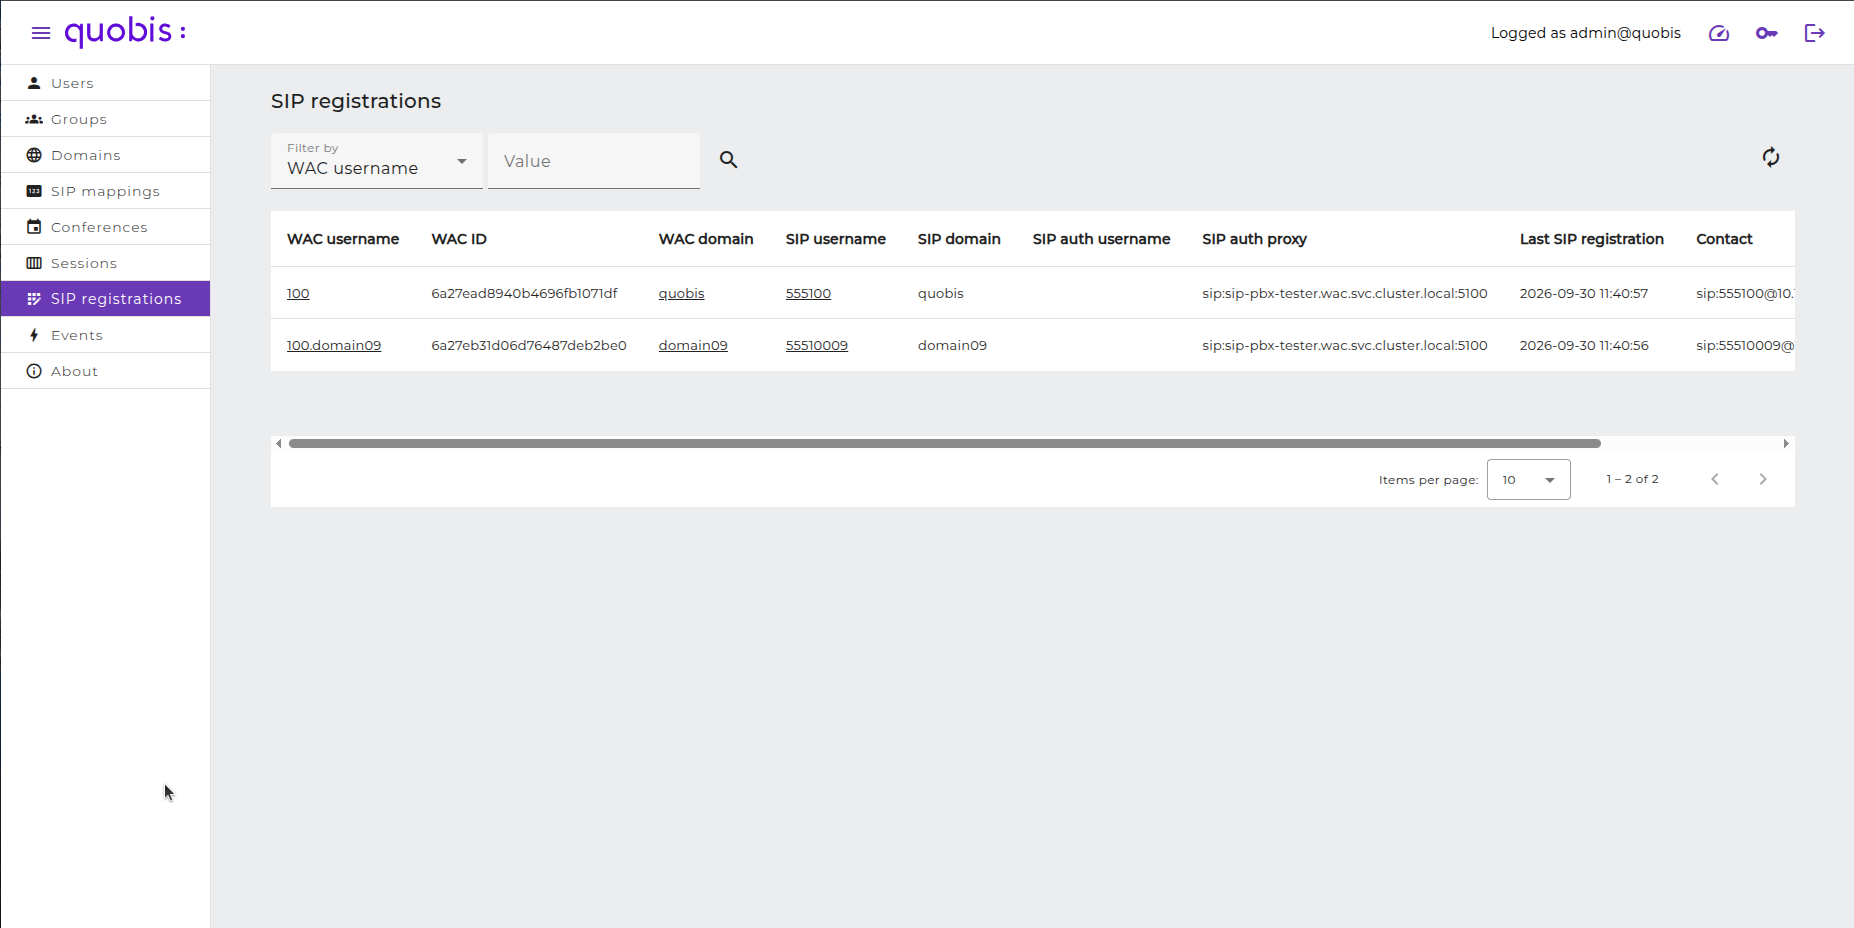
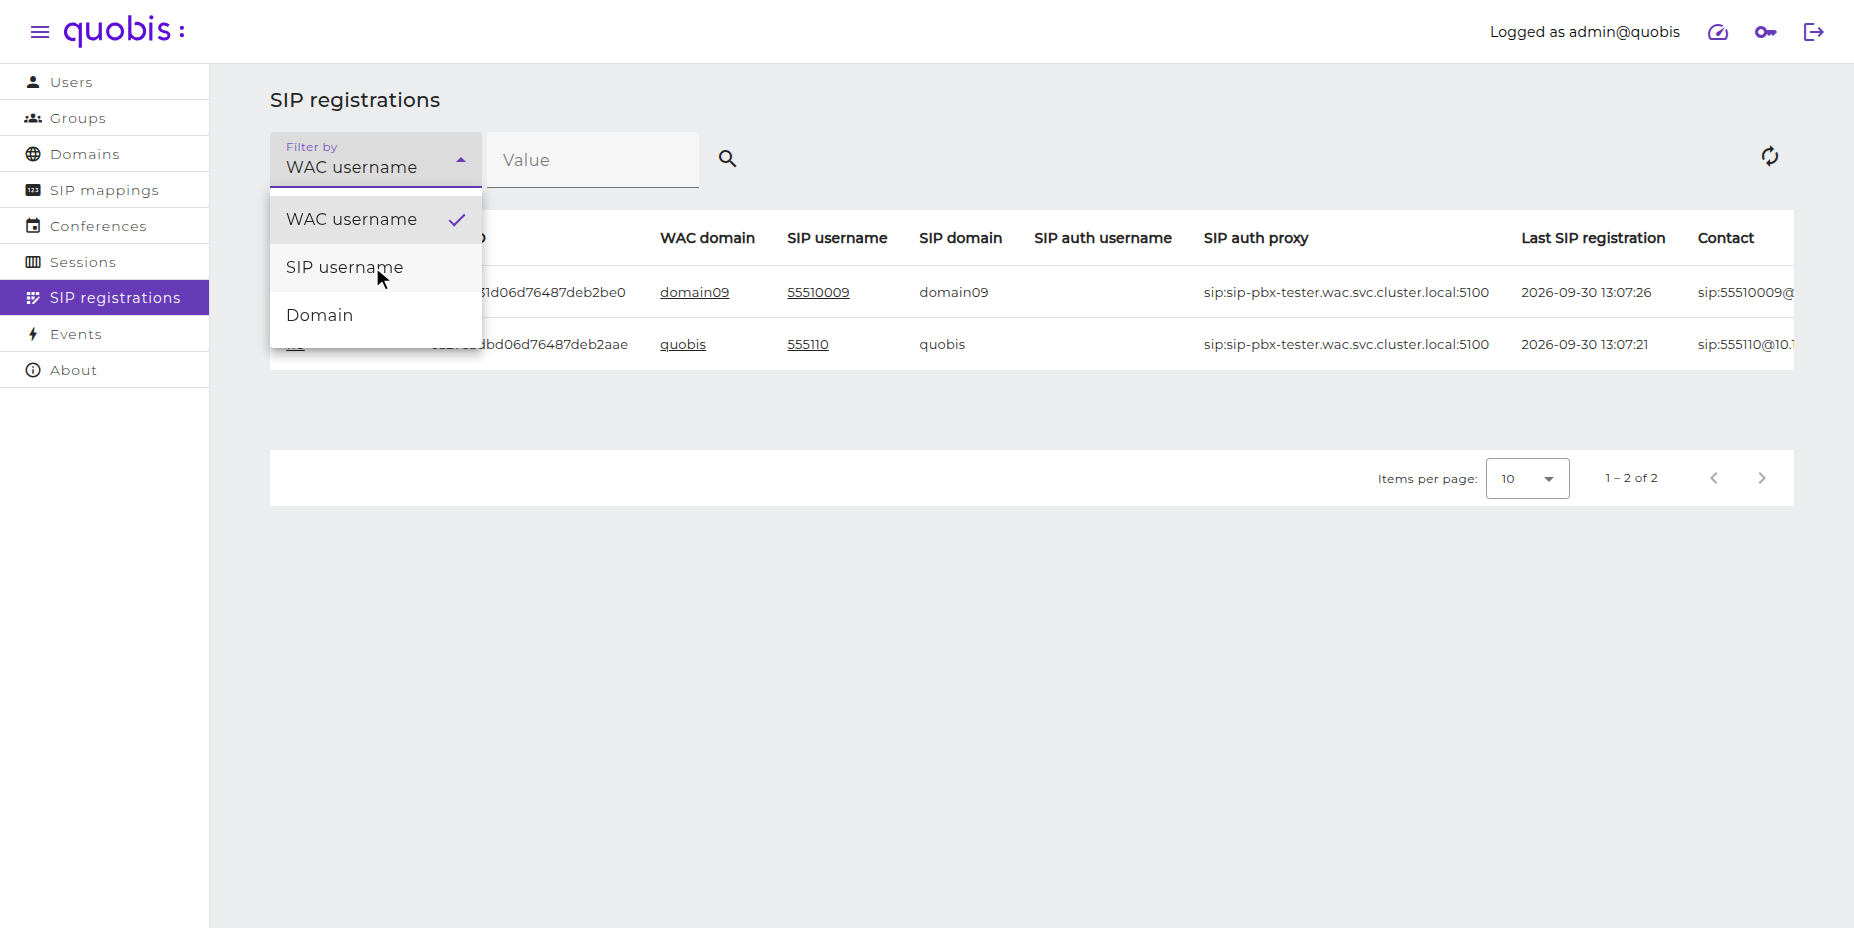
SIP registrations can be filtered by WAC username, SIP username or Domain: choose the field in the Filter by selector, type the value and click on the search button.
Copy a SIP registration
To copy all the information of a SIP registration, click on the Copy registration JSON button in the Actions column. As the table may be wider than the screen, you may need to scroll it horizontally to reach this column.
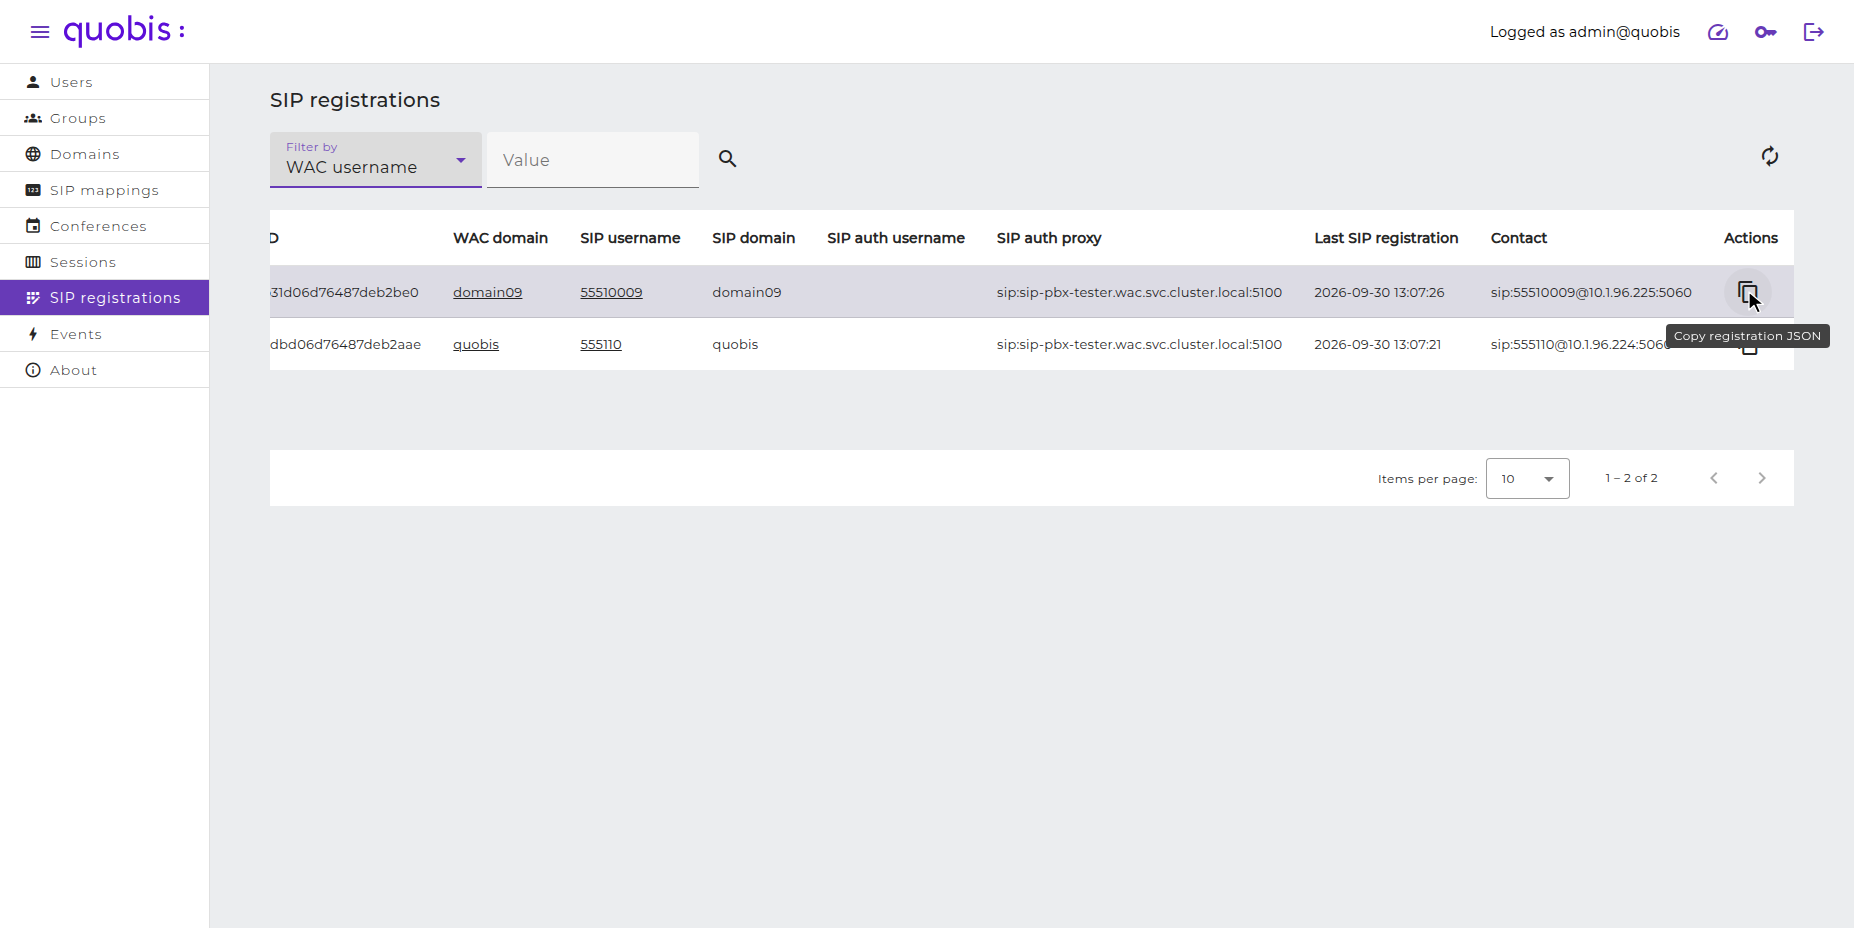
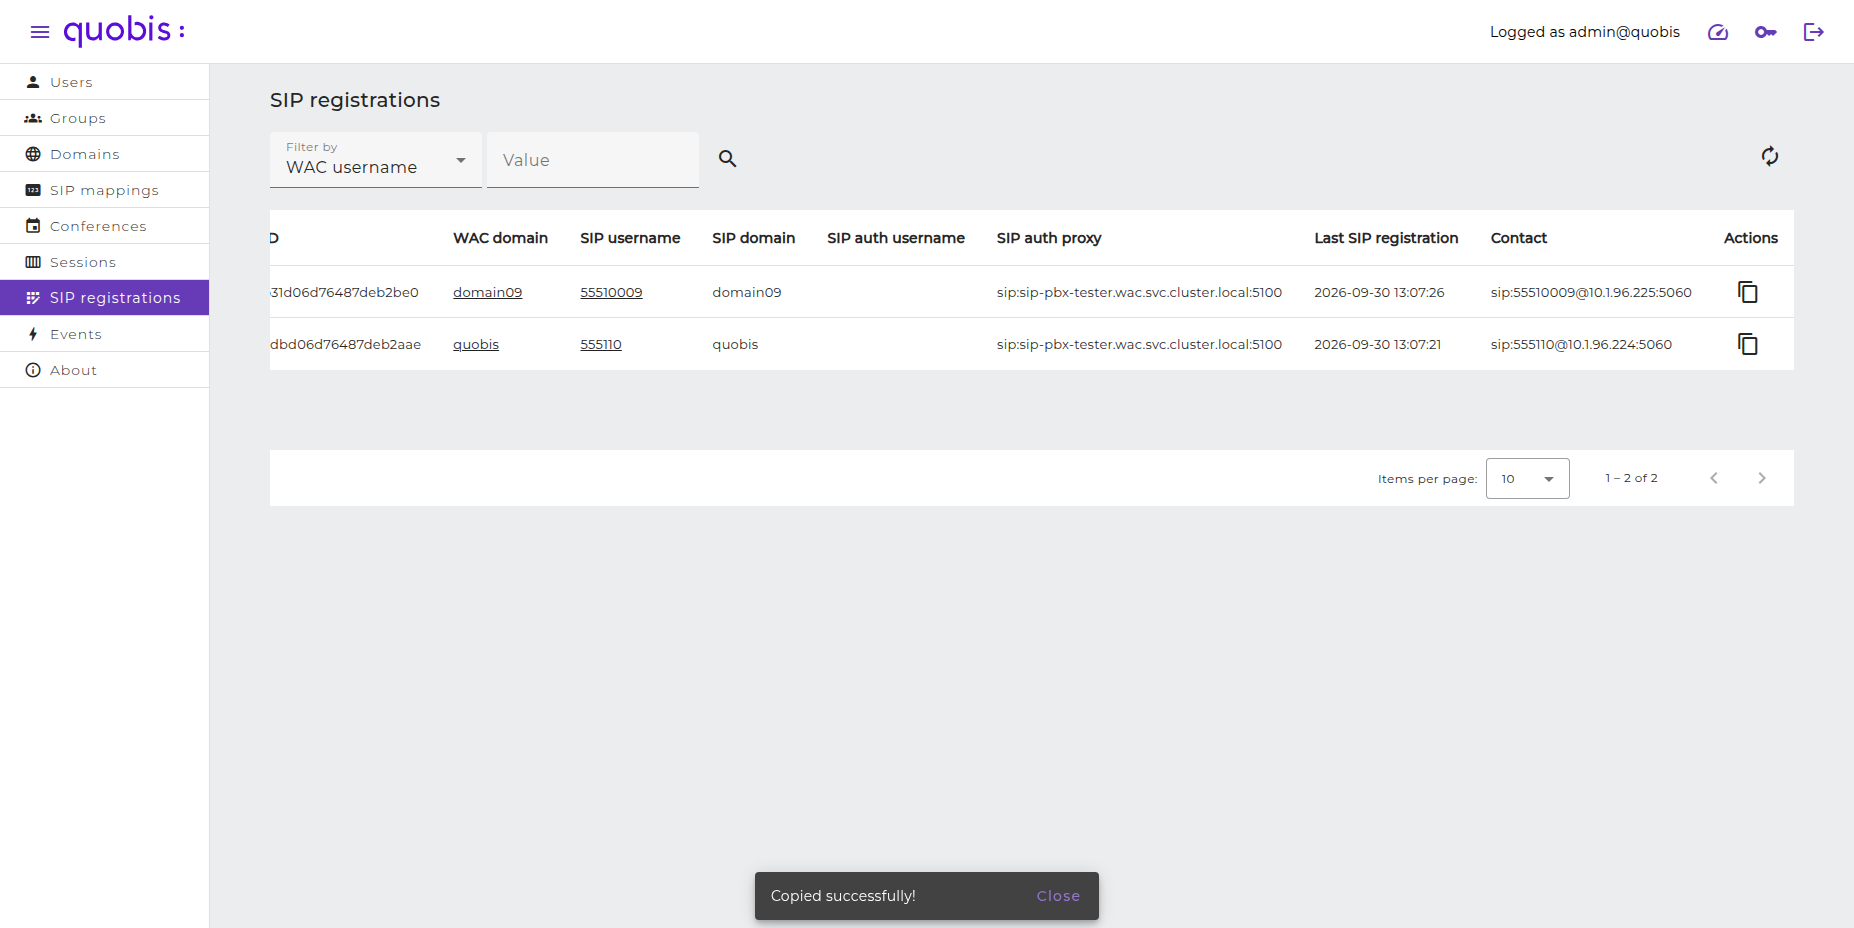
The registration information is copied to the clipboard in JSON format and a notification appears confirming the action:
Events
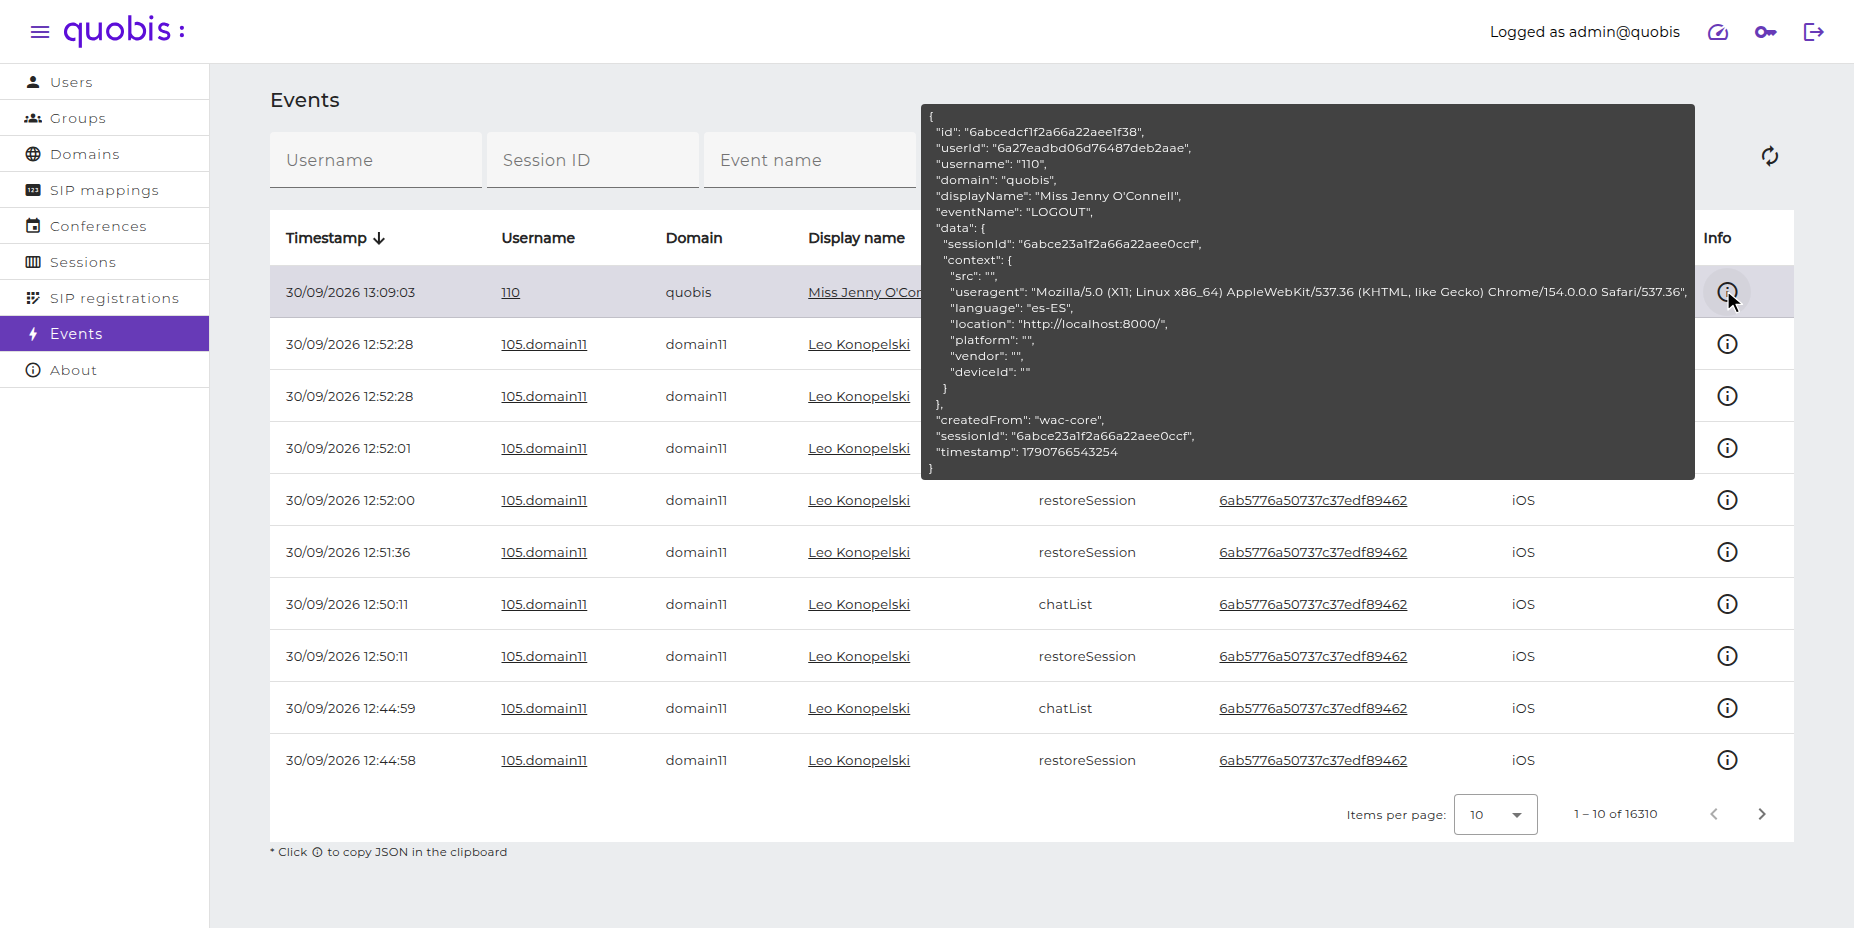
Selecting “Events” in the left panel will display the events generated by the users of the platform, such as logins, logouts or session restorations. This list is composed of the following columns:
Timestamp. Date and time of the event.
Username. Username of the user who generated the event. Clicking on it opens the edit screen of the user.
Domain. Domain of the user.
Display name. Display name of the user.
Event name. Name of the event, for example LOGOUT, restoreSession or chatList.
Session ID. Identifier of the session in which the event was generated. Clicking on it opens the detailed view of the session.
Created from. Origin of the event, for example wac-core or iOS.
Info. Shows all the information of the event.
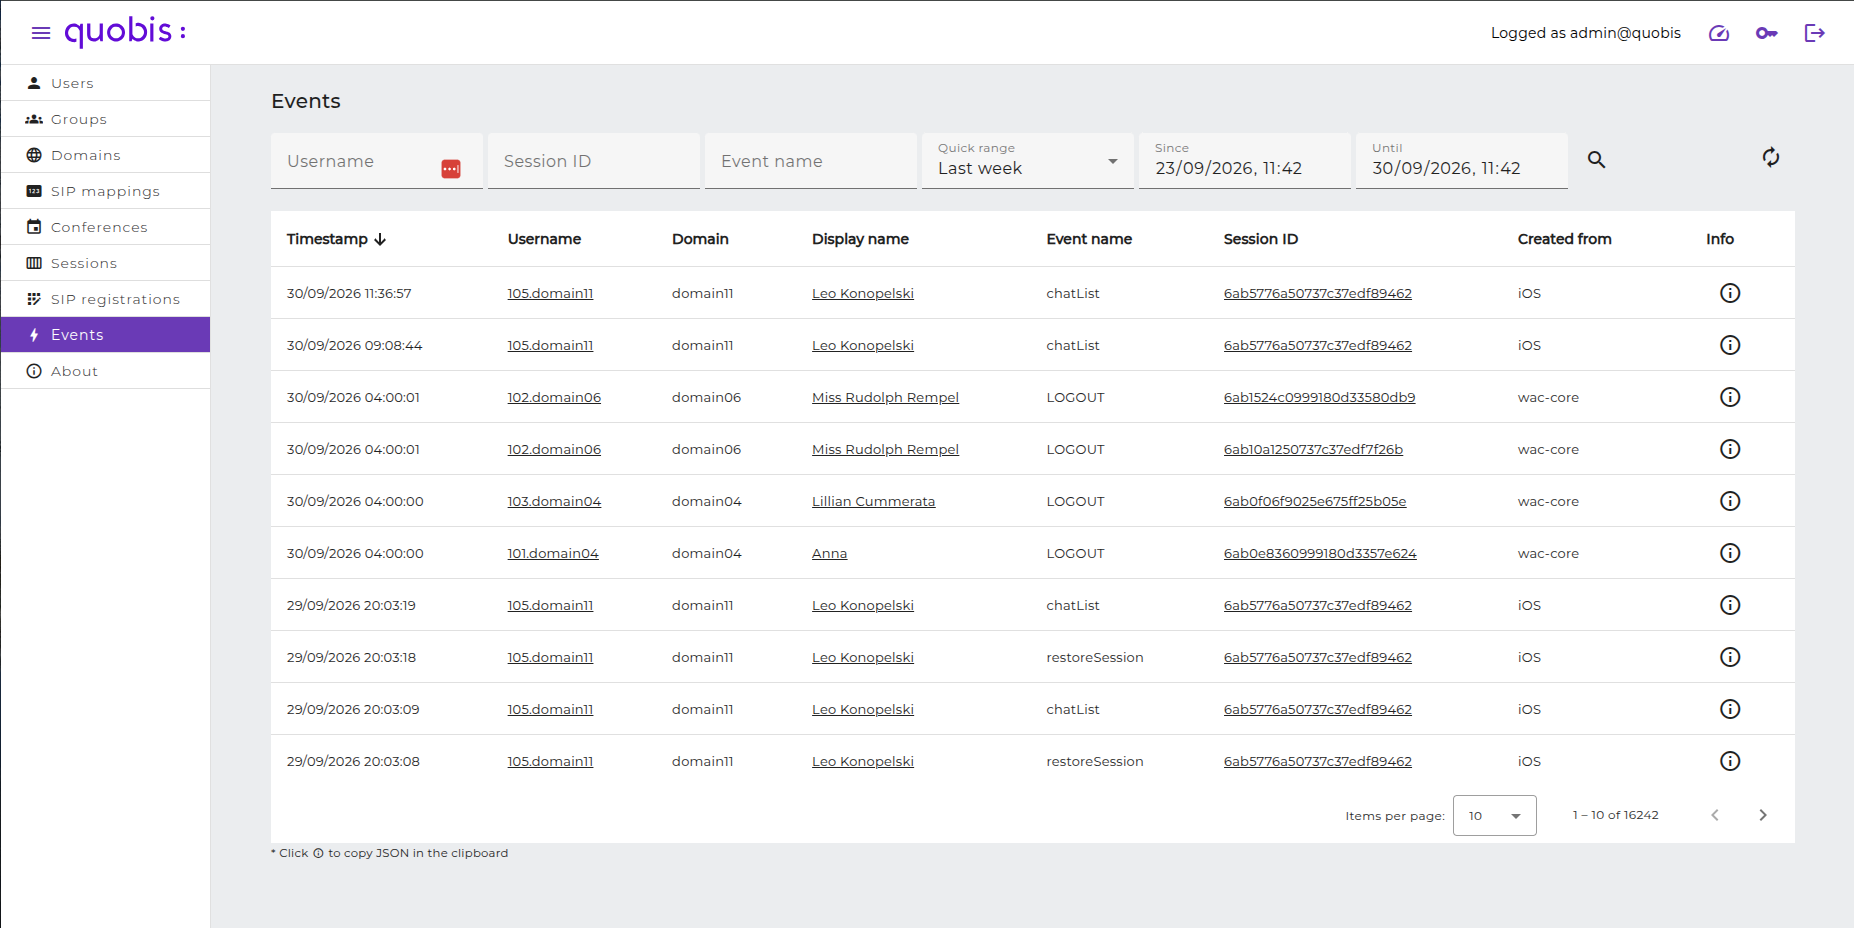
In order to locate one or several events you can use the following filters, and then click on the search button:
Username. Username of the user who generated the event.
Session ID. Identifier of the session.
Event name. Name of the event.
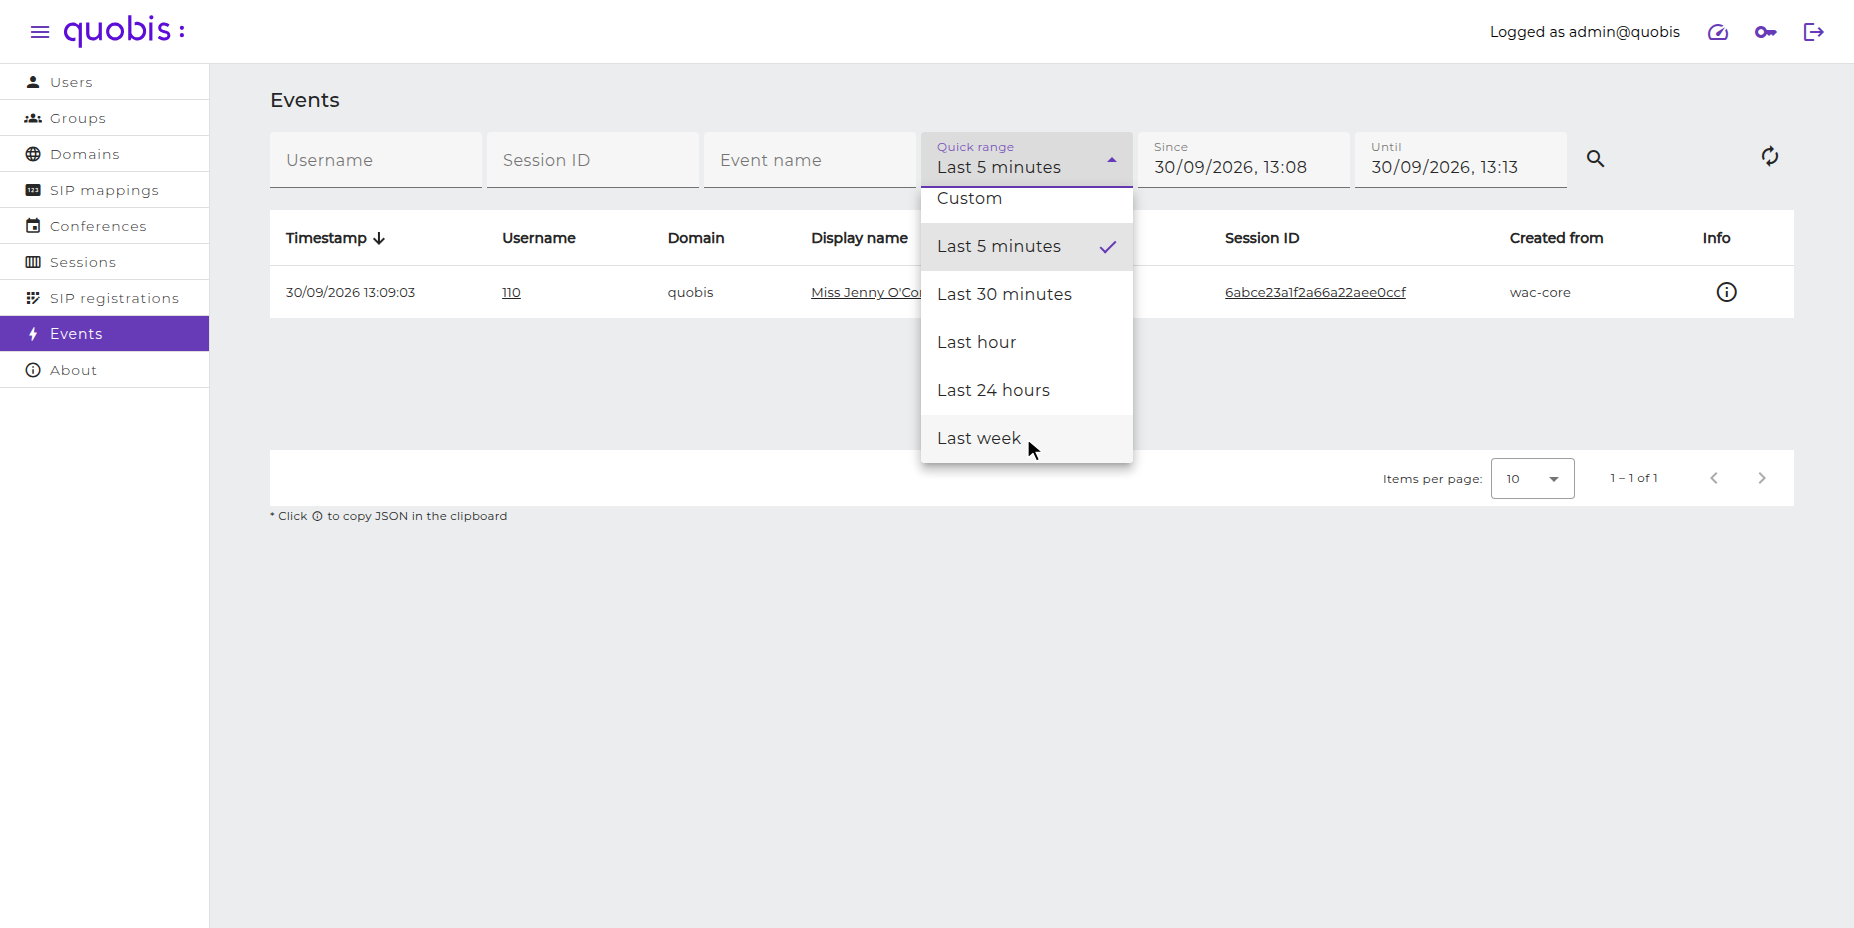
Quick range. Predefined time ranges (Last 5 minutes, Last 30 minutes, Last hour, Last 24 hours, Last week) or Custom to use the Since and Until fields.
Since and Until. Start and end of the time range to search.
Note
By default only the events of the last 5 minutes are displayed. Select a wider time range in the Quick range selector to display older events.
View the information of an event
Place the mouse over the “i” icon in the Info column to display all the information of the event in JSON format. Click on the icon to copy this information to the clipboard.
About
Selecting “About” in the left panel will display the version of Quobis manager, its configuration variables (such as the authentication and manager URLs) and a link to this documentation.